How to Create Redaction Codes in VIDIZMO
Overview
Redaction codes in VIDIZMO allow users to apply standardized labels to redacted content, informing the user that they receive important context about the information present in redaction on various content. VIDIZMO allows you to create lists containing these redaction codes so that you can apply them in various cases.
Creating redaction codes allows organizations to define and categorize the reasons behind redacted information. Creating and configuring redaction codes in VIDIZMO involves accessing the overlay settings and defining custom code lists. Whether used for compliance, security, or internal processes, they prove helpful in managing sensitive information within the Portal.
Prerequisites
- Ensure that you belong to a group with the Manage Redaction Codes feature enabled. To perform the actual redactions on your content and utilize these codes, you'll need Redaction and Redaction Codes permissions. See Enable Features in the VIDIZMO Portal for more information.
Access Redaction Code Settings
- Open the navigation pane using the button on the top left.
- Click Admin.
- Select Portal Settings.
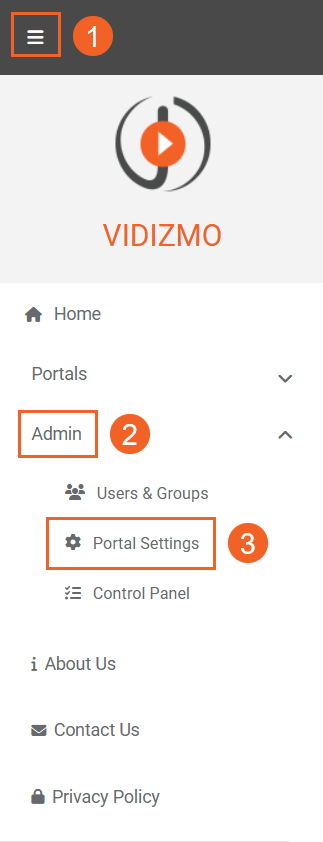
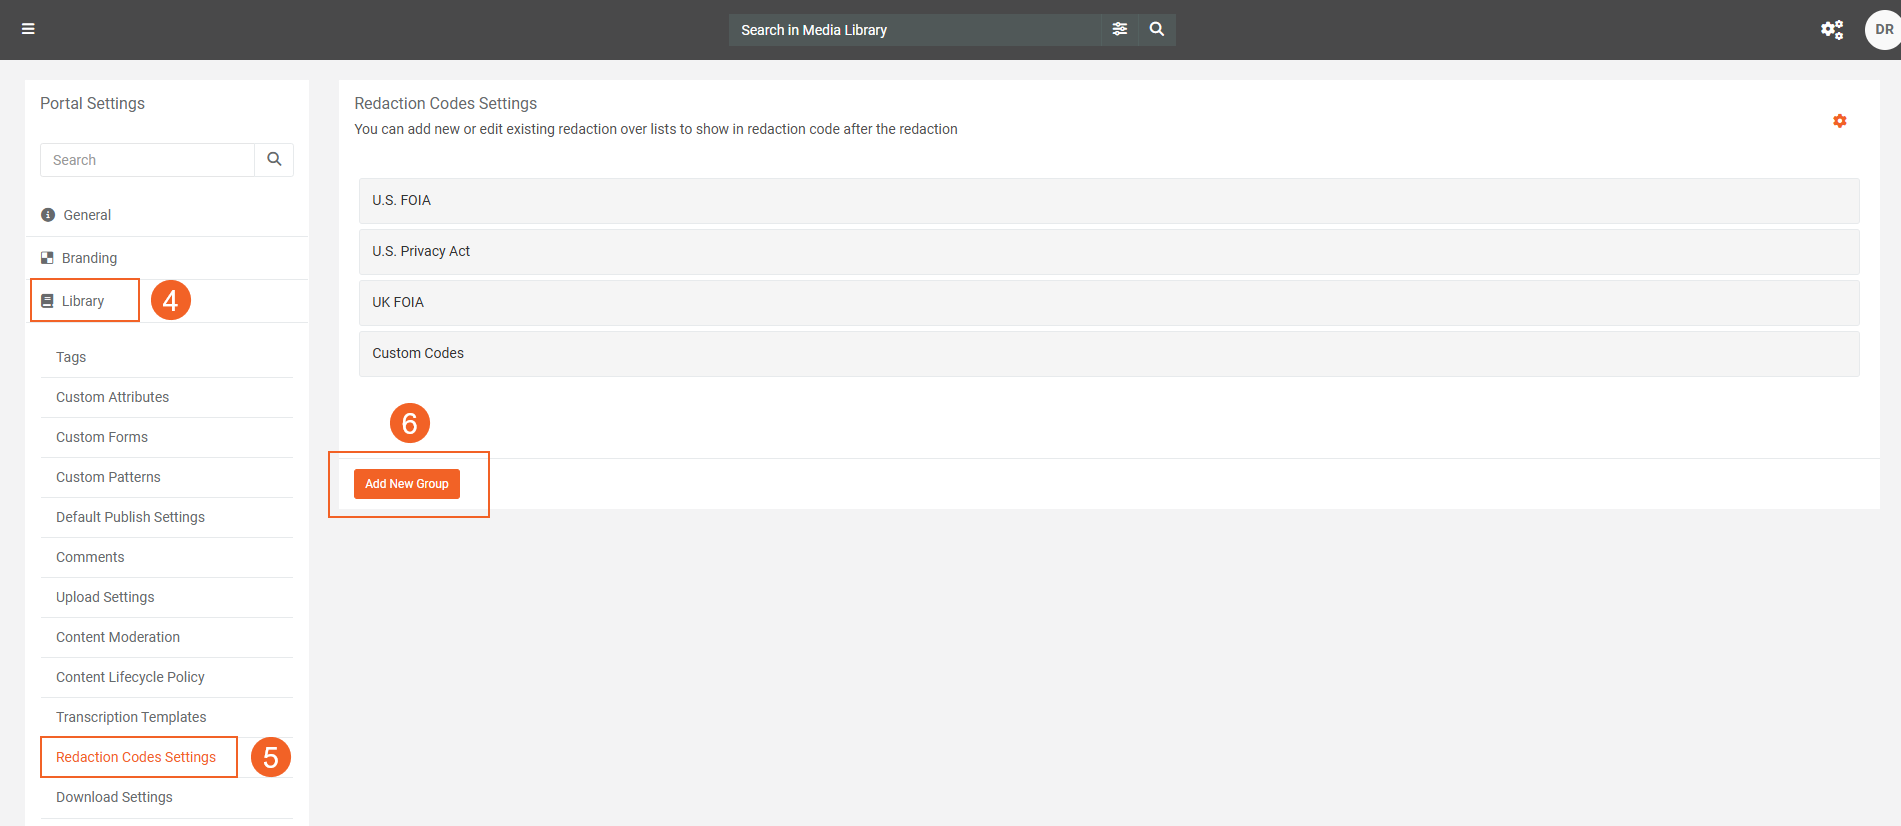
- In Portal Settings, click Library.
- Select Redaction Codes Settings.
- Click Add New Group to start creating a Redaction Code List.
Create a Redaction Code Group
Follow these steps to create a Redaction Code Group and configure individual redaction codes.
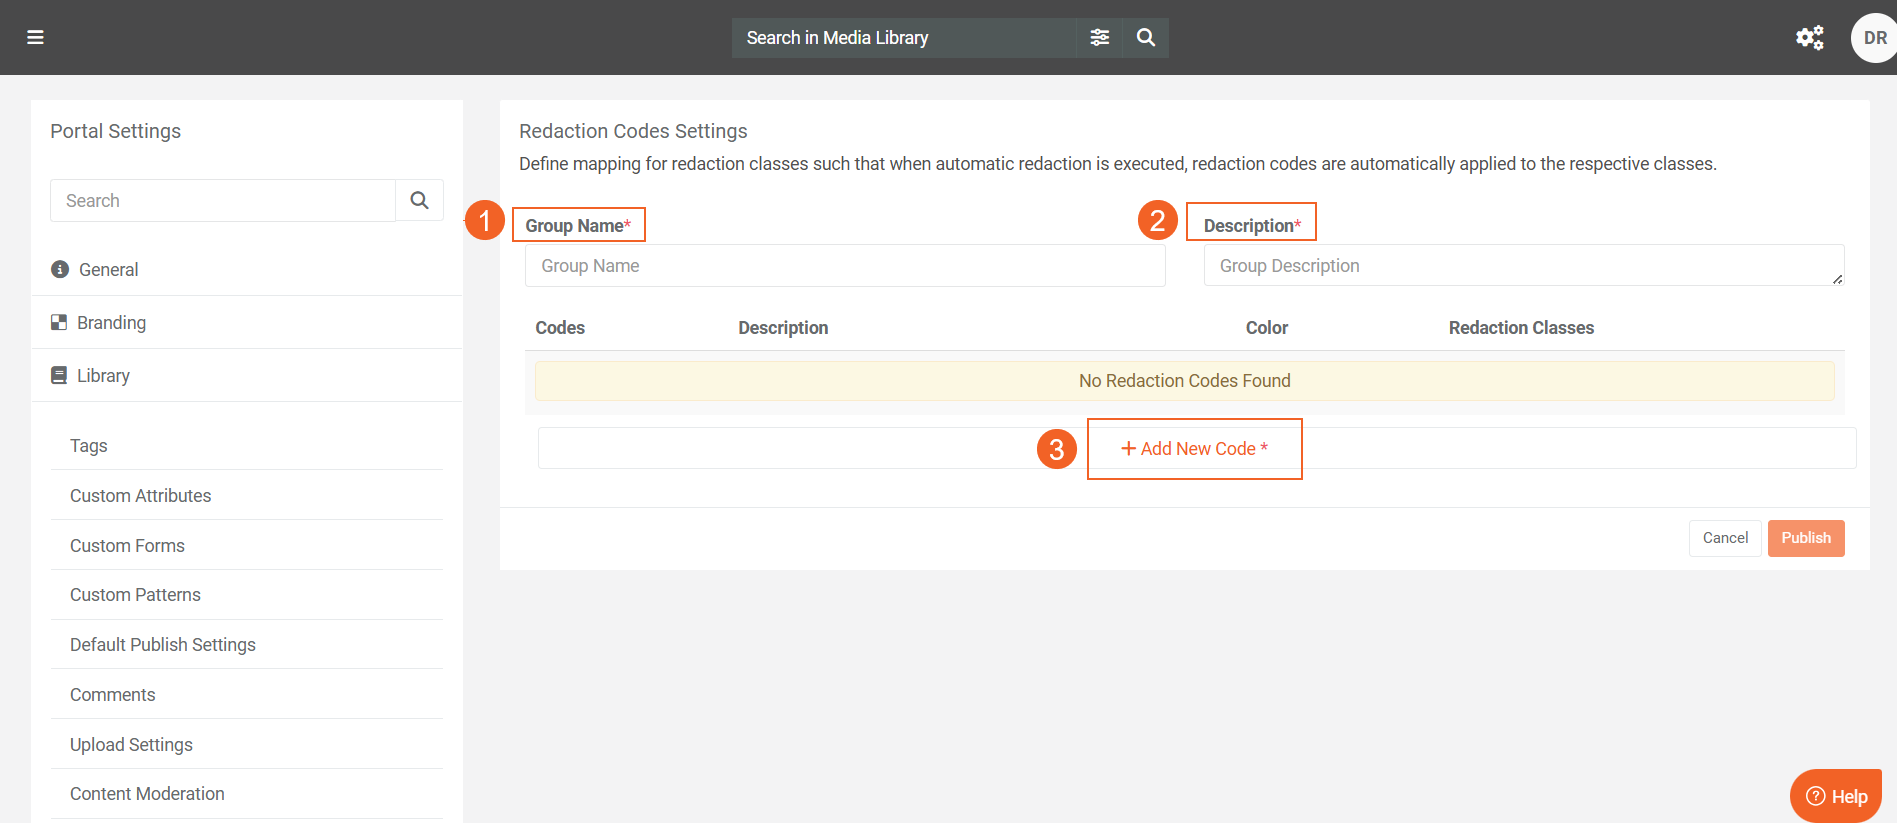
- In Redaction Code Settings, enter a name for your list in the Group Name field.
- Provide a Description for the redaction group.
- Click the +Add New Code to create a new redaction code.
-
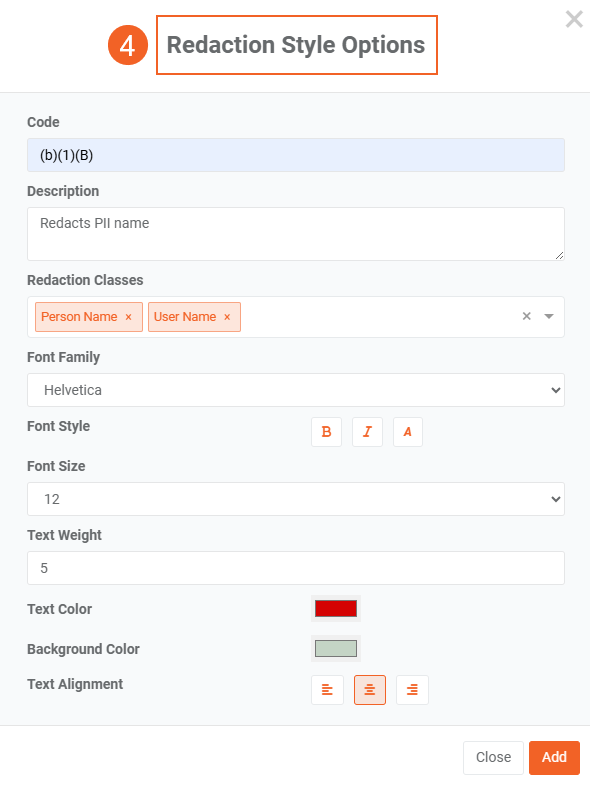
In Redaction Style Options, enter the code to display on the redaction.
-
Provide a Description for the code to indicate the type of information it represents.
-
Select the Redaction Classes applicable to this code. You can add multiple classes from the dropdown.
Note: The available classes depend on the VIDIZMO Indexer configurations in the app.
- Choose a Font Family for the code from the dropdown options.
- Select a Font Size for the code.
- Specify the Text Weight (range 1–10).
- Choose a Text Color for the code.
- Set the Background Color for the redaction where the code will appear.
- Configure Text Alignment to determine the code’s placement on the redaction.
- Click Add to save the code to your list.
-
- To add a new code to your list, click the +Add New Code button. Repeat this process to add additional codes as needed.
- Once you have added all codes, click Publish to finalize your redaction code list.
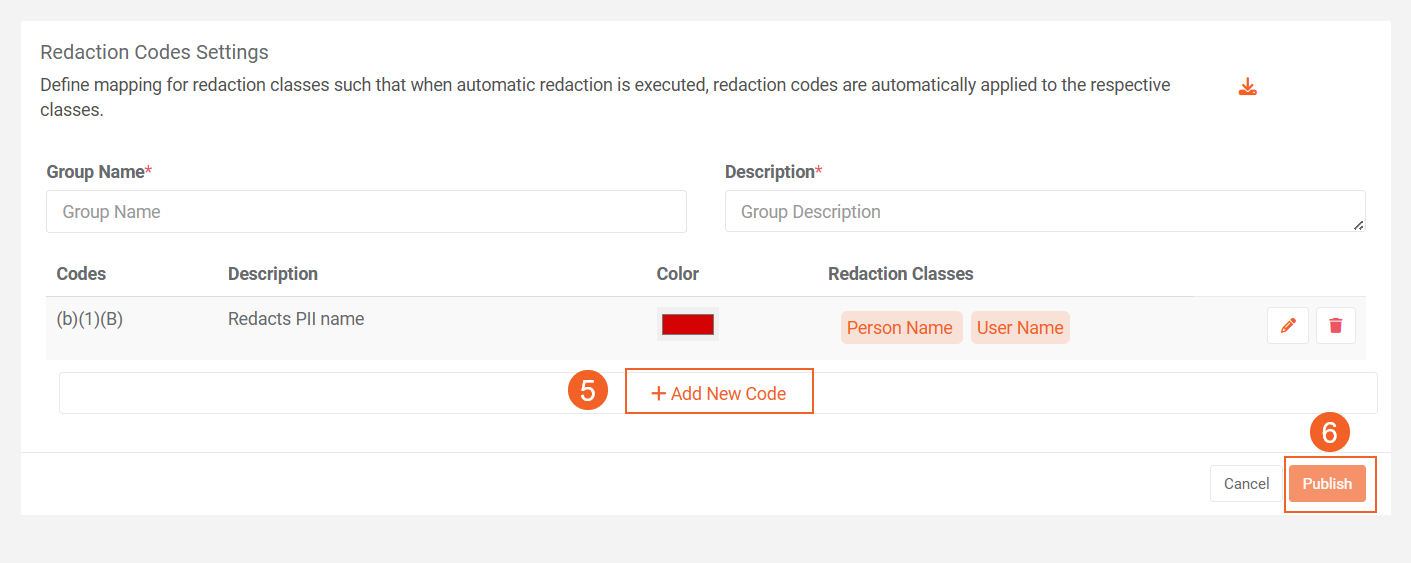
Manage Redaction Codes
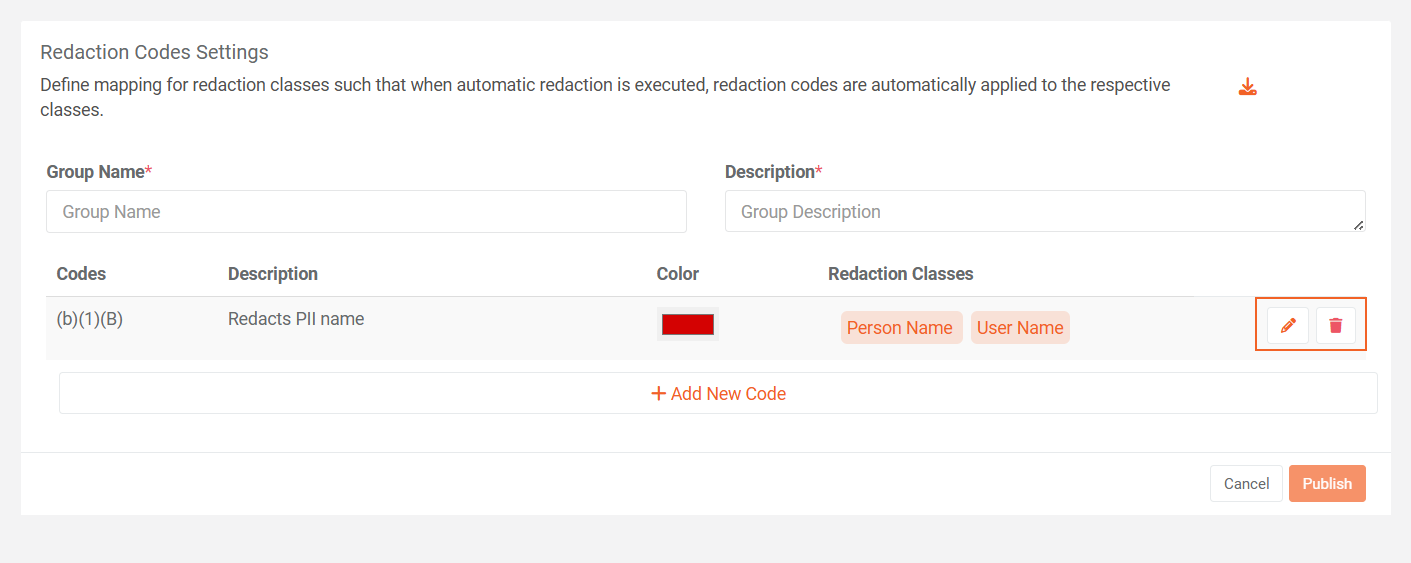
- To edit or adjust settings for a code, click the Edit button.
- To remove a code from the list, click the Delete button.
Export Redaction Codes
- To download a copy of your codes along with their details, click Export to CSV.
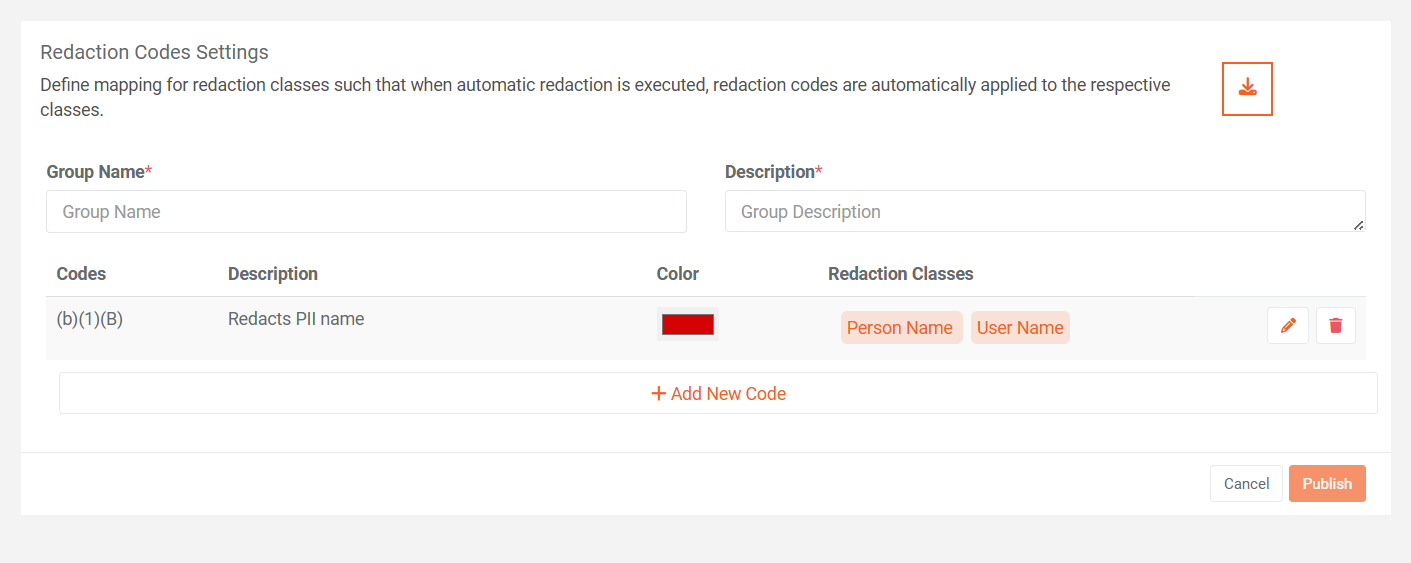
NOTE: Redaction codes are applied automatically only if redaction classes are configured for each code. Default redaction code groups (such as U.S. FOIA and UK FOIA) require you to manually map detection classes to each code.
Redaction Codes Global Settings
After creating your redaction code list, you can configure global settings that apply to all codes in your lists. These settings are loaded by default whenever you add a new redaction code.
- To access global settings, click the gear icon in the top-right corner of the Redaction Codes Settings page.
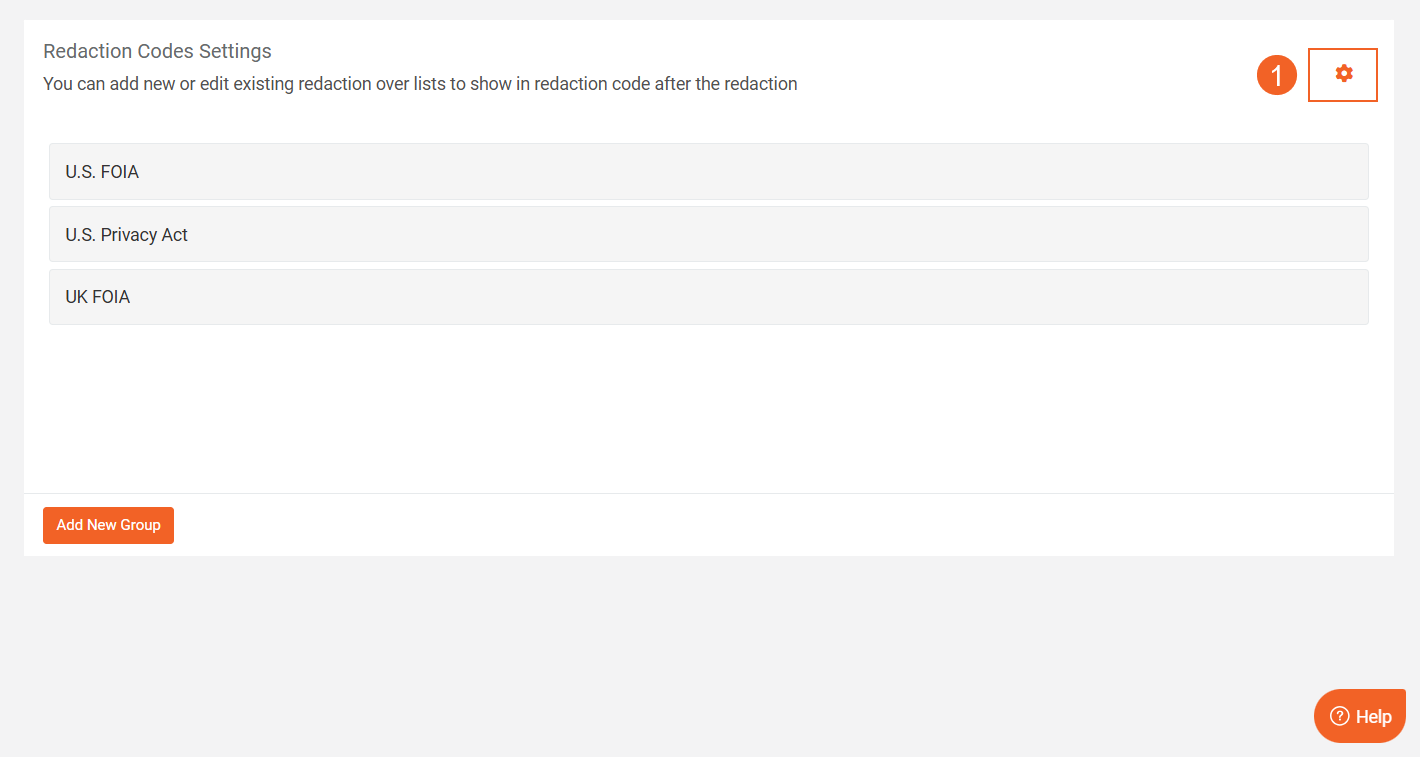
- The Redaction Style Options window opens. Here, you can define default style options for all new redaction codes. Setting these defaults first saves time, as you do not need to specify them for each code individually. Configure the following options:
-
Font Family: Select the default font for your codes.
-
Font Size: Choose the default font size.
-
Font Style and Text Weight: Set the default style and weight.
-
Text Color: Select the default text color.
-
Background Color: Select the default background color for redaction.
-
Text Alignment: Set the default position of the code on the redaction.
- Click Save Changes to apply the global settings.
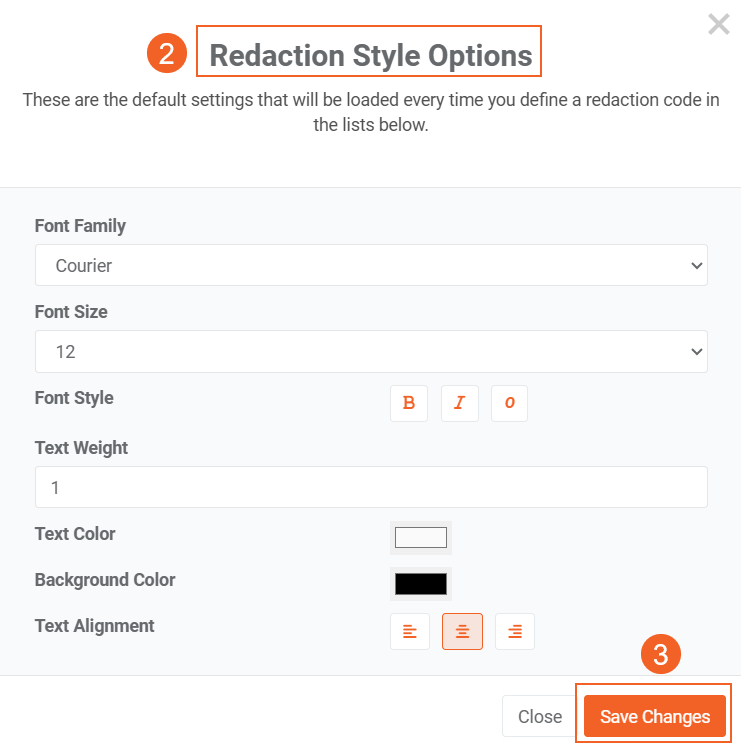
These global settings are applied whenever you create or use redaction codes in Studio Space.
Read Next
- Redaction using Studio Space: A Comprehensive Walkthrough
- How to Perform Document Redaction in VIDIZMO
- Step-by-Step Guide to Using Redaction Tool in VIDIZMO
- Understanding Redaction Using Studio Space