How to Create a Watermark Template
VIDIZMO enables you to create watermark templates that ensure consistent and standardized application of watermarks on your content. You can create two types of watermark templates: one for use during encoding and another for use during export or download.
Additionally, you need to specify the content type for which the watermark template is being created. You can create templates for images, videos, and documents on your portal. During the watermarking configuration process on your Portal, you can select any of these templates to be used as the default for encoding or download.
To enhance the informative value of your watermarks, you can create templates that incorporate attributes or variables. These can dynamically display information related to the content, such as the title, author's name, or upload date.
To learn about watermarking in VIDIZMO, see Understanding Watermarking in VIDIZMO
Prerequisites
- Ensure you belong to a group that has Portal Management and Watermark features enabled. See Enable Features in the VIDIZMO Portal for more information.
Access Watermark Template Page
- Open the side navigation pane using the top left button.
- Click the Admin dropdown.
- Click Portal Settings.
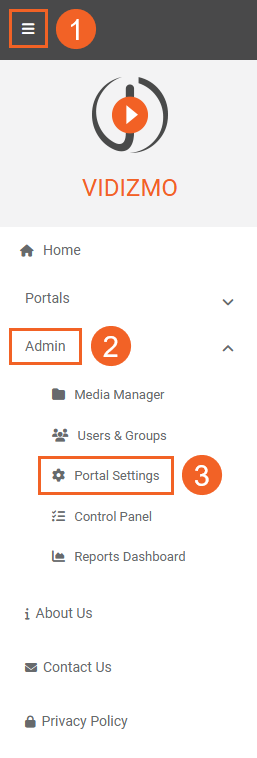
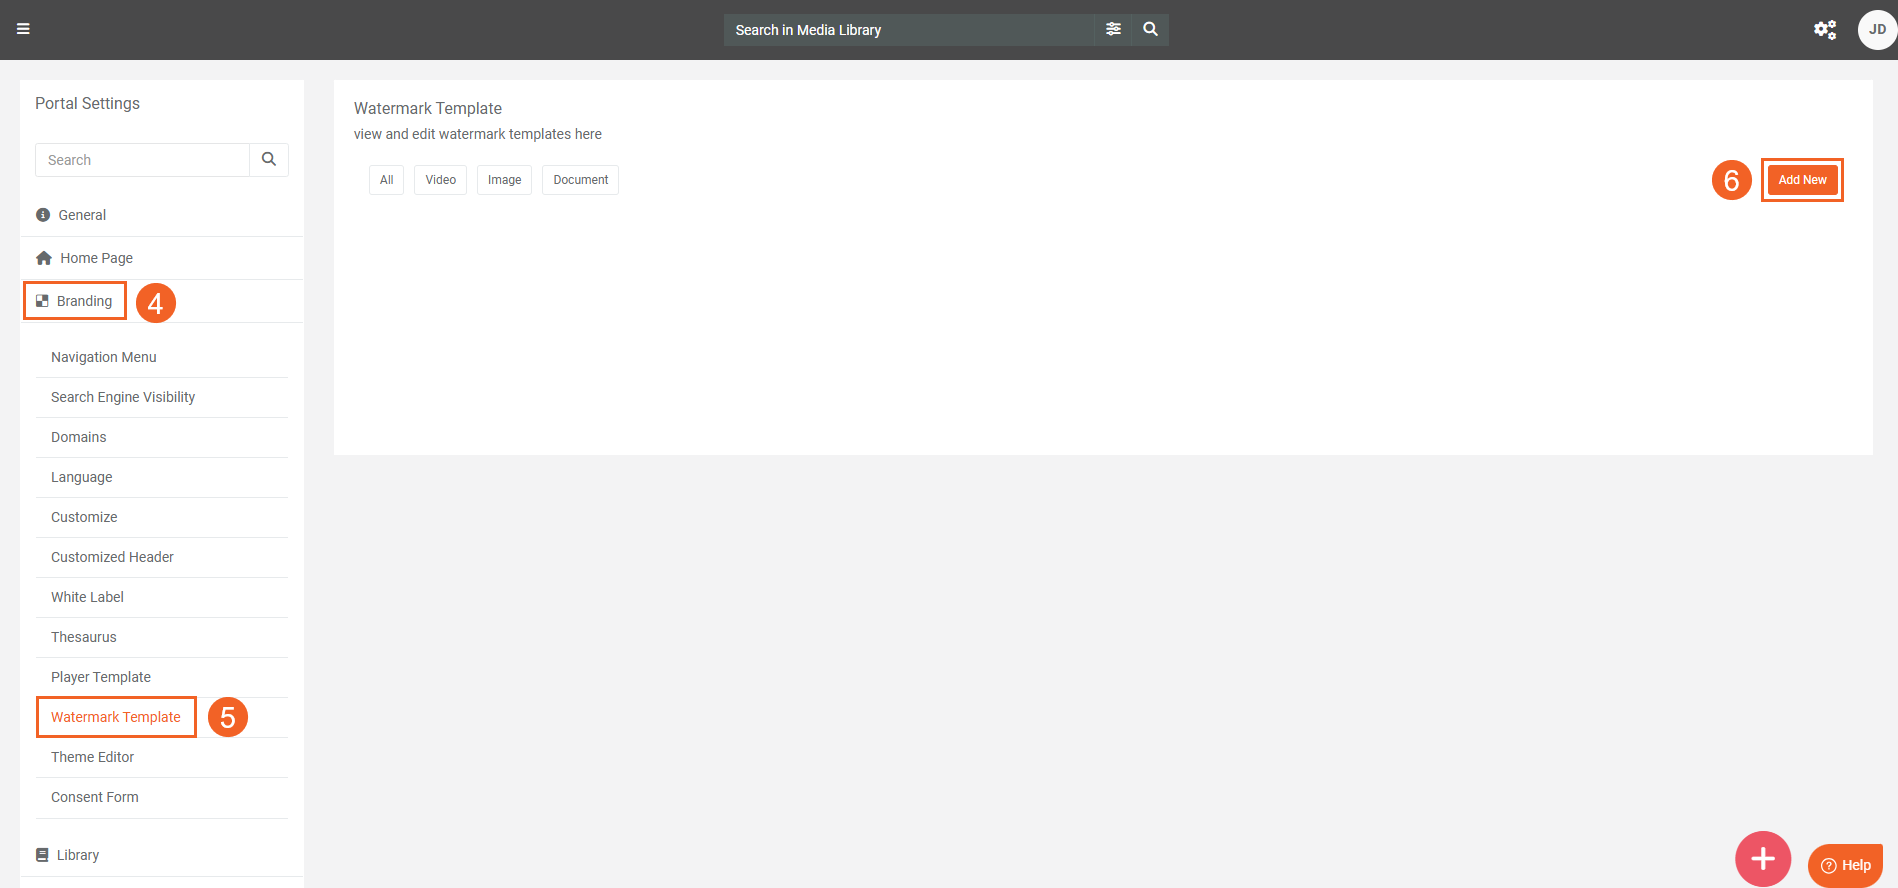
- In Portal Settings, click Branding.
- Select Watermark Template.
- Click the Add New button to begin.
Create a Watermark Template
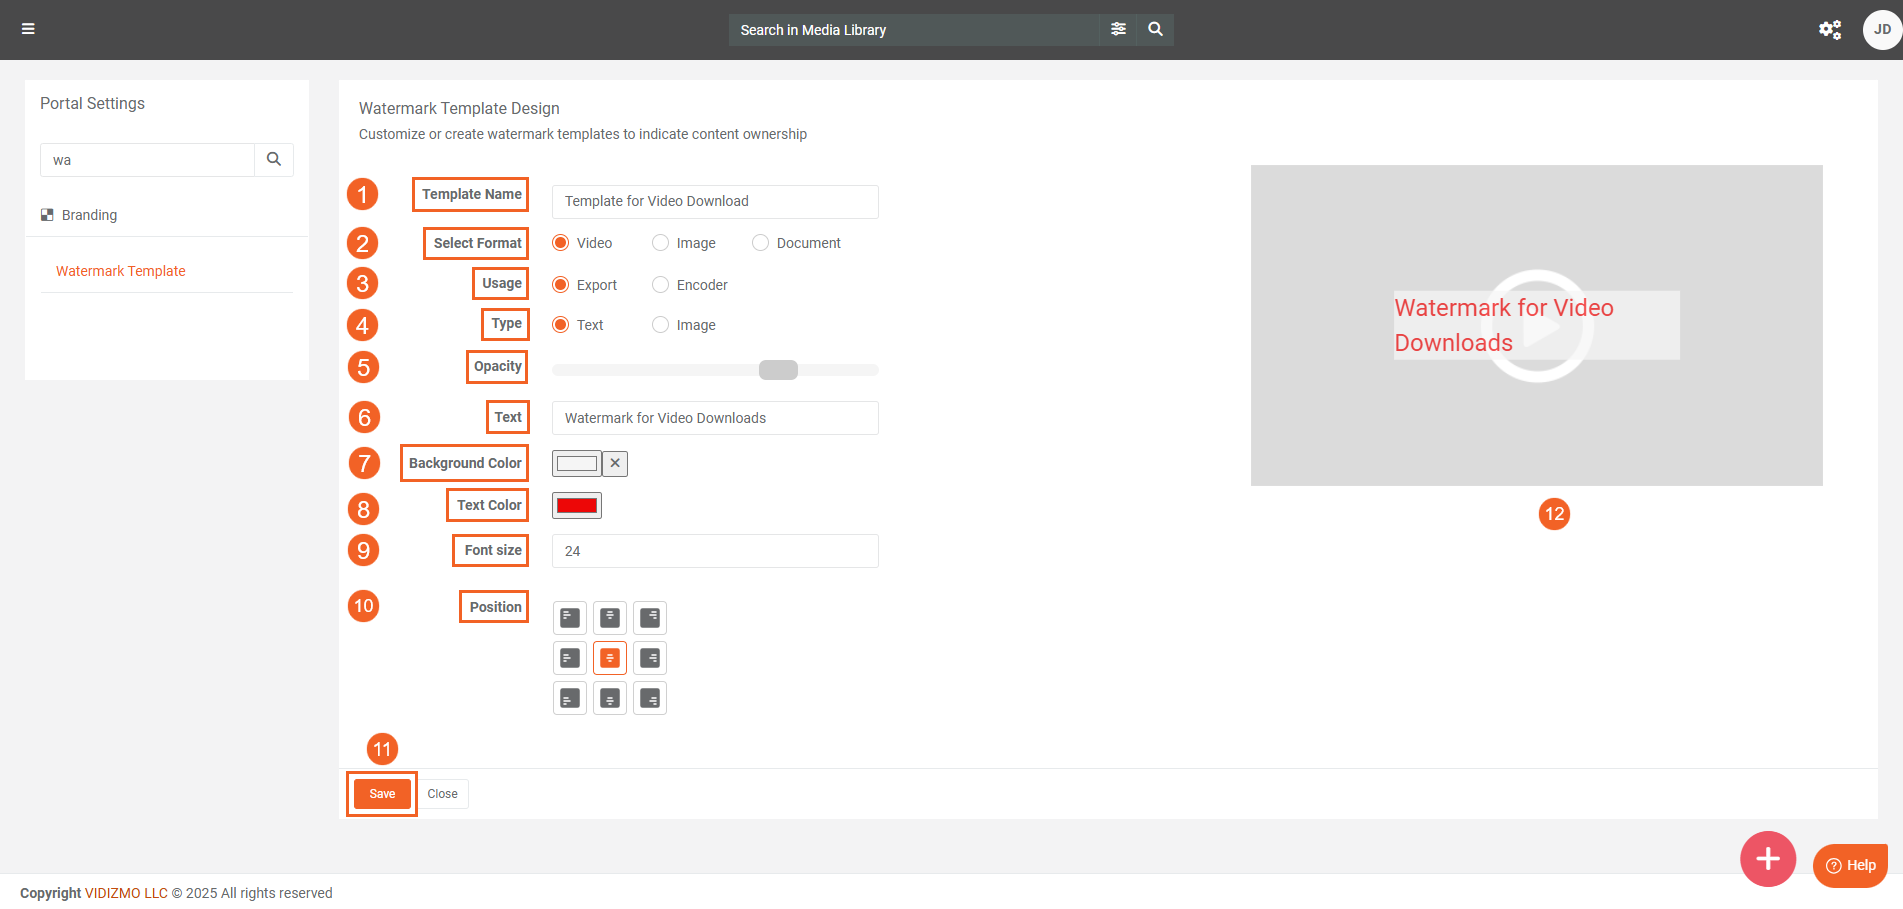
- On the Watermark Template Design screen, enter a name for the watermark template.
- Select the content format you want to create the watermark template for.
- Determine where the watermark template will be utilized. The template can be used when applying the watermark on content during upload when the encoding workflow is run (Enocder), or during download or export (Export).
- Select the watermark type to be applied to your content. You can utilize images or write text to act as watermark.
- Use the dial to adjust the opacity, which controls the visibility or translucency of the watermark. In text based watermarks, the opacity controls the opacity or translucency of both the background and text color.
- If you have chosen a text-based watermark, provide the text that will be used as the watermark on your content. The text area also allows you to use any custom attributes you’ve created in your Portal. To insert a custom attribute, type a
!in the field to display a dropdown menu containing the available attributes. Alternatively, you can manually type the variable within the text to display its value. For a list of variables, refer to Understanding Watermarking in VIDIZMO. - Select the background color of your text based watermark. You have options to customize the colors using several options.
- Next select the color of the text that is present in the Text area which will be implemented as a watermark.
- Select the font size of the text of the watermark that is implemented in the watermark template. You can select a value from 10 to 75.
- Select the alignment to specify the watermark's position on your content. This option determines its exact placement.
- Click the Save button to finalize your changes.
- Use or refer to the preview screen to see how the watermark looks after your configurations are done, this screen is dynamic and reflects all your changes real time, you can use it as a reference to see how your watermark will look applied for the selected media format.
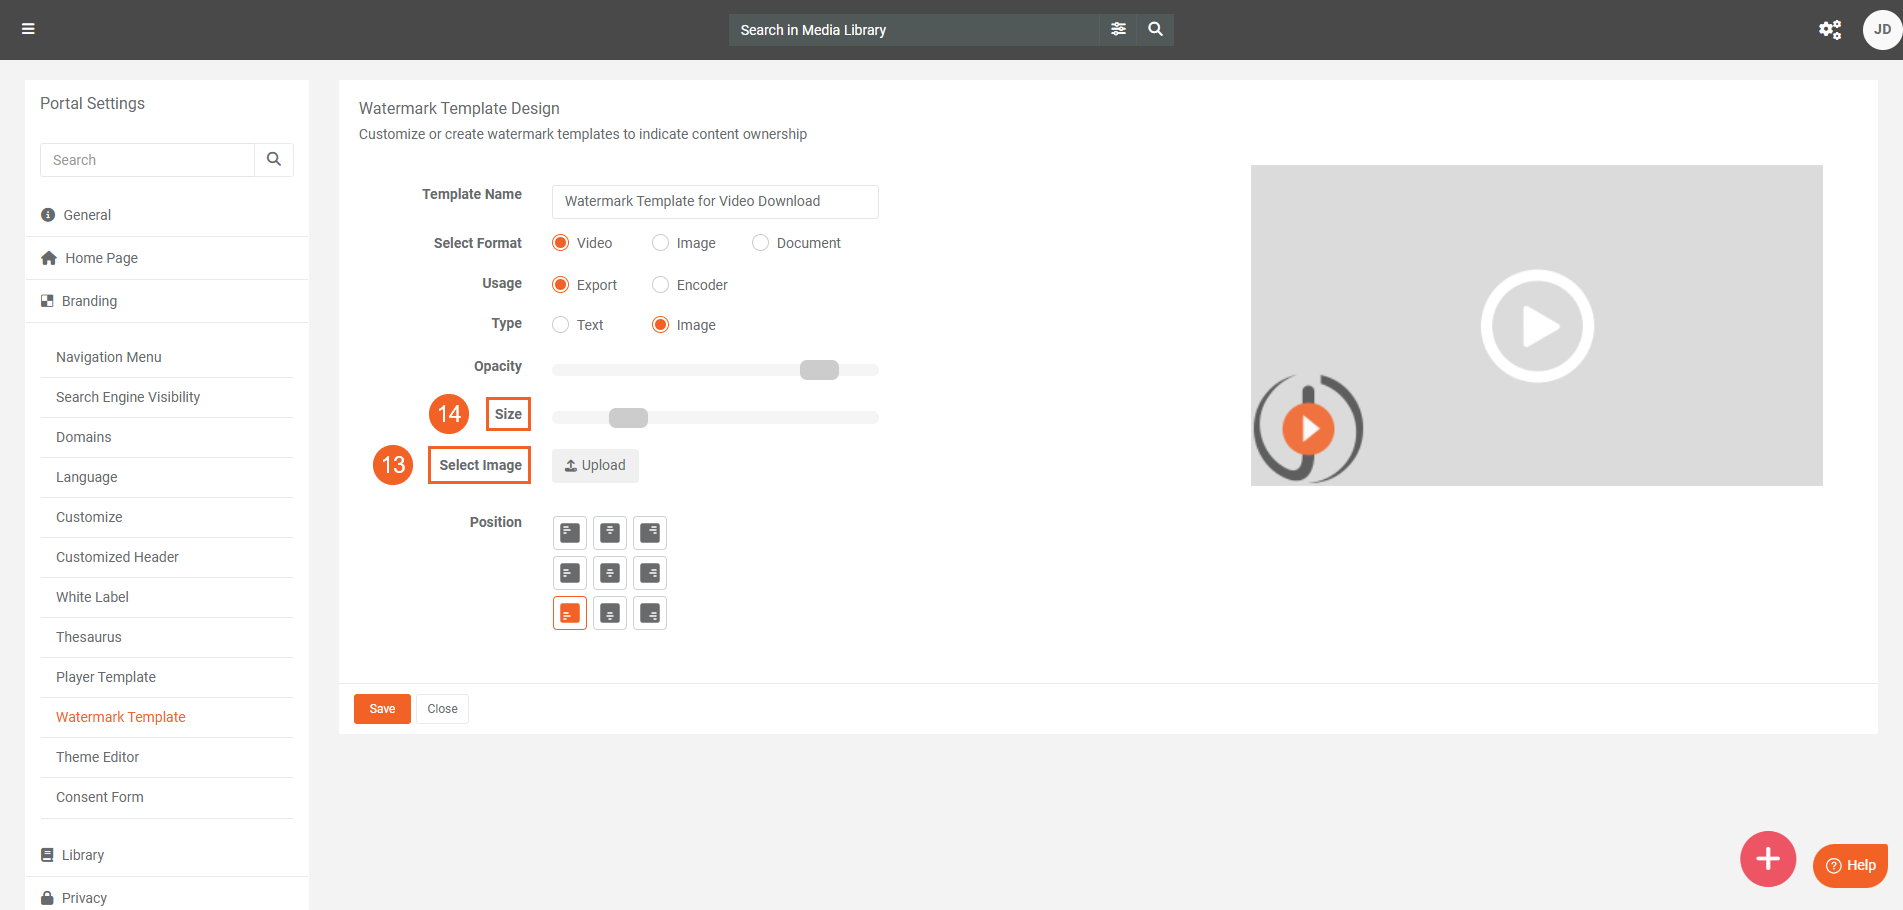
- If you’ve opted for image based watermark, use the Upload button to select an image to use as the watermark.
- Use the dial to increase or decrease the watermark image's size for optimal placement.
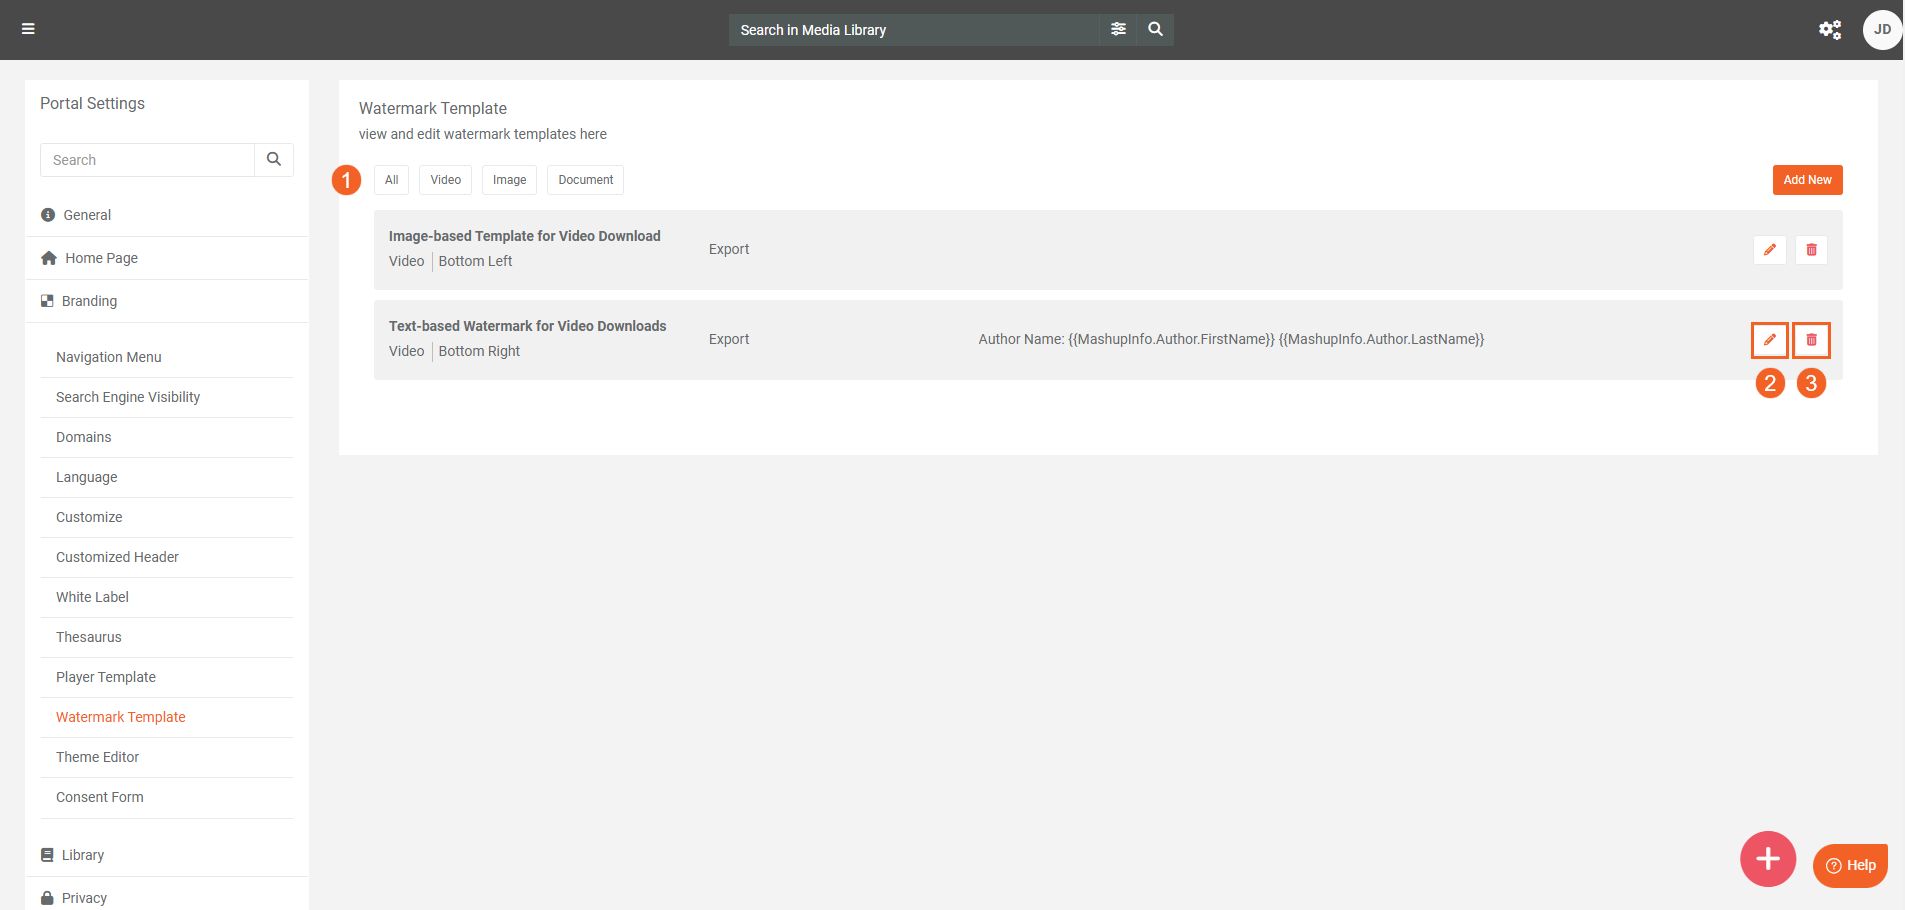
Managing Watermark Templates
All of your watermark templates, whether created or default are present on the Watermark Template page.
- You can use the buttons at the top to filter watermark templates by the formats to bring watermark that are specific to them using the buttons at the top.
- If you want to make adjustments or improvements to a specific watermark template, use the edit button.
- If you want to remove or delete a template, use the delete button.
These watermark templates will be available to you for application across the Portal when you are downloading or uploading media. Refer to How to Add a Watermark to your Content for more.