How to Configure SSO using Ping Identity
VIDIZMO supports Single Sign-On (SSO) using the OpenID Connect protocol with Ping Identity, allowing users to sign in with their Ping Identity credentials.
To learn more about SSO, see Understanding Single Sign-On.
Prerequisites
- Ensure that you belong to a group where the Management of SSO + SCIM permission is enabled.
- You must have a Ping Identity server administrator account to create a Ping Identity OIDC application for authorization.
- If your portal is using HTTPS protocol, make sure your Ping authentication server is also using HTTPS.
- VIDIZMO requires your Ping authorization server to expose the following scopes for attribute mapping and user authentication:
- Profile: Exposes the user's First Name and Last Name.
- Email: Exposes the user's Email Address.
- Openid: Required to indicate that the application intends to use OIDC to verify the user's identity.
Configuration in Ping Identity
Create and Configure OIDC Application
-
After you log into your Ping authorization server using an admin account, go to your default view of Applications. Add a new Web Application of the connection type OIDC. You will be asked to enter an Application Name, its Description, and an Icon.
-
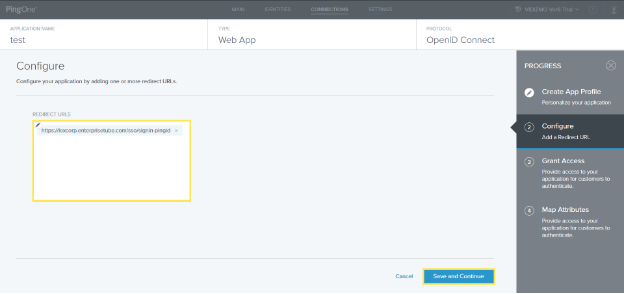
After creating the application profile, configure Redirect URLs for the application. Specifying them helps Ping Identity whitelist addresses upon which to send user information after a successful login.
i. In the Redirect URLs section, enter your Portal URL appended with
/sso/signin-pingid.ii. Select Save and Continue.
Grant Access
-
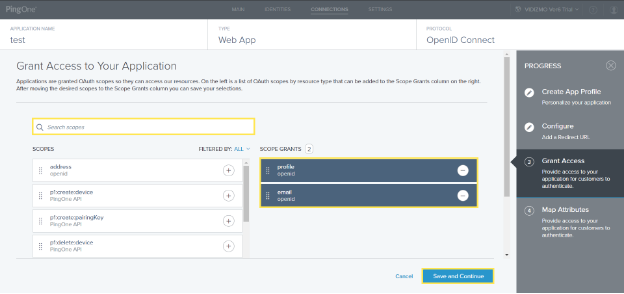
Grant access to the application by selecting the OIDC scopes for the application. The OIDC scopes determine the resources that the application can access.
i. Search scopes of email and profile in the left column.
ii. Select and drag each of them to add them to the scope grants column on the right.
iii. Select Save and Continue.
Map Attributes
-
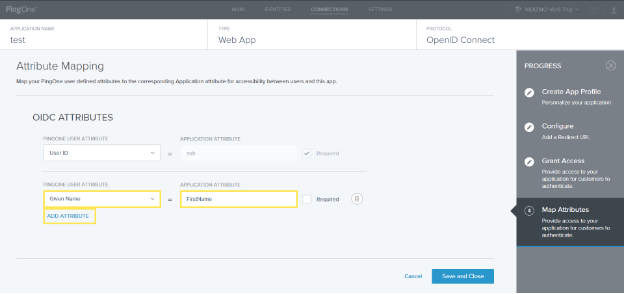
Map PingOne attributes to VIDIZMO Portal attributes by reading the following article: Map PingOne Attributes. The attribute mapping allows the user information in both platforms to be synchronized after authorization.
i. Apart from the default attribute, select Add Attribute.
ii. Select PingOne Attribute from the dropdown.
iii. Search for the attribute Given Name under PingOne User Attribute and select it.
iv. Enter FirstName under Application Attribute against the PingOne Attribute.
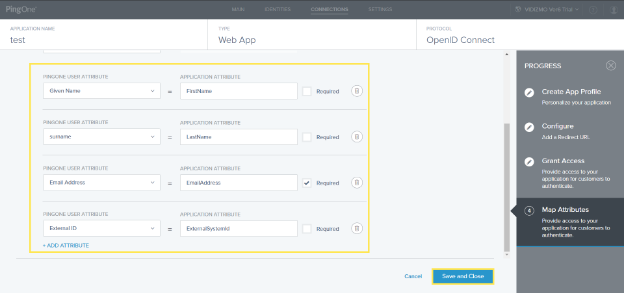
- Similarly, add the following list of attributes within the application. Make sure to mark Email Address as Required.
| PingOne User Attribute | Application Attribute |
|---|---|
| Given Name | FirstName |
| surname | LastName |
| Email Address | EmailAddress |
| External ID | ExternalSystemId |
Get Client ID, Secret, and Meta Address
-
Navigate through your applications to get the relevant Client ID, Secret, and Meta Address to be later used in VIDIZMO configuration:
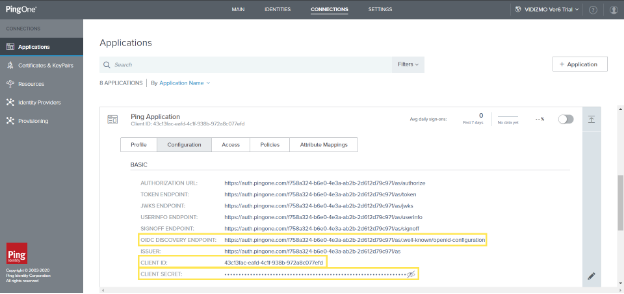
i. View the application you recently created and copy its Client ID: View Application.
ii. View the Client Secret and copy it for later use: View Client Secret.
iii. While viewing your application, go to the Configuration section, and copy the OIDC Discovery Endpoint for later use.
-
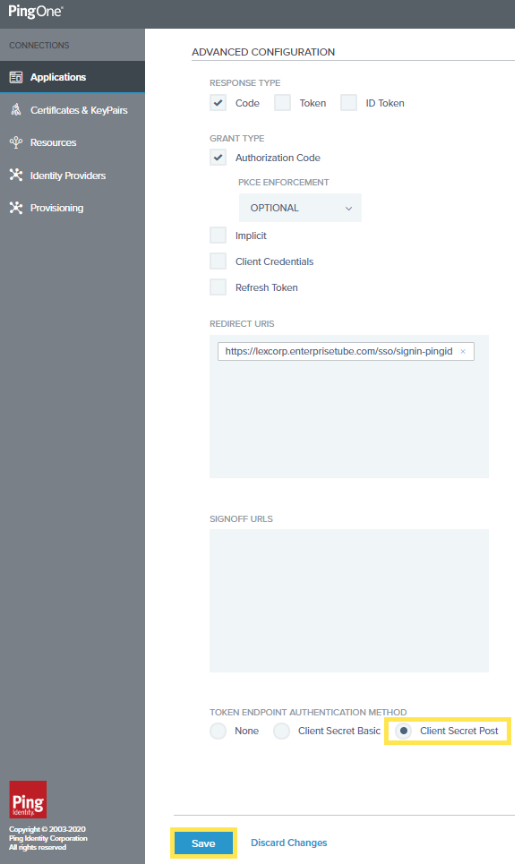
There is one last step you need to perform in the same Configuration. Scroll down to see Advanced Configuration:
i. Under Token Endpoint Authentication Method, make sure to select Client Secret Post.
Enable Application
Make sure your application is enabled after fully configuring its settings. The application will not be functional until you switch it on. See: Enable or disable an application.
Configuration in VIDIZMO
- In VIDIZMO, select the menu icon in the top-left corner to open the navigation pane.
- Expand the Admin section and select Portal Settings.
- Go to Apps > Single Sign-On.
- Select the settings icon on the PingID app.
- In the settings dialog, enter the following:
- SSO Login Message A custom message displayed on the sign-in page for this SSO option.
- SSO Login Button Label A custom label for the Ping Identity sign-in button on the sign-in page.
- Client ID The Client ID copied from your Ping Identity application.
- Client Secret The Client Secret copied from your Ping Identity application.
- Meta Address The OIDC Discovery Endpoint copied from your Ping Identity application.
- Requires HTTPS Metadata Select this checkbox to ensure HTTPS is required to get the metadata. When the request is handled for the first time, it tries to retrieve metadata from the authorization server. This metadata, or discovery document in OpenID Connect terminology, contains the public keys and other details needed to validate tokens.
- Force Login Select this option to redirect users directly to the Ping Identity sign-in page. When unchecked, users sign in through your Portal's sign-in screen.
- Callback Path
Pre-configured to
/sso/signin-pingid. - Attribute Mapping Map your Ping Identity attributes (FirstName, LastName, EmailAddress, ExternalSystemId) to your VIDIZMO Portal. You can also add new attribute mappings if needed.
- CAL Select a Client Access License to assign to users who sign in through Ping Identity SSO. When a user enters the Portal via Ping Identity SSO, this CAL is assigned to them, granting the permissions associated with that CAL.
- Select Save Changes to apply your settings.
- Turn on the toggle for the PingID app to enable SSO.
Result
Navigate to your Portal's sign-in screen. You will see an option to Sign in via Ping Identity. Selecting it redirects you to the Ping Identity sign-in page where you can enter your Ping Identity credentials.