How to Integrate MS Teams with VIDIZMO
Microsoft Teams is an online collaboration tool that makes it easier for organizations to collaborate and share data among people. Its video conferencing capabilities also enable organizations to host and record conferences.
Use the Microsoft Teams app in VIDIZMO to ingest content from your organization's Teams into your VIDIZMO Portal. Once connected, you can select the drives and folders that contain your Teams files (such as meeting recordings or channel files) and let VIDIZMO sync them into your library.
This article covers the full setup from Azure registration to enabling the app and choosing the folders to ingest.
Prerequisites
Before configuring the Microsoft Teams integration with VIDIZMO, ensure the following requirements are met:
- You must belong to a group with the integration app permission enabled to access this feature.
- Ensure you have an active Microsoft Azure account and you sign in to Teams with an Entra ID account.
- Global Administrator or Application Administrator role in Microsoft Entra ID.
Configure Microsoft Entra ID
To connect VIDIZMO with Microsoft Teams, you need to register an application in Microsoft Entra ID (formerly Azure AD). This is a one-time setup.
Register App in Entra ID
The first step is to register a client application in Microsoft Entra ID. For detailed instructions, refer to the Azure documentation.
Below, we've outlined the key steps required to complete the registration process.
- In the Azure portal, go to Microsoft Entra ID.
- Select App registrations.
- Select New registration.
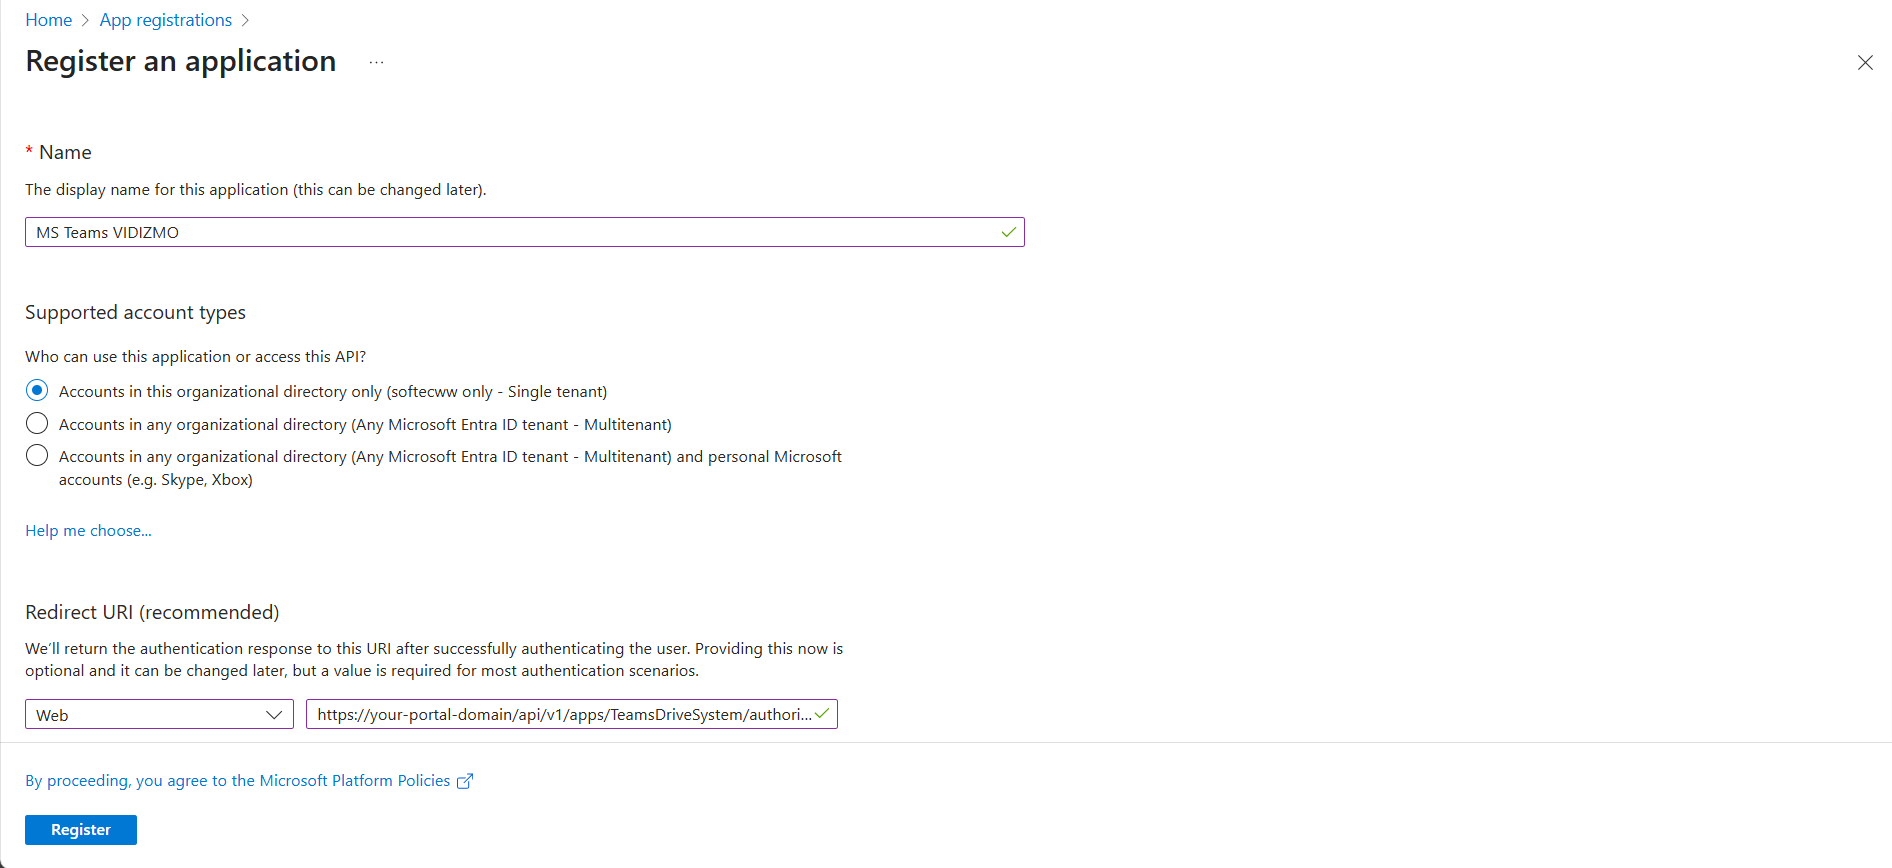
- On the Register an application page, complete the required fields.
- Name the display name for the App.
- For the supported account types, select Accounts in this organization directory only.
- In the Redirect URI section, select Web field, enter your portal domain. For example:
https://your-portal-domain/api/v1/apps/TeamsDriveSystem/authorize.
Application Credentials
After registering the application, you can find the Application (Client) ID and Directory (Tenant) ID in the Overview section.
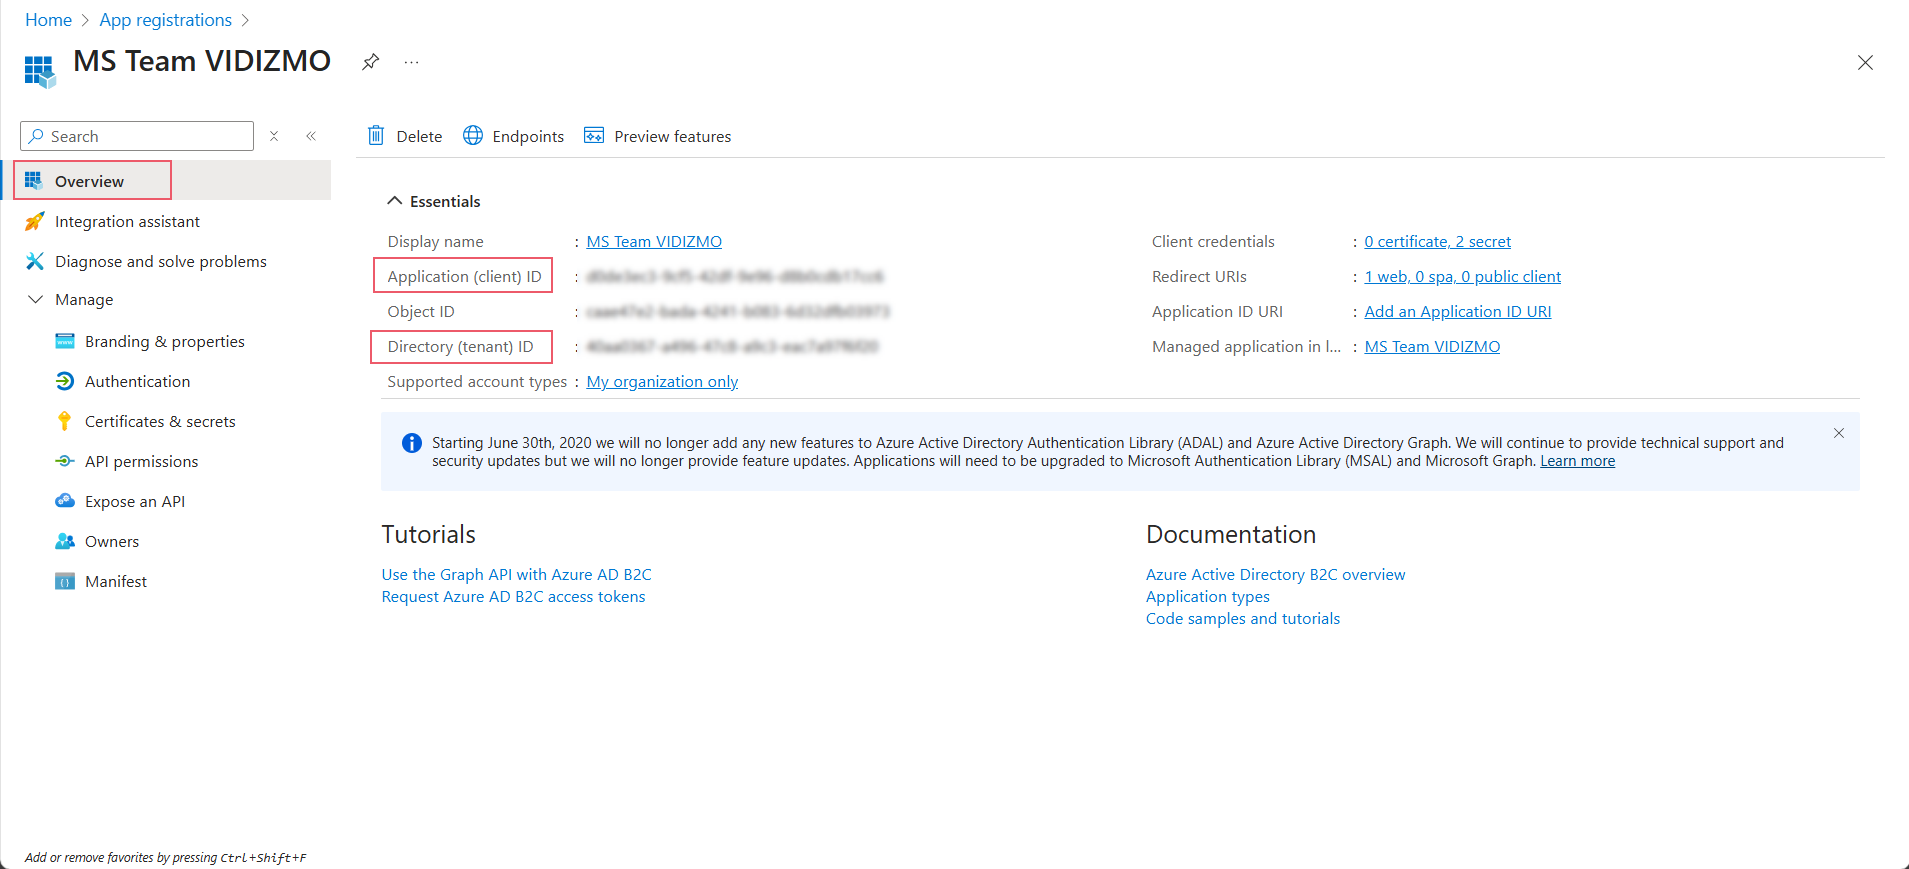
Save these values for future use in the MS Teams App in the VIDIZMO portal.
Create a Client Secret
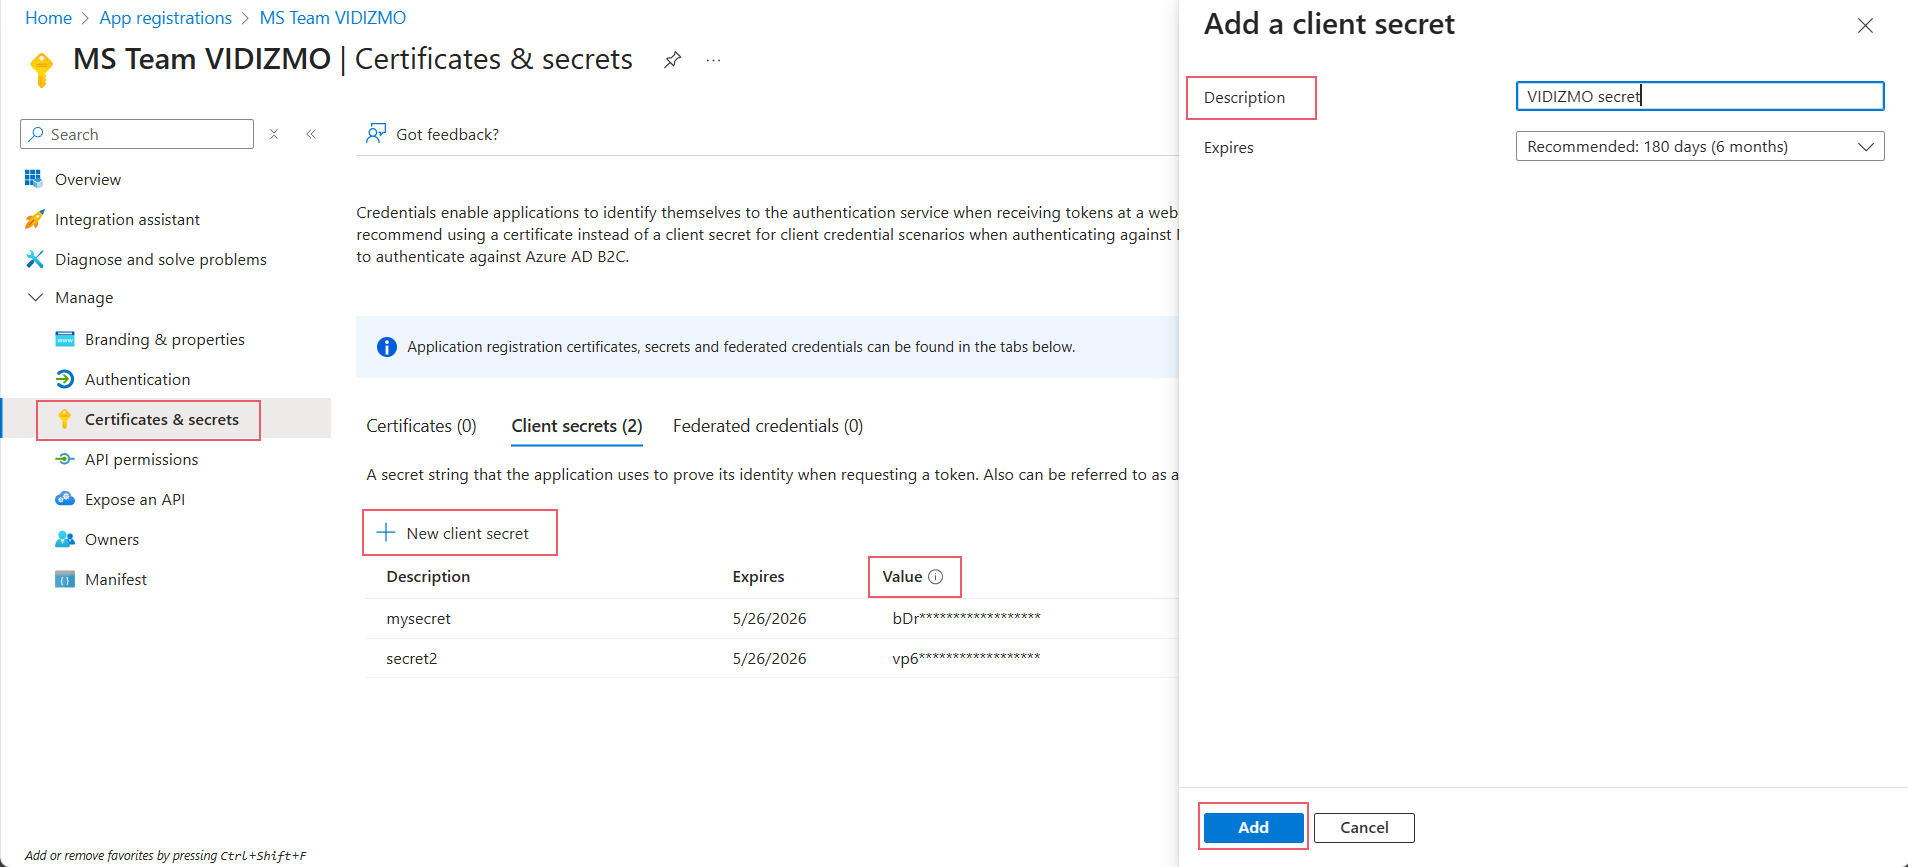
- In your app, go to Certificates & secrets.
- Under Client secrets, select New client secret.
- Enter a description (for example,
VIDIZMO secret) and select an expiration period. - Select Add.
- Copy the secret value immediately - it won't be shown again.
NOTE: Store the client secret securely. You cannot retrieve it later.
Configure API permissions
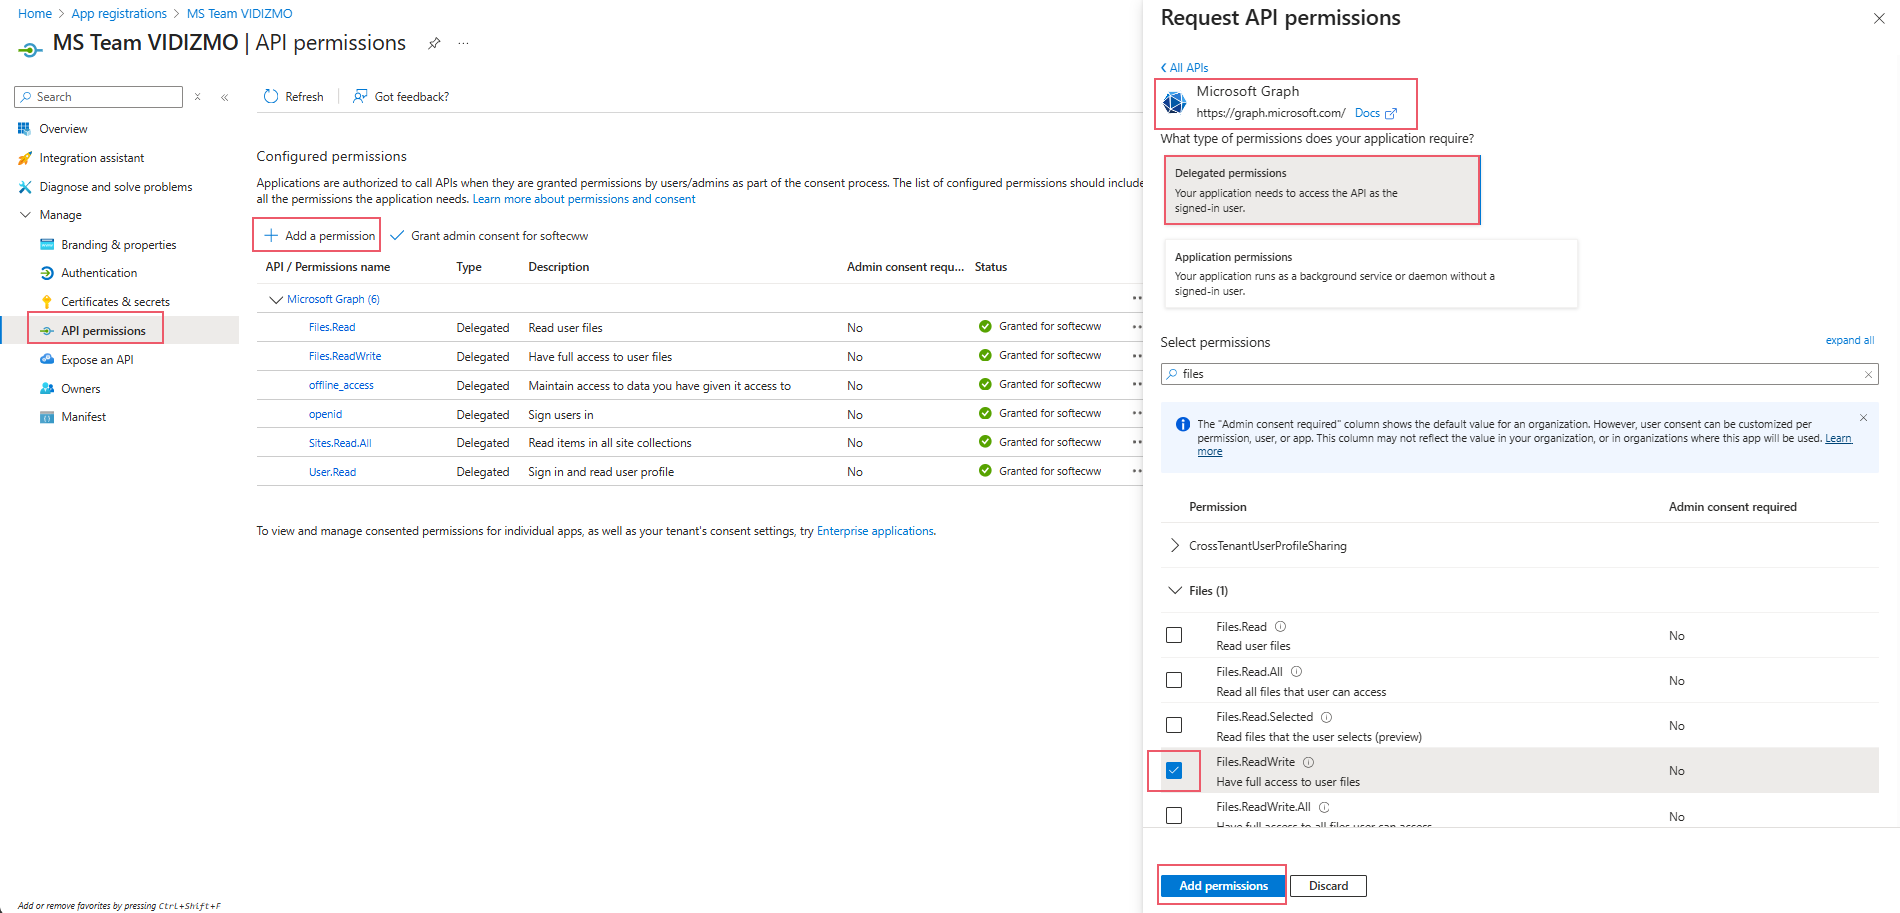
- In your app, go to API permissions.
- Select Add a permission > Microsoft Graph > Delegated permissions.
- Add the following permissions:
User.ReadFiles.ReadWrite
- Select Add permissions.
- If required by your organization, select Grant admin consent.
Configure MS Teams App in VIDIZMO
-
Open the navigation menu via the button on the top left.
-
Select the Admin dropdown.
-
Select Portal Settings.
-
Select Apps.
-
Select Content Ingestion.
-
Select the settings icon on the Microsoft Teams app.
-
In the Microsoft Teams - Settings dialog, enter the following:
-
Client ID Enter the Application (Client) ID copied from the Azure app registration.
-
Client Secret Enter the Client Secret value copied from Certificates & secrets.
-
Tenant ID Enter the Directory (Tenant) ID copied from the Azure app registration.
-
-
Select Save Changes.
-
Turn on the toggle to activate the app for your Portal.
After activation, the app shows operational status:
- Sync Process: Displays the current synchronization status, such as Running or Finished. If the process fails, an error message is also shown.
- Last Synced Attempt: Indicates the most recent date and time (in local format) when the processor attempted to retrieve content from Microsoft Teams cloud storage. This information helps you stay informed about the synchronization status of your files in the VIDIZMO portal.
Select Drives and Folders to Ingest (My Library)
- On the Home Page, select your profile icon on the top right.
- Select Uploads to go into your My Library.
- Select Import Settings.
- If your Teams app is enabled from your Portal Settings, it will show up here. Select its settings button.
- Login to Azure AD and select the Drive Type on your SharePoint.
- Select the Drives.
- Use the Folders appearing here to navigate to the path or directory where the content is present.
- Selecting the checkbox will create a path under Selected Folder(s).
- Selecting the folder name appearing here will let you enter it.
- Content present in these paths will be ingested.
- Select Save Changes.
- Enable the application and wait for the content to be ingested.