Configuring Azure Video Analyzer ARM in the VIDIZMO Portal
Artificial Intelligence (AI) has brought a transformative shift in the way information is collected and distributed. Organizations now recognize the critical importance of empowering their content with advanced media processing capabilities, as it enables easier uploading, targeted sharing, and enhanced content accessibility.
VIDIZMO offers AI-powered visual and audio insights, leveraging ARM-based Azure Media Indexer to enable smarter analysis and search optimization. ARM-based Azure Media Indexer, a sophisticated media analytics service, utilizes AI algorithms to extract video insights. This integration between VIDIZMO and Azure Video Indexer empowers organizations to unlock valuable intelligence, enhancing content analysis and search capabilities.
Expand your knowledge and leverage the full potential of VIDIZMO's offerings by referring to the detailed documentation titled Understanding Video Insights using Azure Media Analyzer.
This article provides comprehensive guidance on configuring the ARM Indexer app in VIDIZMO, offering two distinct options for customization. Following the steps outlined in this documentation, you will learn how to seamlessly integrate the ARM Indexer app into your VIDIZMO portal with the flexibility to choose between automatic configuration or configuring your ARM indexer app with personalized settings.
Prerequisites
- Ensure that you belong to a group where the App Management permission is enabled to access this feature.
Automatic Configuration with Default Settings
When you sign up for a VIDIZMO account, the ARM indexer app is automatically configured with some basic default settings and presets. However, you have the flexibility to modify these presets and settings to incorporate enhanced video insights and transcription capabilities into your Portal.
Follow these steps to access and customize the default ARM Indexer app settings:
Access Portal Settings
-
Open the navigation menu via the button on the top left.
-
Select the Admin dropdown.
-
Select Portal Settings.
-
Select Apps.
-
Select Content Processing.
-
Select the settings icon on the Azure Video Analyzer ARM app.
-
Edit or change the following settings in the default ARM Indexer app to incorporate enhanced video/audio insights and transcription capabilities into your Portal:
- AI Insights
Choose from five indexing presets to determine the type of insights to extract from the audio and video components. Each preset provides a different level of analysis for your media, ranging from basic transcription to advanced detection of emotions, objects, and topics.
- Basic Audio Only
- Standard Audio Only
- Basic Video Only
- Standard Video Only
- Standard Audio + Video Only
For detailed information on the available indexing presets and the insights they provide, see the Azure AI Video Indexer documentation.
-
Source Content Language Specify the language of the source content or choose the "Auto-detect multi-language" option for automatic language detection.
NOTE: The "Auto-detect multi-language" feature automatically identifies the spoken language in your content, eliminating the need to manually specify the source content language. The "Auto Detect" supports nine languages, including English, Spanish, French, German, Italian, Mandarin Chinese, Japanese, Russian, and Portuguese (Brazilian).
-
Insights Translation Utilize the drop-down menu to select the preferred language options for translating insights extracted from the content.
-
Select Insights Select the desired insight(s) settings you wish to extract and display from the video or audio content.
NOTE: The available insight options depend on the selected preset mentioned above. Choose the insights according to your specific requirements.
-
Delete Generated Insights The "Delete generated insights from the indexer" option allows users to remove the indexed insights from the Azure Indexer after processing. Enabling this checkbox ensures the content is deleted from the Azure Indexer once the indexing process is completed.
-
Automatic Processing To turn on or off automatic processing, select the relevant option. If the "On" setting is chosen, any uploaded evidence or media will undergo automatic processing without requiring manual intervention.
- AI Insights
Choose from five indexing presets to determine the type of insights to extract from the audio and video components. Each preset provides a different level of analysis for your media, ranging from basic transcription to advanced detection of emotions, objects, and topics.
-
Select Save Changes to save all the configurations.
NOTE: When a user saves the default ARM indexer app settings, the changes are applied specifically to their portal settings. Any updates or modifications to the default configuration will not automatically reflect in the user's app settings.
- Select the toggle to activate the Azure Video Analyzer ARM app, enabling its functionality within your portal. A notification will appear confirming the successful update of the app settings.
In the next part, we will explore how to configure your own ARM indexer app with personalized configurations and settings.
Configure Your ARM Indexer App
For users seeking a more tailored experience, VIDIZMO offers the flexibility to customize the ARM Indexer App with your own configuration and settings.
Prerequisites
- Ensure you have an active Azure subscription to access ARM-based Azure Media Services, which enables indexing or fetching insights from video and audio files.
Create an ARM Indexer Account
Refer to the tutorial to create an Azure Video Indexer account and associated resources through the Azure portal. The account that will be generated is an ARM (Azure Resource Manager) account.
Register an App with Azure Active Directory
To utilize the ARM Indexer app, register it with Azure Active Directory, enabling external client applications to authenticate using OAuth. For detailed instructions, consult the How to Register App with Azure AD documentation.
NOTE: It is important to ensure that the region of your Video Indexer account matches the region selected during the setup of your storage and media service account in Azure. Failing to do so may result in connection issues and the inability to establish a successful connection.
Grant Permission to Azure Video Indexer Registered App
Provide the necessary permissions to the Azure Video Indexer registered app to establish a successful connection.
- Open Azure Video Indexer.
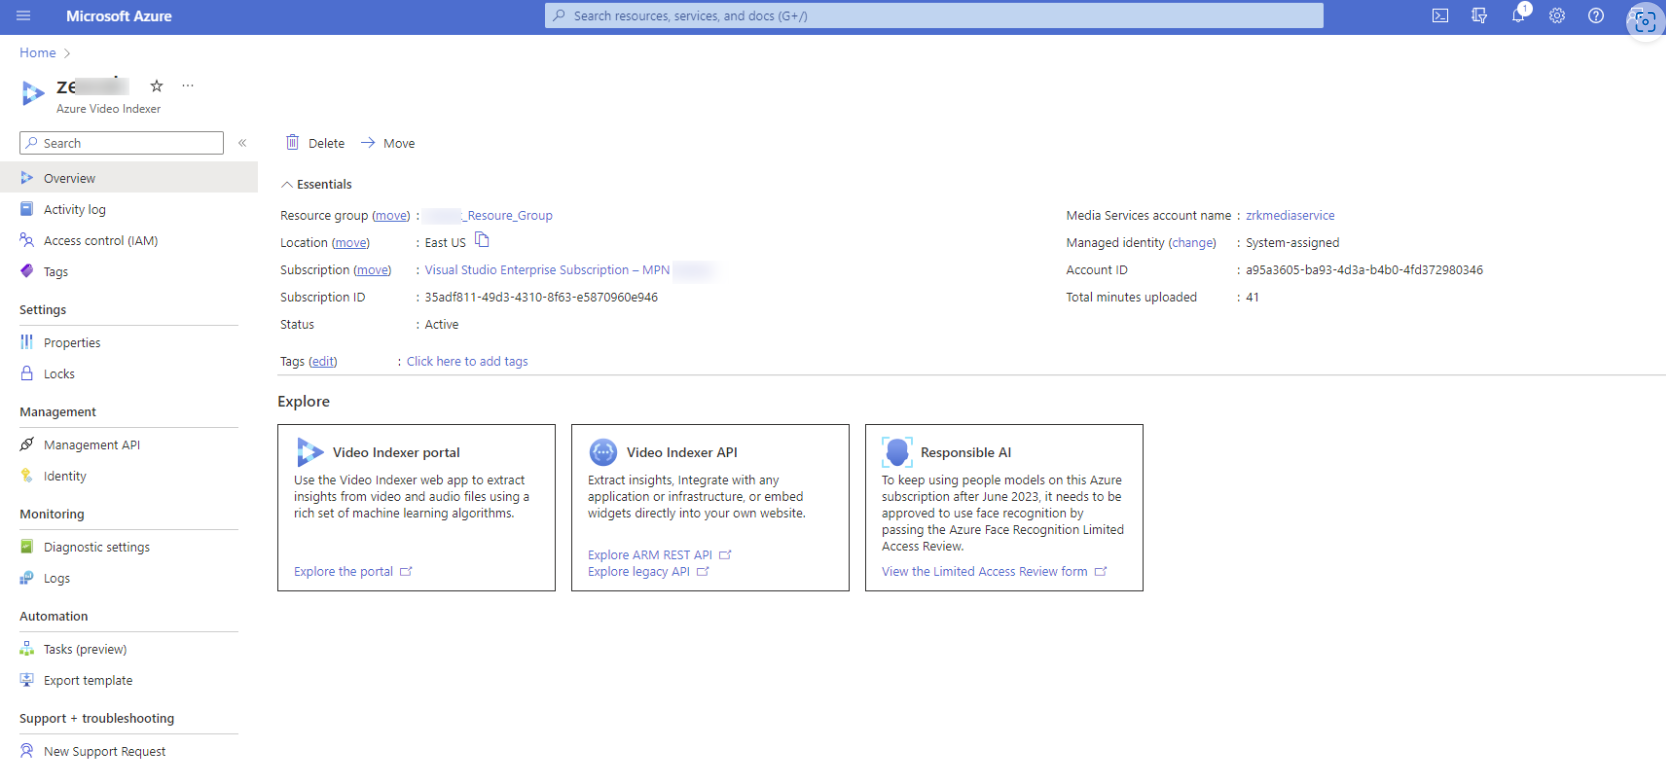
- Navigate to the Access control (IAM) tab, select + Add, then select Add Role Assignment.

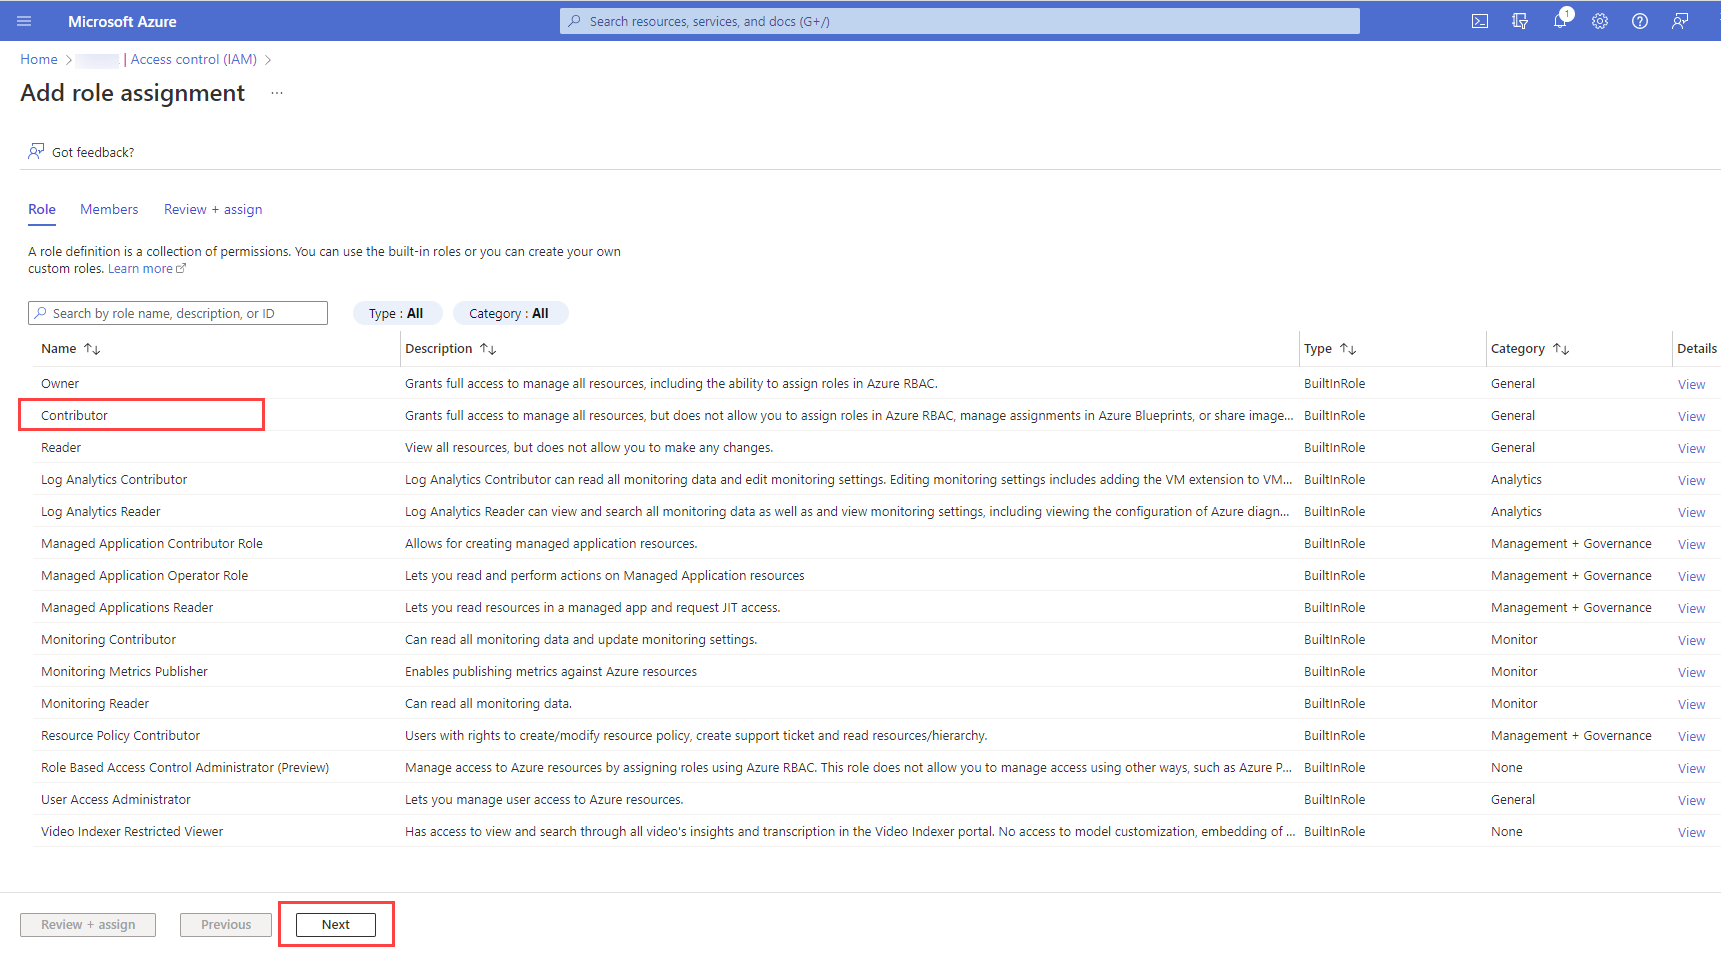
- Select the Contributor role from the list and select Next.
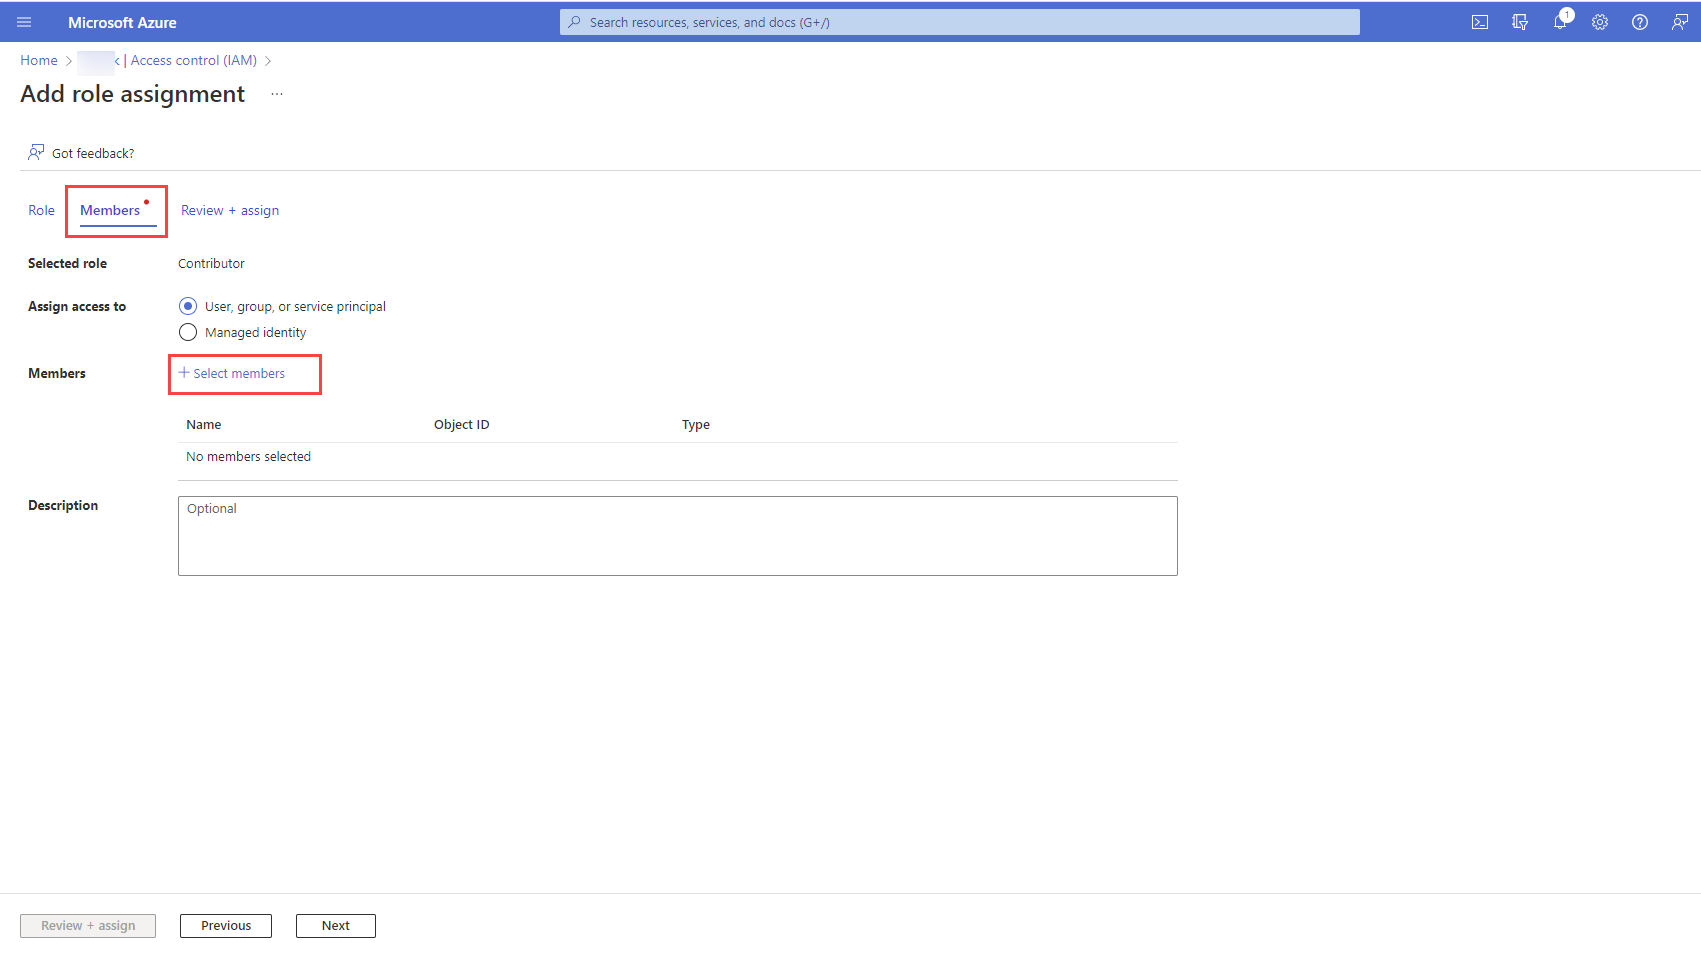
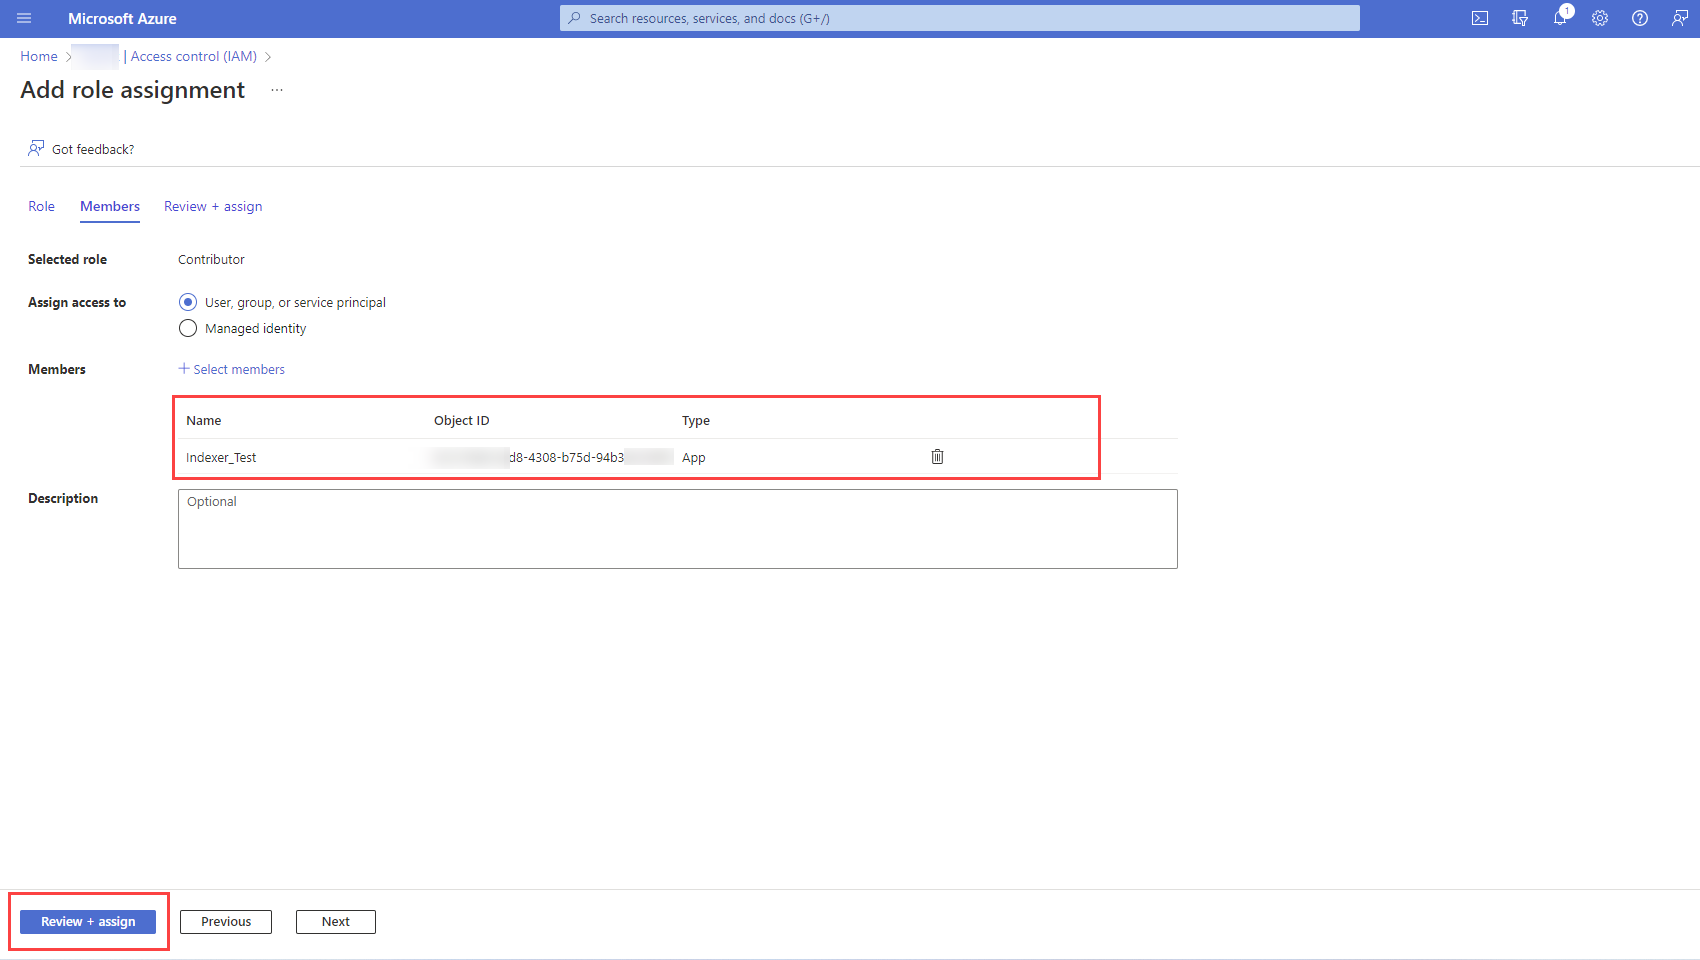
- Select the Members tab on the role assignment screen. Then select + Select members.
- Search and then select the Azure AD App you created previously or the one you want to give access to.
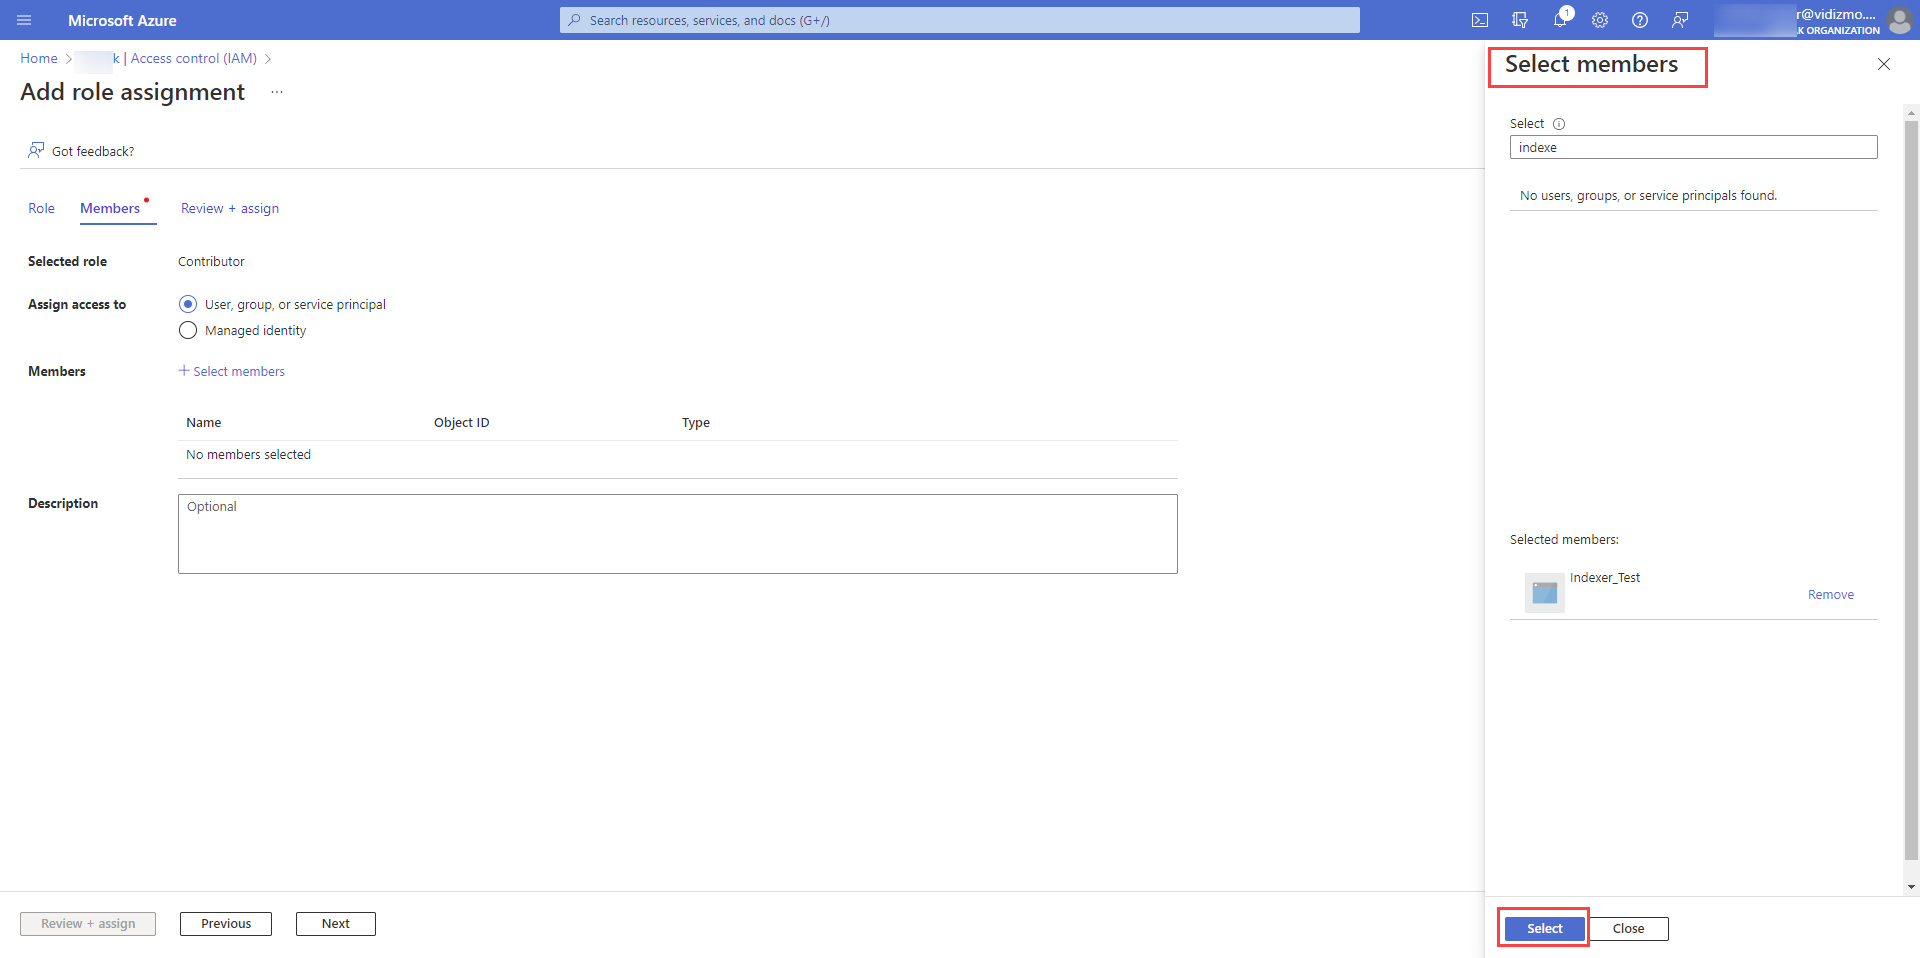
- The selected App will be shown under the "Members" section. To complete the process, select Review + assign to review and assign the permissions to the App.
NOTE: To avoid any authentication issues, follow the same steps for media service and storage accounts associated with the Azure Video Indexer.
Set up the ARM Indexing App
This section will guide you through setting up the ARM indexing app using your Azure subscription and Azure resources for fetching insights and transcription from audio and video file uploads in your VIDIZMO portal.
Refer to the "Automatic Configuration with Default Settings" section earlier in this document for detailed steps on how to access Portal Settings and navigate to the ARM-based Azure Video Indexer.
-
Select Set up your own account in the Azure Video Indexer - Settings modal.
-
Provide the necessary information in the modal:
-
Tenant ID Each subscription in Azure has a unique tenant ID associated with it. To obtain the tenant ID, copy the Directory ID from Azure Portal > Azure Active Directory > Properties.
-
Application ID To obtain the Application ID (Client ID) for your application, go to the app Overview page in the Azure portal. Copy the value using the clipboard icon. It is important to accurately copy the Application ID as it uniquely identifies your application within the Microsoft identity platform.
-
Client Secret The Client Secret is a confidential string or application password, utilized by the application to authenticate its identity when requesting a token. To create the Client Secret for your application, go to the "Certificates and Secrets" tab in the Azure portal under App registration, and generate the secret key from there.
-
Subscription ID Provide the ID of your Azure subscription.
-
Resource Group Name Enter the resource group name for the Video Indexer account. The resource group name refers to the resource created under the provided subscription, and the ARM Indexer is created within this resource group.
-
Account Name Specify the name of your ARM indexer under the mentioned resource group.
-
Azure Region Choose the appropriate Azure region.
-
AI Insights Choose the indexing preset based on your requirements.
-
Source Content Language Select the language of the source content or choose the "Auto-detect multi-language" option for automatic language detection.
NOTE: The "Auto-detect multi-language" feature automatically identifies the spoken language in your content, eliminating the need to manually specify the source content language. The "Auto Detect" supports nine languages, including English, Spanish, French, German, Italian, Mandarin Chinese, Japanese, Russian, and Portuguese (Brazilian).
-
Insights Translation Utilize the drop-down menu to select the preferred language options for translating insights extracted from the content.
-
Select Insights Select the desired insight(s) settings you wish to extract and display from either the video or audio content.
NOTE: The available insight options depend on the selected preset. Choose the insights according to your specific requirements.
-
Delete Generated Insights Select "Delete generated insights from the indexer" if desired.
-
Automatic Processing Select the appropriate option to turn automatic processing on or off. If the "On" setting is chosen, any uploaded evidence or media will undergo automatic processing without requiring manual intervention.
-
-
Select Save Changes to save the configurations.
Alternatively, if you wish to revert to the VIDIZMO default configuration at any point, select the Reset button located below the app settings modal.
By following the steps outlined in this documentation, you can effectively configure the ARM Indexer app in VIDIZMO.
If you plan to use Summarization Insights, you must configure an Azure AI app within your Azure account to enable this feature. For detailed instructions, see Configure Azure ARM App for Summarization Insight in VIDIZMO.