How to Setup SSO using ADFS
Single Sign-On (SSO) is a user authentication process that allows your users to sign in to multiple applications using the same set of login credentials. This allows ease of use for the end-users and ease of management for users. VIDIZMO offers the most flexible options for you to integrate with a wide range of single sign-on authentication providers, including:
- Directory services such as Azure AD, Azure Directory Federation Service, etc.
- Identity Access Management (IAM) services such as Okta, OneLogin, Ping, Centrify, ForgeRock,
- Third-party login services such as Facebook, Google, Office 365, X, LinkedIn, etc.
With an app model integration for SSO, VIDIZMO makes the integration as easy as enabling/disabling your identity provider from within the platform administrator interface in minutes. Enterprises using ADFS as their identity provider can utilize SSO option with VIDIZMO, allowing users to sign in using the same set of credentials.
For more information about VIDIZMO SSO Apps, read Understanding Single Sign-On.
Prerequisites
- For configuring ADFS SSO with VIDIZMO, you must have an ADFS server's administrator account so that you can create an Application Group for authorization.
- If more SSO Apps have been configured and enabled on your Portal other than ADFS SSO, your users will see multiple buttons on the login page allowing them to choose any identity provider of their choice to log in to their VIDIZMO Portal.
- VIDIZMO requires your ADFS authorization server to expose a list of scopes to map attributes and provide user authentication. These scopes include:
- Profile (The user's First Name and Last Name are exposed and mapped in your VIDIZMO account in this Scope)
- Email (The user's Email Address is exposed and mapped in your VIDIZMO account in this Scope)
- Openid (this is required to indicate that the applicant intends to use OIDC to verify the user's identity)
- Users of the Portal can configure and enable SSO options in VIDIZMO who belong to the group in which Management of SSO + SCIM (Excluding Social SSO) feature permission is enabled.
- If your portal is using HTTPS protocol, make sure your ADFS authentication server is also using HTTPS.
Configuration in ADFS
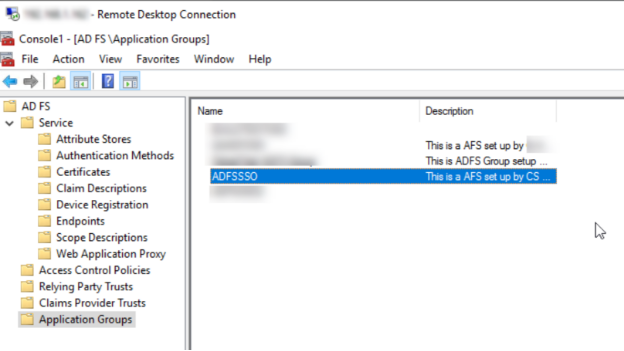
- Create Application Group (This will help you configure settings for the VIDIZMO in ADFS).
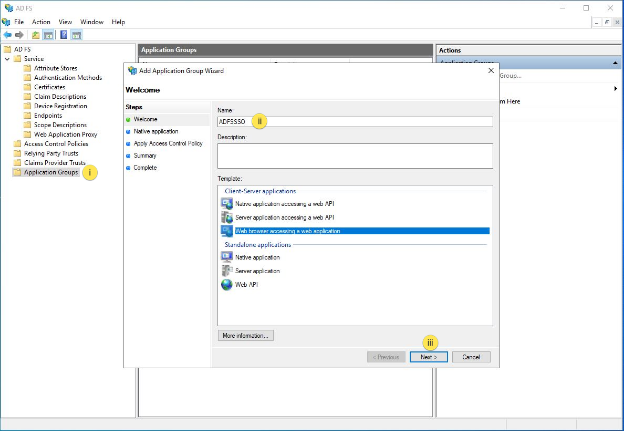
- In ADFS Management, right-click on Application Groups and select Add Application Group.
- On the Add Application Group Wizard, for the name enter ADFSSSO (you can give it any name of your choice) and under Client-Server applications select the Web browser accessing a web application template.
- Select Next.
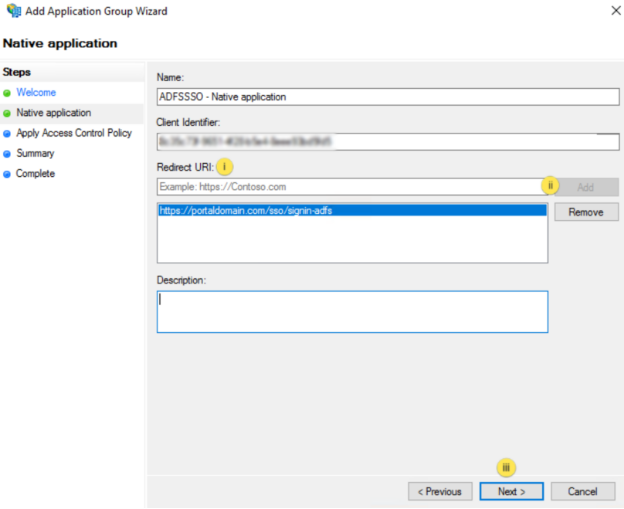
- In Add Application Group Wizard:
-
Copy the Client Identifier value. It will be used later as the value for ClientId in the VIDIZMO Configuration. (Client identifier field can be edited, so you can add self-defined client Identifier key)
-
Enter the following for Redirect URI: - https://portaldomain.com/sso/signin-adfs. Select Add. Select Next.
NOTE: Your portaldomain is your portal URL. For example, if your portal URL is lexcorp.com so the Redirect URL will be https://lexcorp.com/sso/signin-adfs.
-
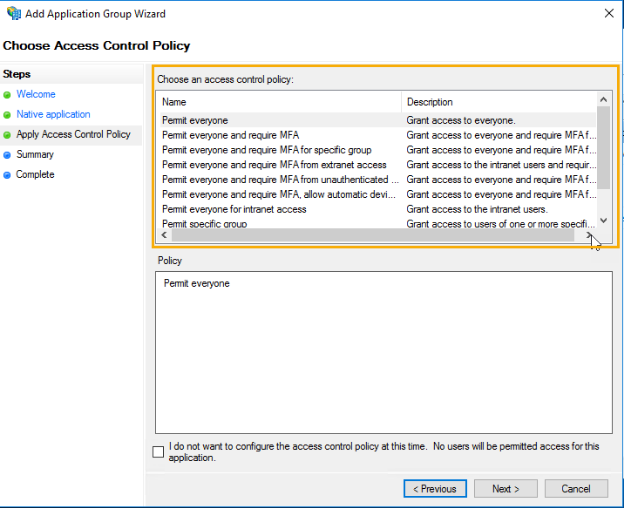
- From Choose an access control policy select the type of user group policy you want to configure. (e.g. select Permit everyone if you want to allow all your portal members to use ADFS) and select Next.
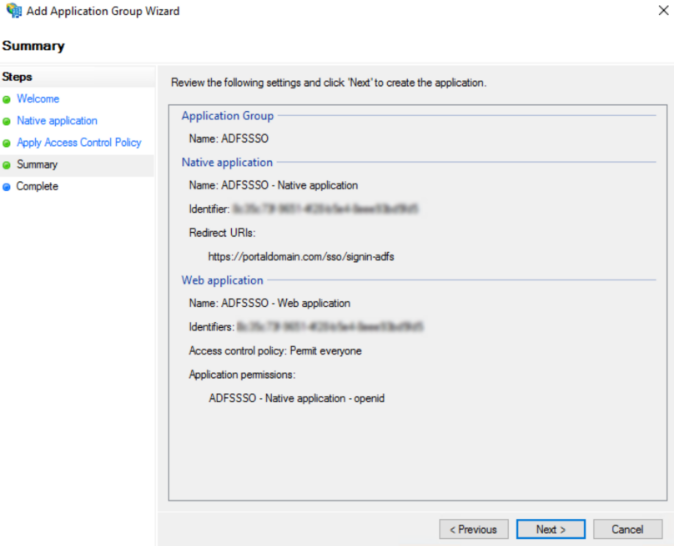
- On the Summary screen review the details, select Next and then select Close.
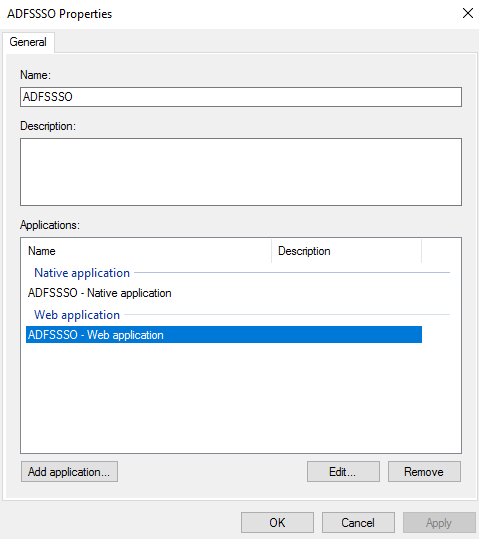
- In ADFS Management, select Application Groups and right-click on ADFSSSO (created in step 1) application and select properties. (This will help you configure/transform the Issuance Transform Rules, which are used by VIDIZMO to authenticate the login process using ADFS)
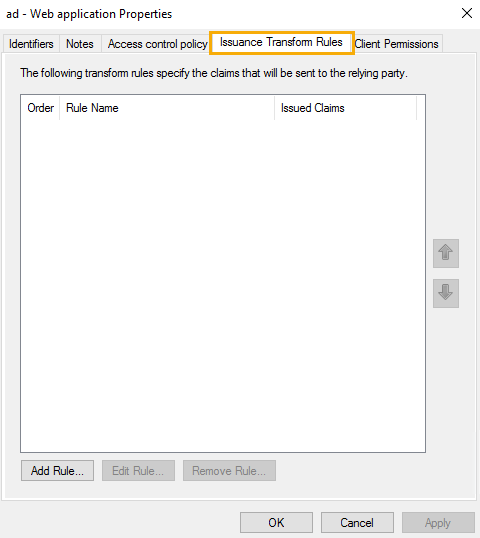
- Select and edit the ADFSSSO - Web application.
- Select Issuance transform Rules Tab and select Add Rule.
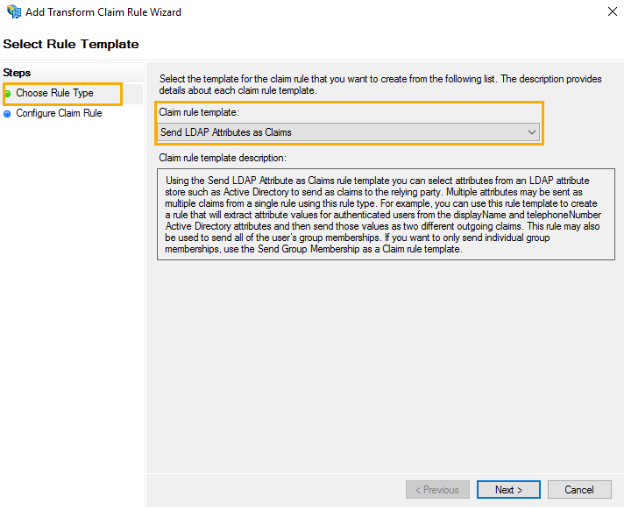
- Add Transform Claim Rule Wizard will open.
- At Choose Rule Type screen, select Send LDAP Attributes as Claims as the Claim Rule template from the drop-down list.
- Select Next to proceed.
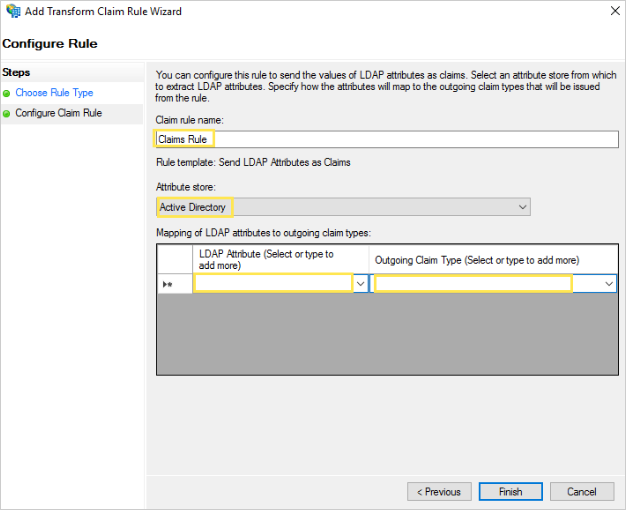
- You will move on to Configure Claim Rule screen: (Here you can configure a rule to send the values of LDAP attributes as claims).
- Enter Claim rule name.
- Select Active Directory as the Attribute store from the dropdown list.
- Start Mapping LDAP attributes to Outgoing ClaimTypes.
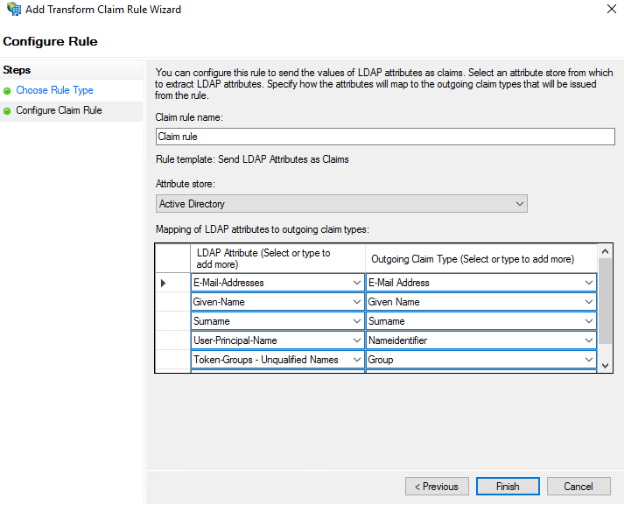
The LDAP Attribute column shows the claims available from Active Directory and Outgoing Claim Type are claim types that will be sent to VIDIZMO.
| LDAP ATTRIBUTE | OUTGOING CLAIM TYPE |
|---|---|
| E-Mail-Addresses | E-mail Address |
| Given-Name | Given Name |
| Surname | Surname |
| User-Principal-Name | Nameidentifier |
| Token-Groups - Unqualified Names | Group |
Once all the LDAP Attributes to outgoing claim types are added, select Finish.
NOTE: Token-Groups - Unqualified Names is used to grant access to all the users of a group as well as the subgroup associated with that group.
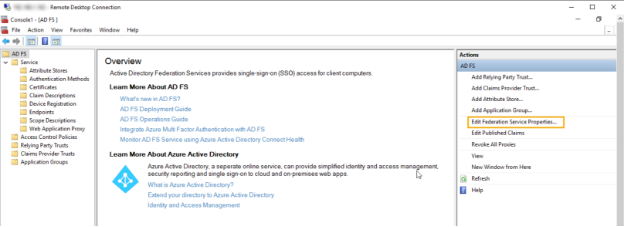
- Getting the Portal URL and Meta Address. (This Portal URL and Meta Address is a required field for configuring the ADFS SSO in VIDIZMO. You will have to use them in combination). Copy these two fields, you will have to use them in VIDIZMO portal settings.
- Go to ADFS Management.
- Select Edit Federation Service Properties.
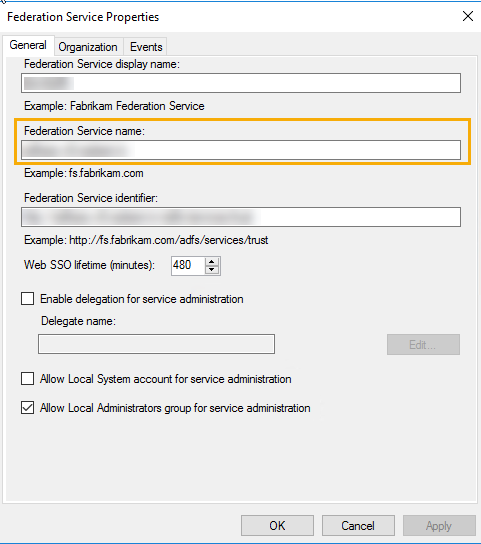
- Federation Service Properties screen will be opened.
- Copy your Federation Service Name.
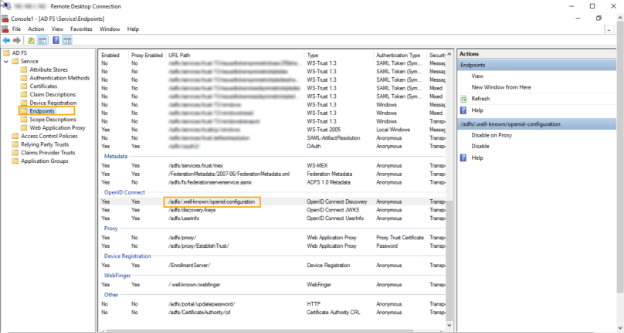
- Get the Meta Address by going to Endpoints in ADFS Management.
Configuration in VIDIZMO
- Open the navigation menu via the button on the top left.
- Select the Admin dropdown.
- Select Portal Settings.
- Select Apps.
- Select Single Sign-On.
- Select the settings icon on the ADFS SSO app.
- In the ADFS SSO - Settings dialog, configure the following:
- Enter the Client Identifier you copied in step 2 of ADFS Configuration.
- Enter the Meta Address. It is the combination of Federation Service Name (Portal URL) and Meta Address.
- Requires HTTPS Metadata: Select this checkbox to get metadata. When the request is handled for the first time, it tries to retrieve some metadata from the authorization server (also called authority or issuer). This metadata, or discovery document in OpenID Connect terminology, contains the public keys and other details needed to validate tokens.
- Force Login: Select the checkbox to enable forced login and it will take you directly to ADFS. When unchecked, it will not redirect automatically to the IdP and you will be required to sign in through your Portal's sign-in screen.
- Select Save Changes.
- Enable the toggle on the ADFS SSO app to activate it on your portal.
Sign in using ADFS SSO
Sign out from your existing account and navigate back to the Login page to see an option to sign in using ADFS SSO.