How to Submit External Evidence in VIDIZMO
In VIDIZMO, external users can submit evidence.This article offers a comprehensive, step-by-step guide to help you understand the process of creating an evidence request form and how users can submit the evidence.
For a deeper understanding of how public evidence submissions work, refer to the article "Understanding External Evidence Submissions in VIDIZMO."
Prerequisites
Make sure that the following configurations and permissions are in place:
- Configured Apps in the VIDIZMO Portal:
- Required Permissions:
- External Media Submission Permission
- Manage All Evidence Requests
- Manage Form Templates
- MFA App
Optional,
- Evidence/Media Moderation
- Partner App to enable Partner Agency App
- Malware Threat Control for enabling Scan/Malware app.
- Ensure that custom forms are created in the VIDIZMO portal needed for submission.
Evidence Request
To request evidence from the public, you must first create an Evidence Request. This will generate a link that you can share with the public or use to send direct invites to specific individuals, enabling them to submit evidence.
Follow the steps below to create an Evidence Request:
Steps to Create an Evidence Request:
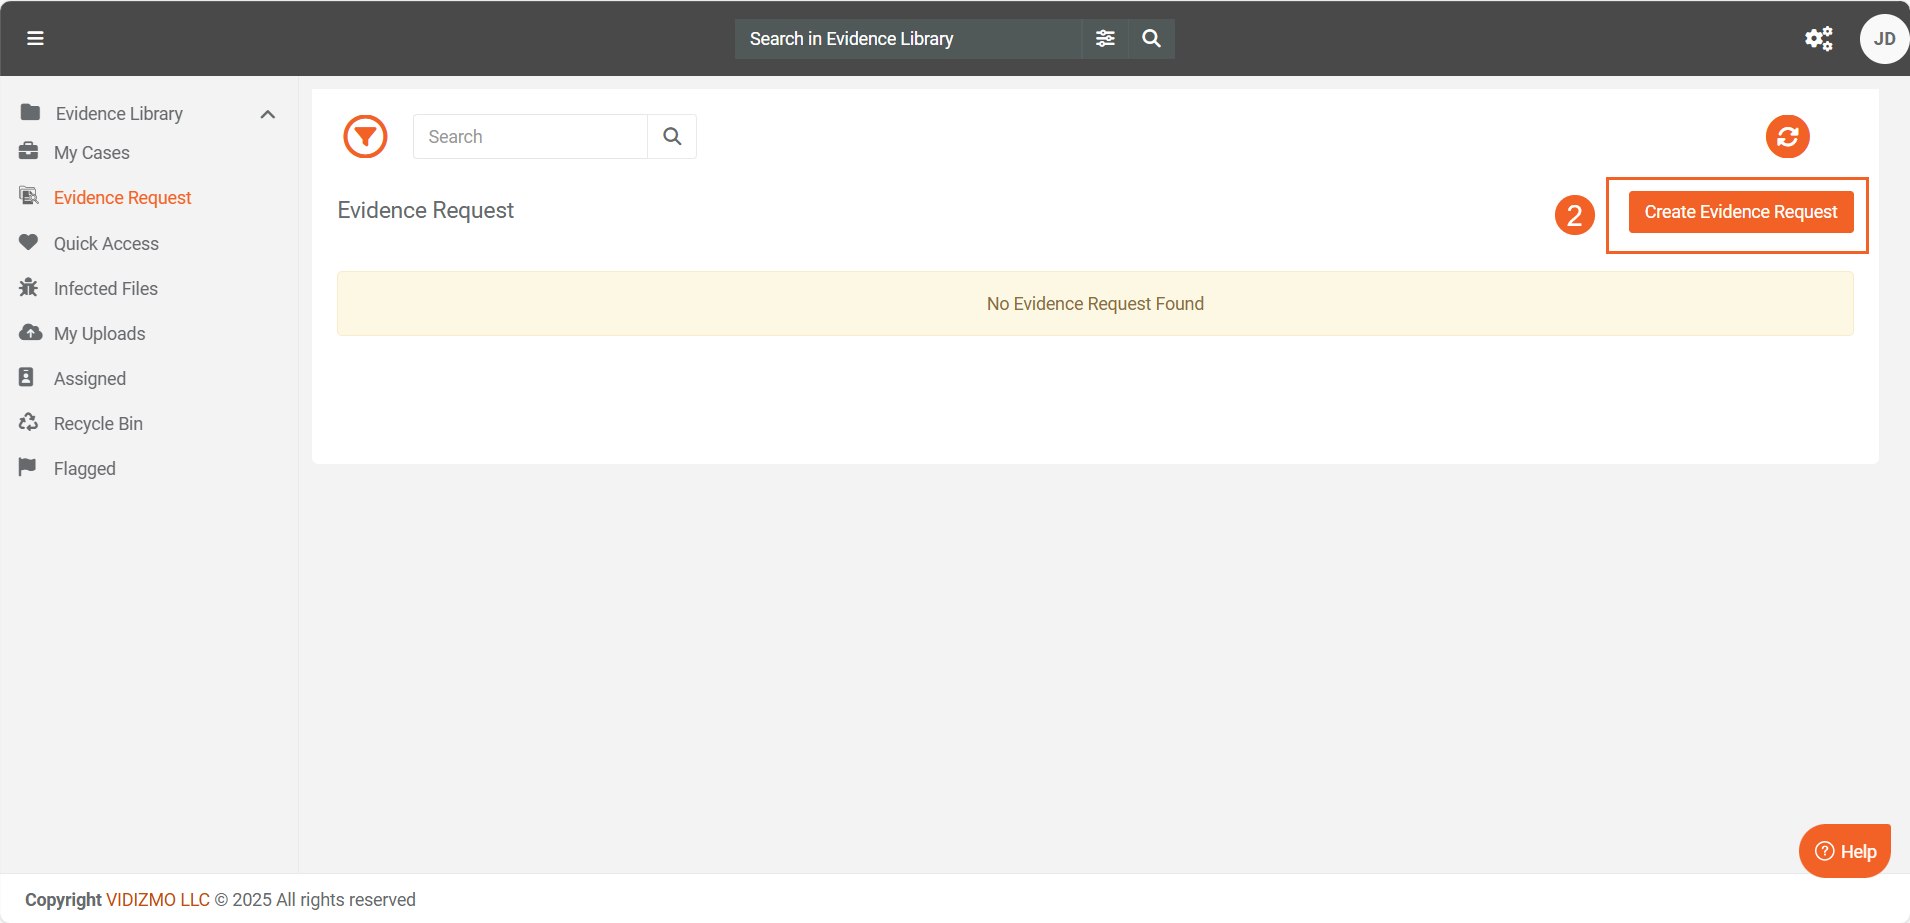
- In your Evidence Library, select Evidence Request from the left pane in your portal.

- Click the Create Evidence Request button to initiate the process.
-
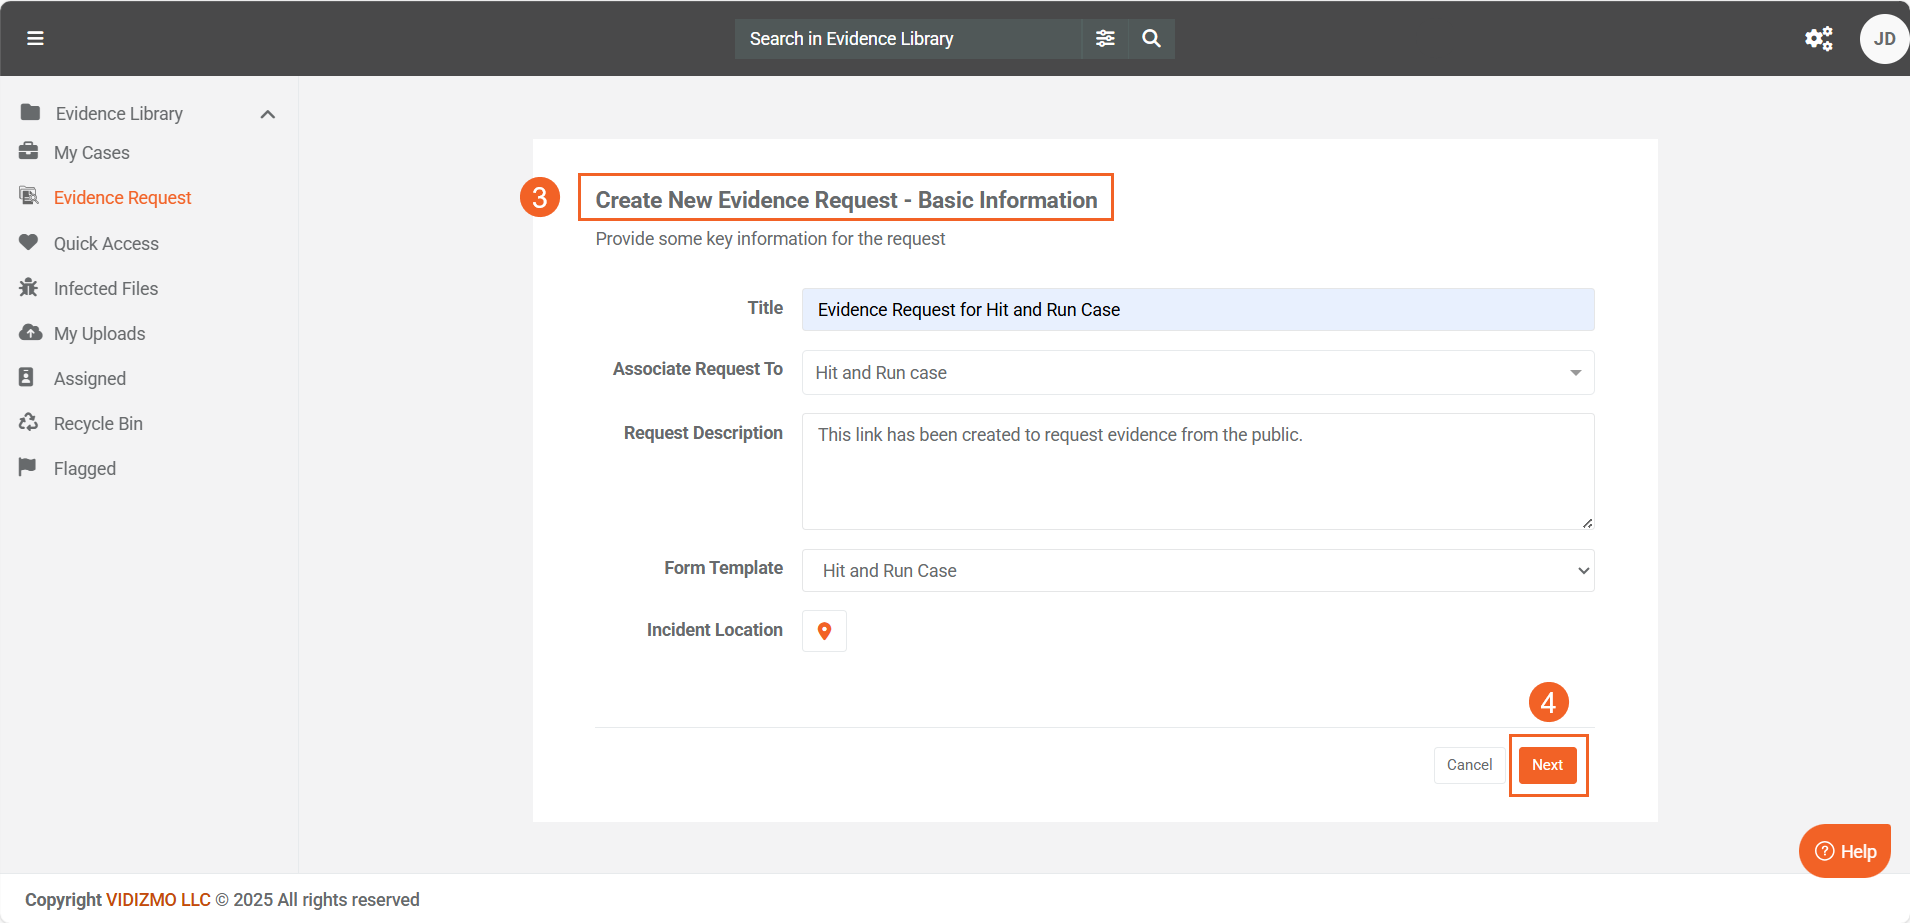
Fill out the form with the required details:
- Title (Mandatory): Enter a title for the request.
- Associate Request To (Mandatory): From the dropdown menu, select the case or folder associated with the evidence. It’s essential to create a case and folder for evidence collection from the public to ensure all submissions are linked to that case or folder.
- Request Description: Enter a description for the request.
- Form Template: Choose a form template from the dropdown menu to collect submissions. These are custom forms available in the VIDIZMO portal that you can create and customize in portal settings.
- Incident Location: Select the location by choosing coordinates on the map.
-
Click Next.
-
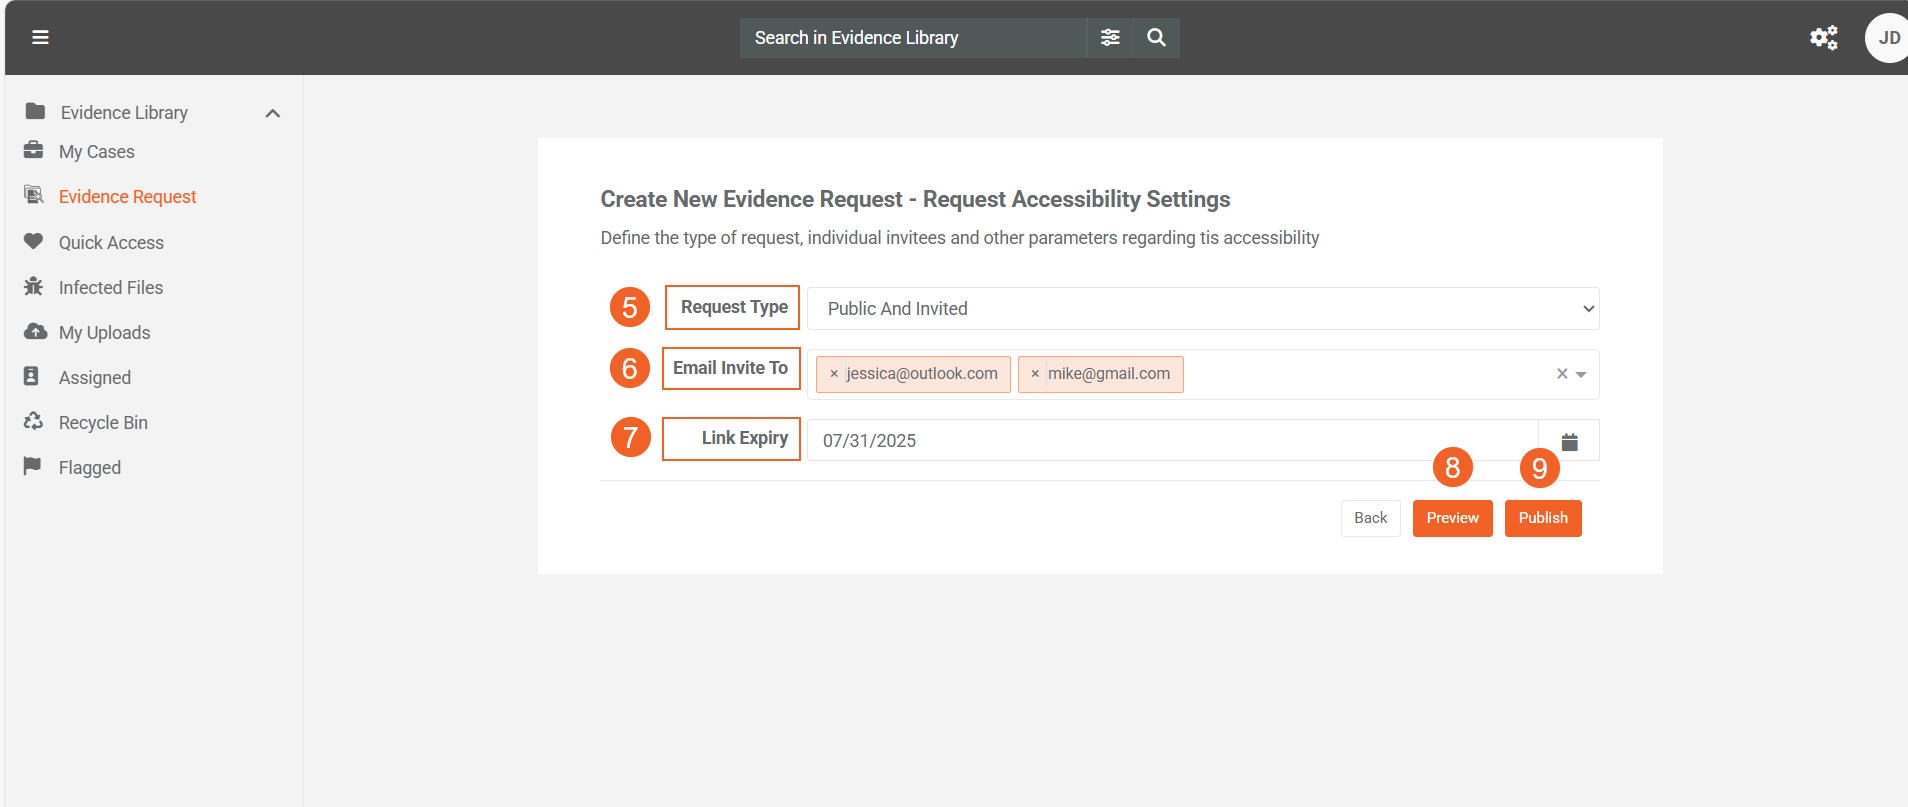
Request Type: Select the type of request:
- Public: A general link for the public to access.
- Direct Invite: A link you can directly send via email to invite specific users to submit evidence.
- Public and Invited: A link that serves both purposes (public and invite-only).
-
If you select Direct Invite or Public and Invited, the Email Invite To field will appear. Enter the recipient’s email address here. You can add multiple emails by pressing Enter after each entry.
Note: A direct invite is sent only to the email address provided the first time. If the form is later edited and a different email address is entered, the direct invite will not be sent to the new email address.
- Link Expiry: Select the expiry date from the calendar. The link will expire on this date.
- You can Preview the form before finalizing the request.
- Once everything is set, click Publish to create the request.
- Enabling the toggle button activates the link, allowing it to accept evidence submissions. When the button is disabled, the link will no longer accept submissions.
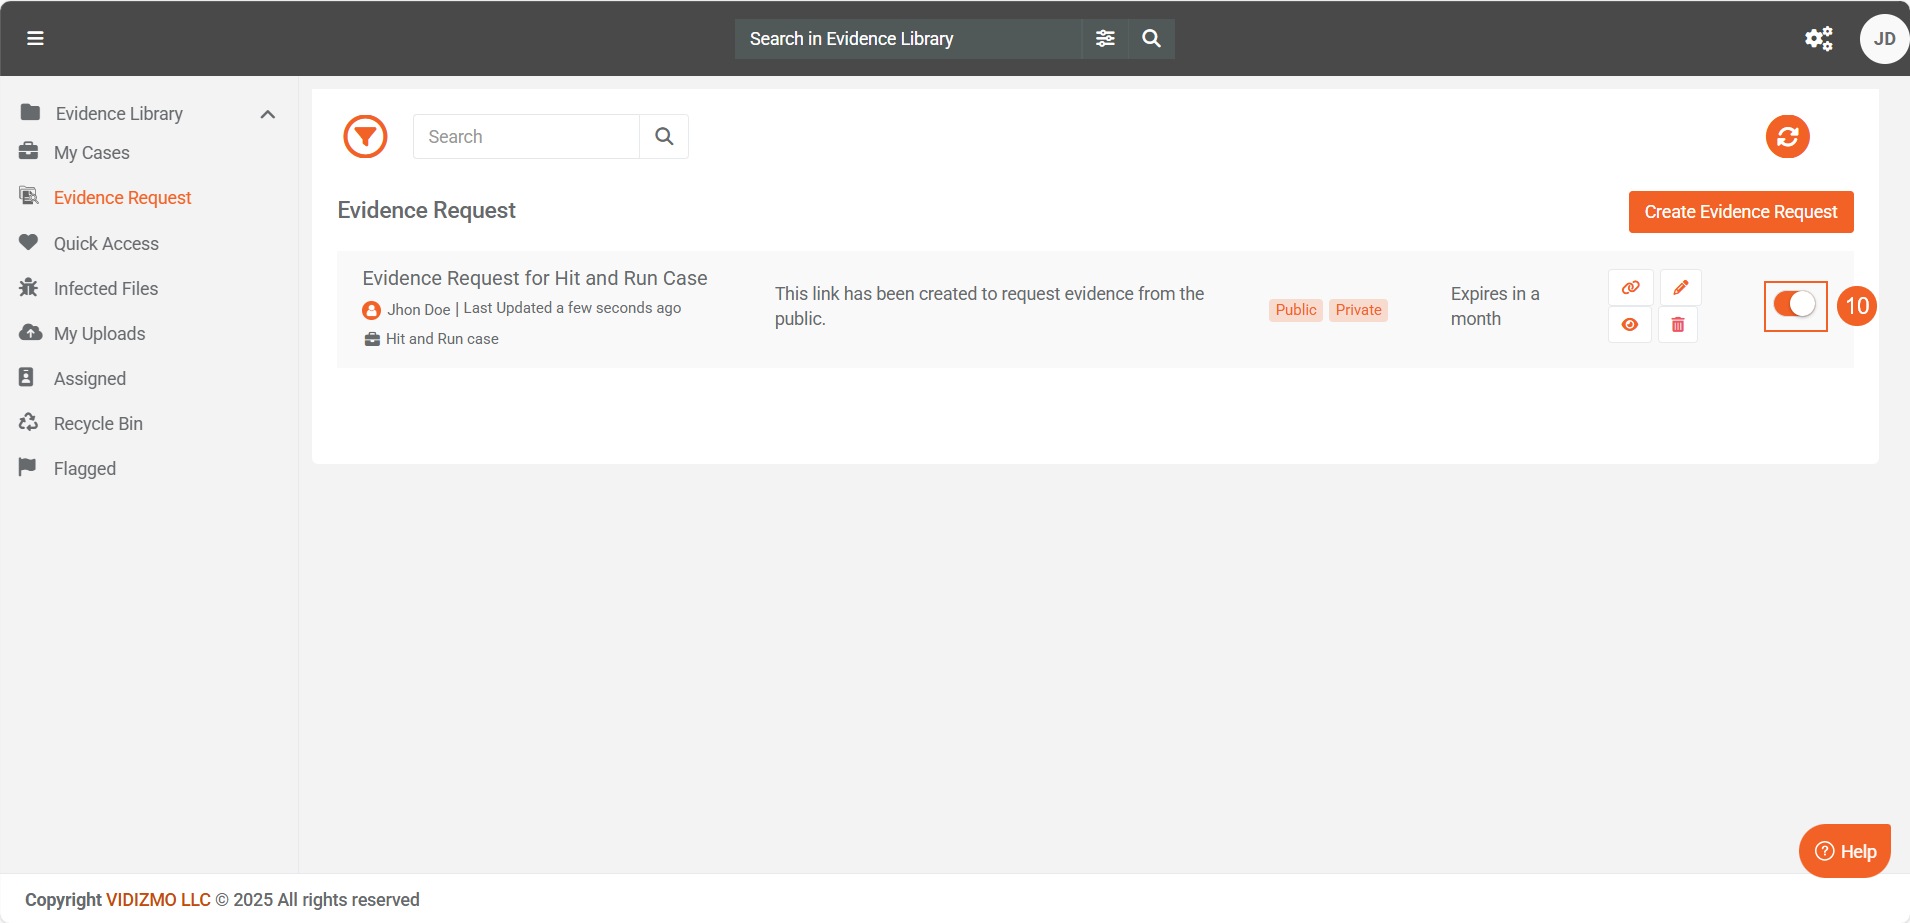
Note: Please note that disabling the toggle does not affect the expiration date of the link; it will still expire on the specified date regardless of the toggle's state. The purpose of this toggle button is to control the activation and deactivation of the link, allowing the Evidence Manager to decide whether or not to accept evidence submissions via the link.
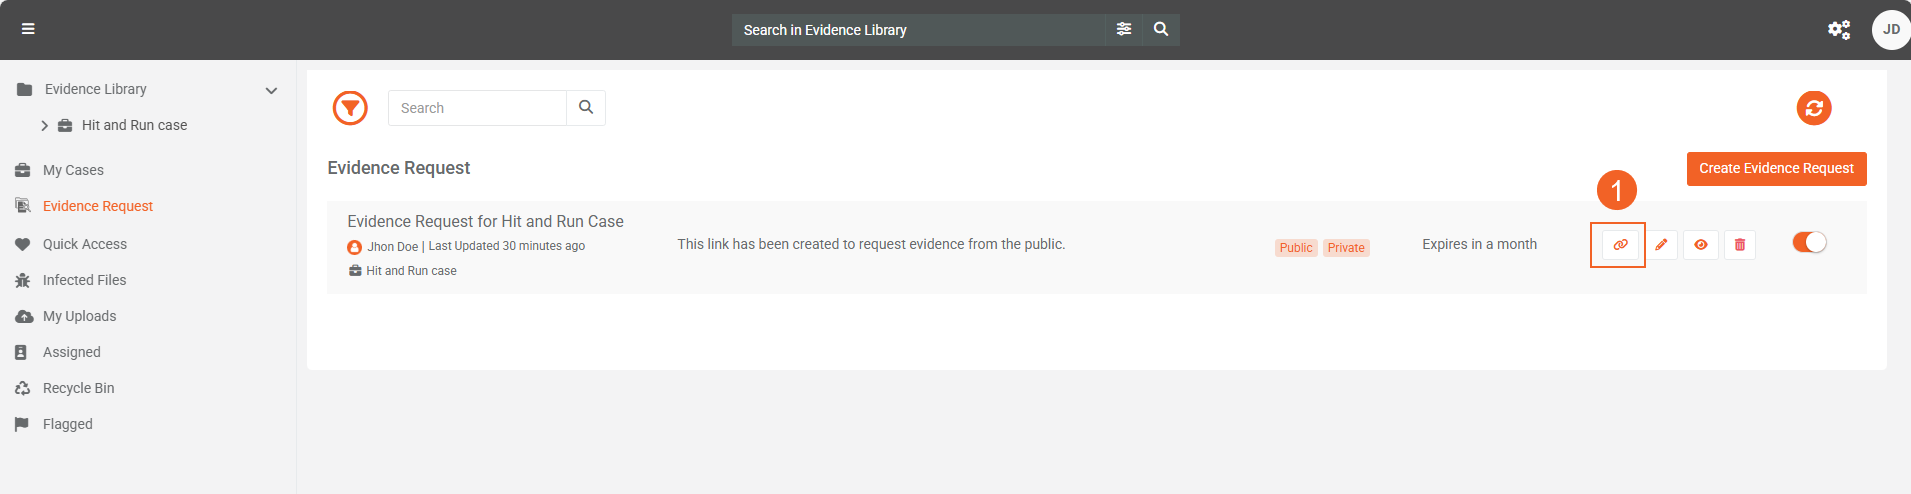
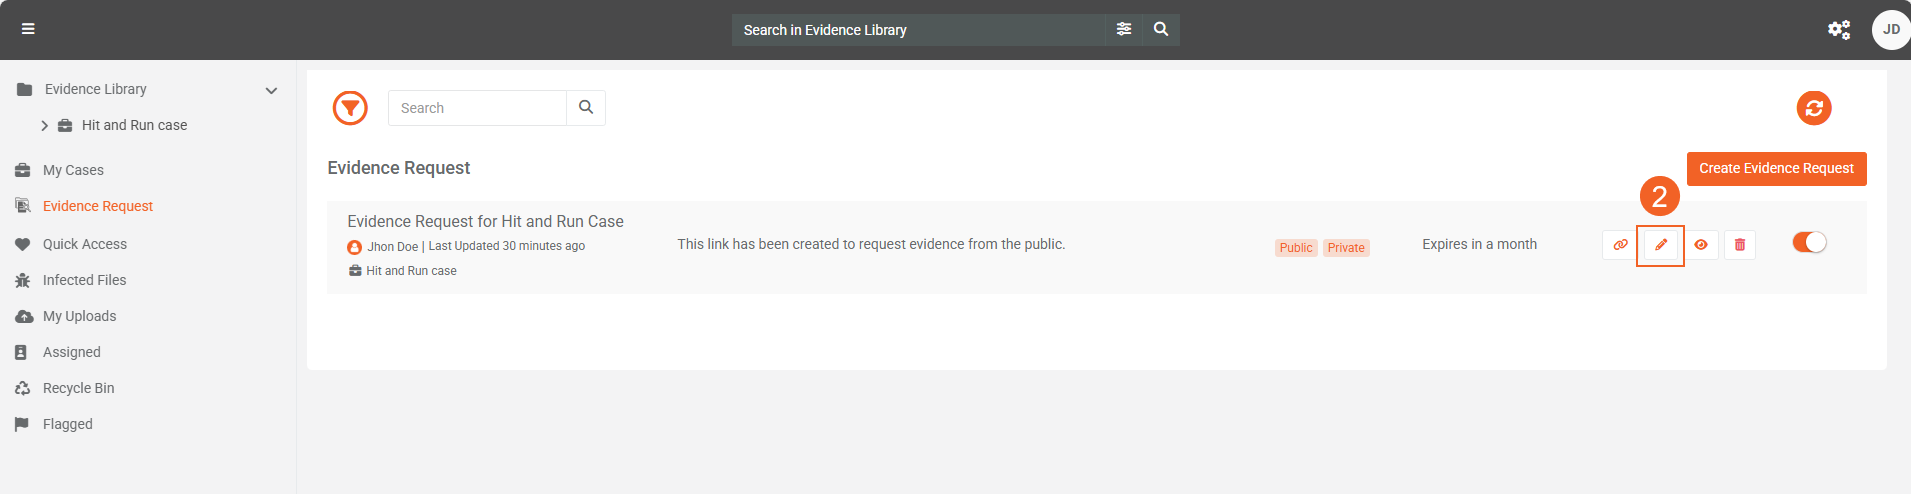
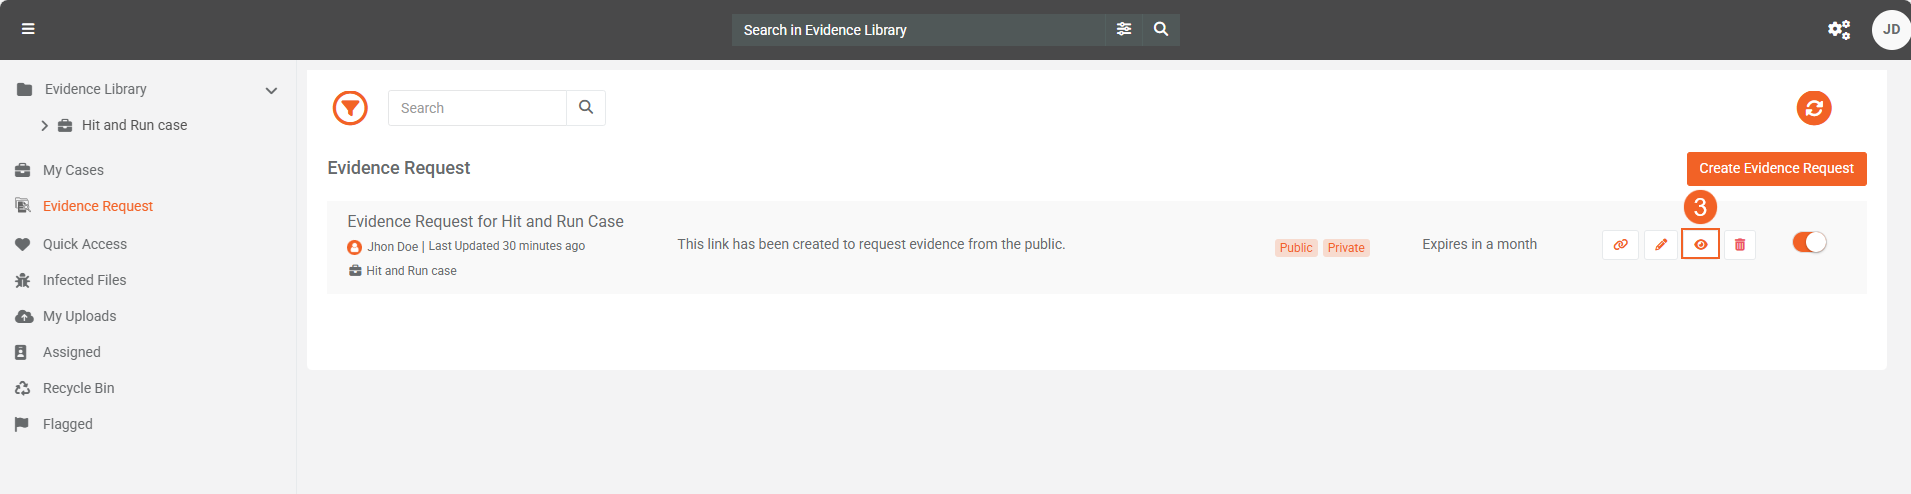
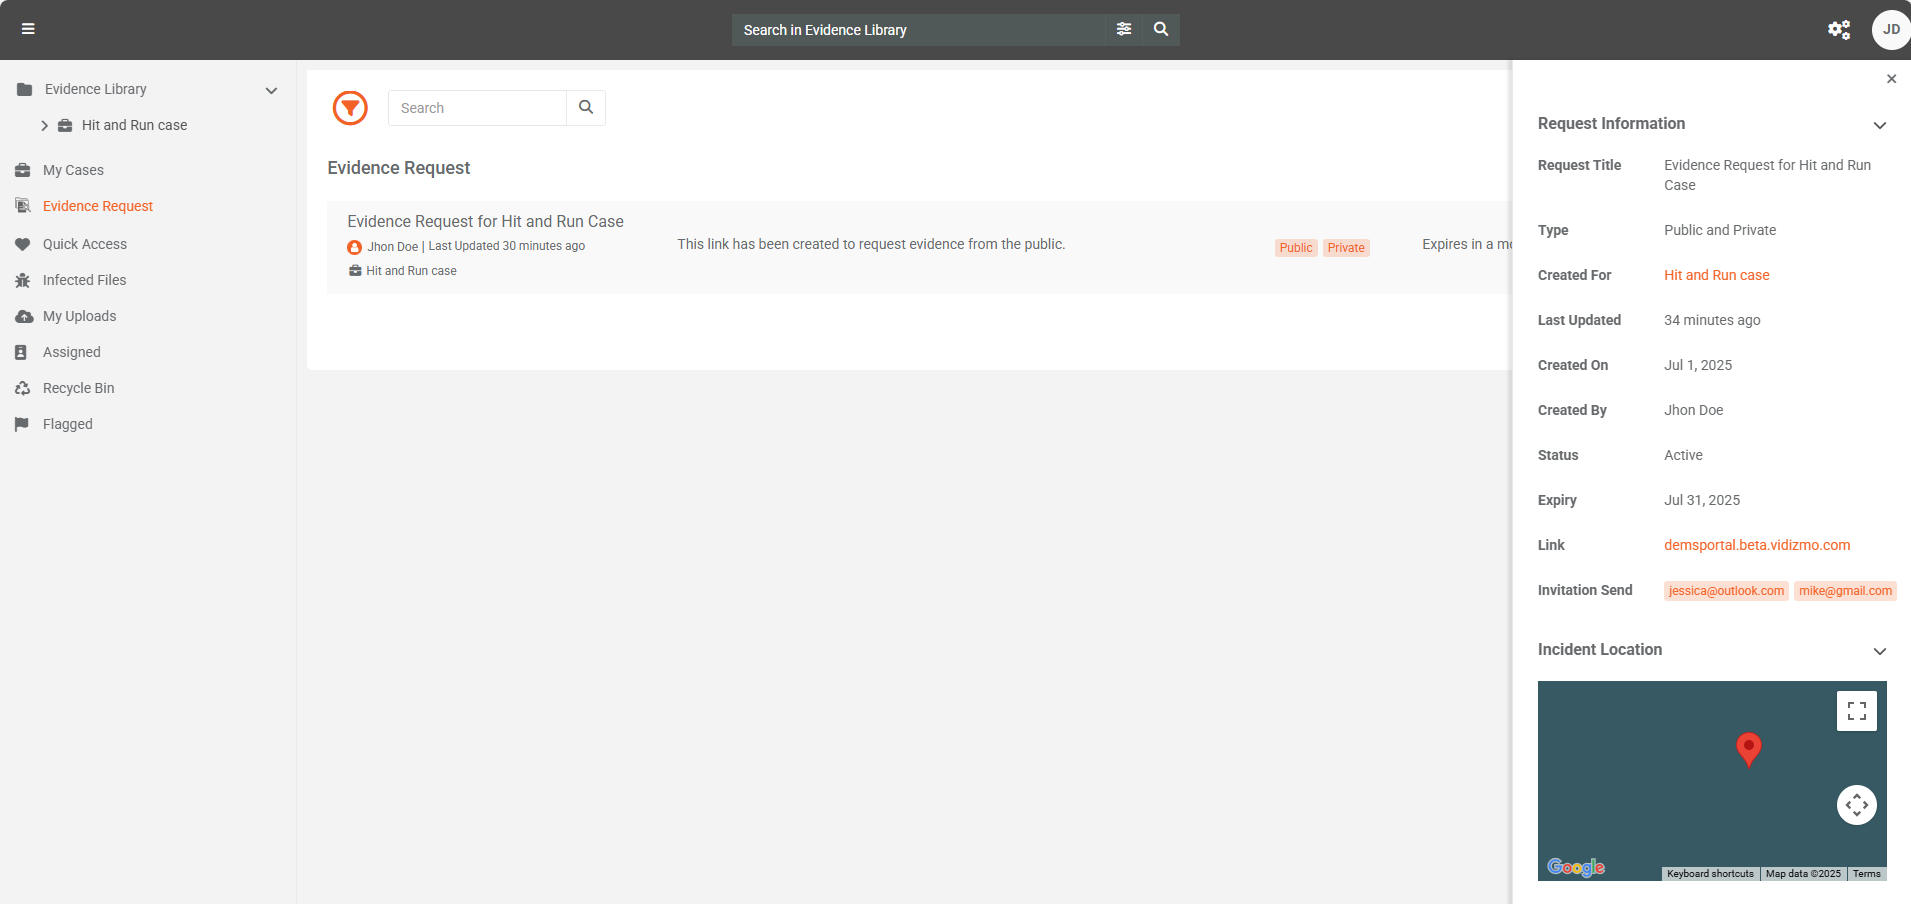
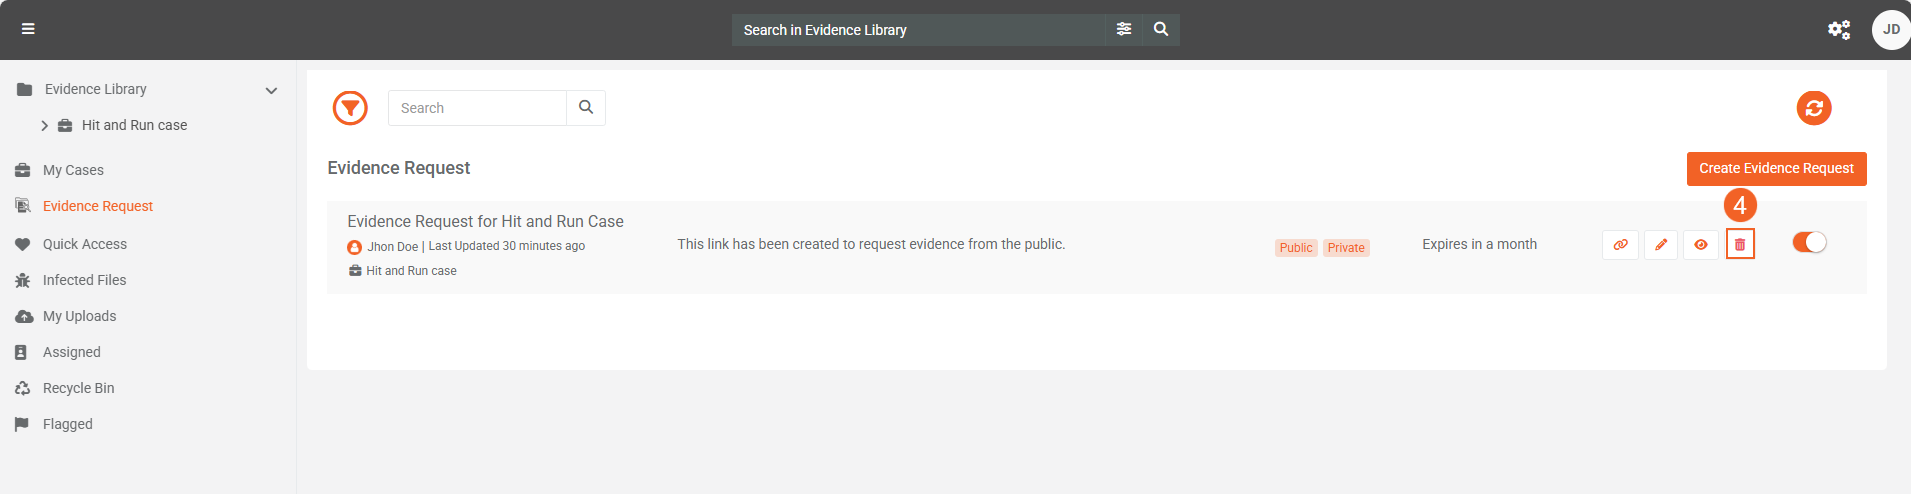
Manage Evidence Request
You can manage your evidence request through the following options:
- Link: Copy the link and share the evidence request on public forums or any other platforms.
- Edit: Click the "Edit" option to modify the details of the request form.
- View: Click the "View" button to quickly preview the contents of the form without making any changes.
- Delete: Click the "Delete" button to remove the evidence request permanently.
What the Public Sees
This section provides information on what the public sees when interacting with a public link or receiving a VIDIZMO evidence request invitation via email.
Public Link
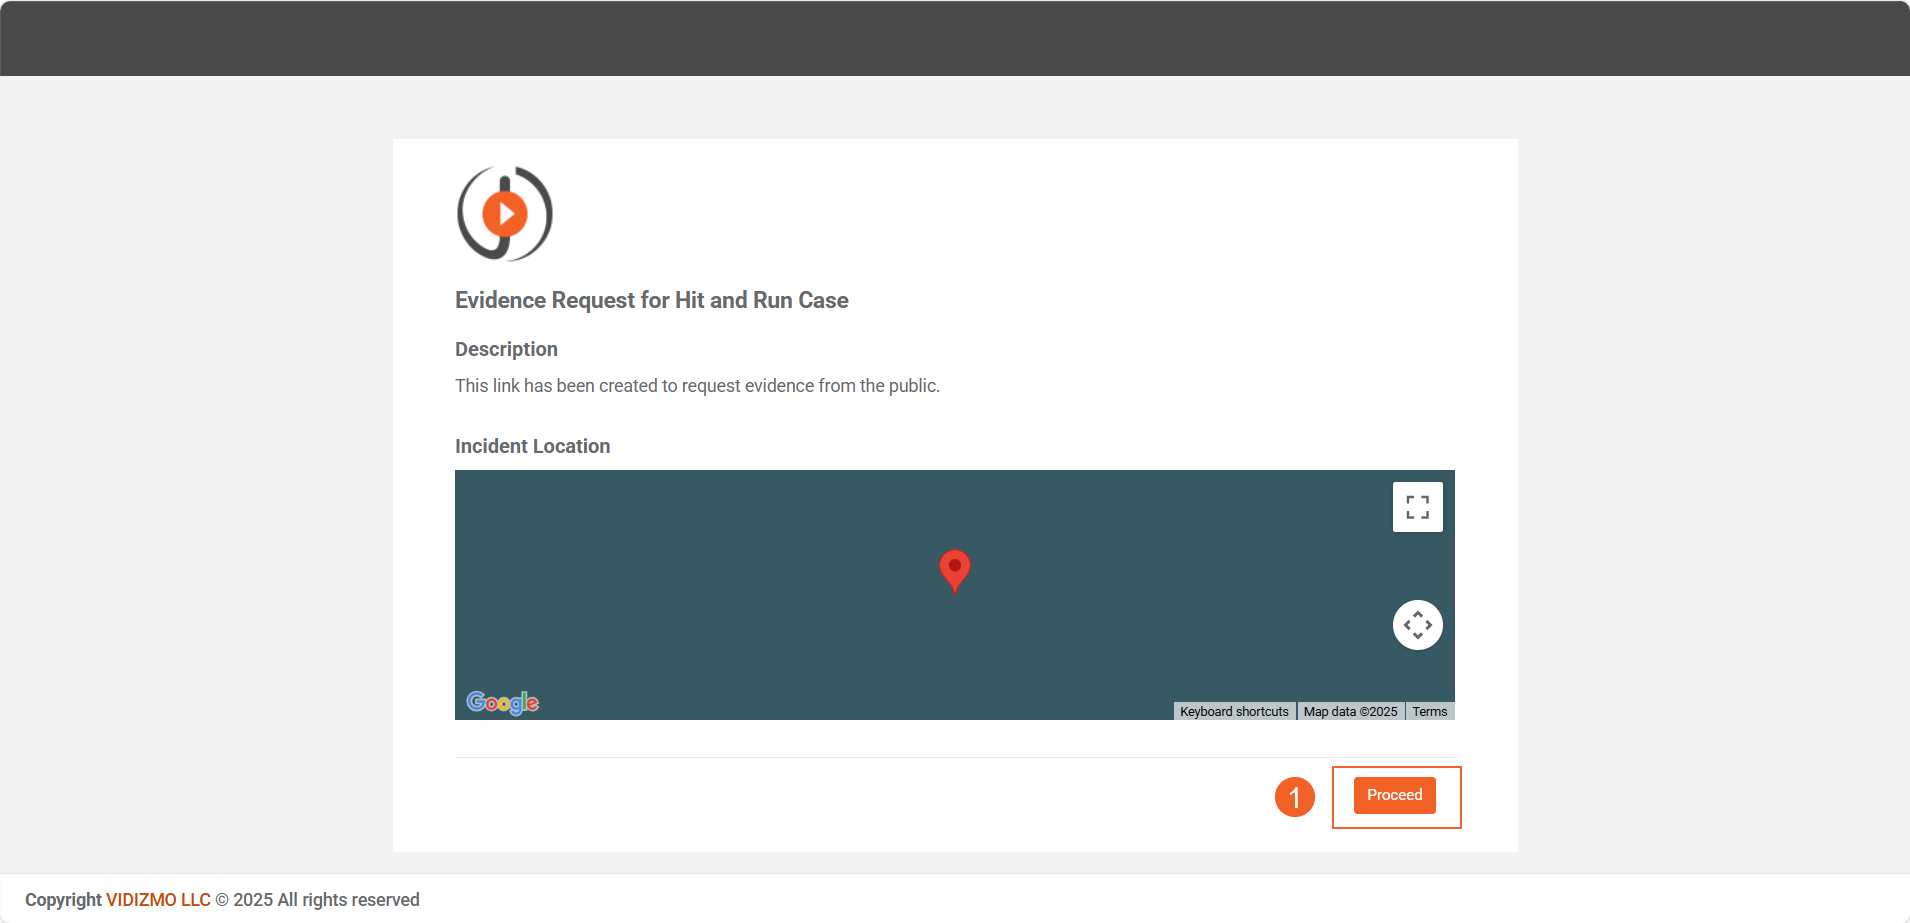
When the public clicks the VIDIZMO evidence request link, they are directed to the welcome page. The process is as follows:
- The user clicks Proceed to continue.
-
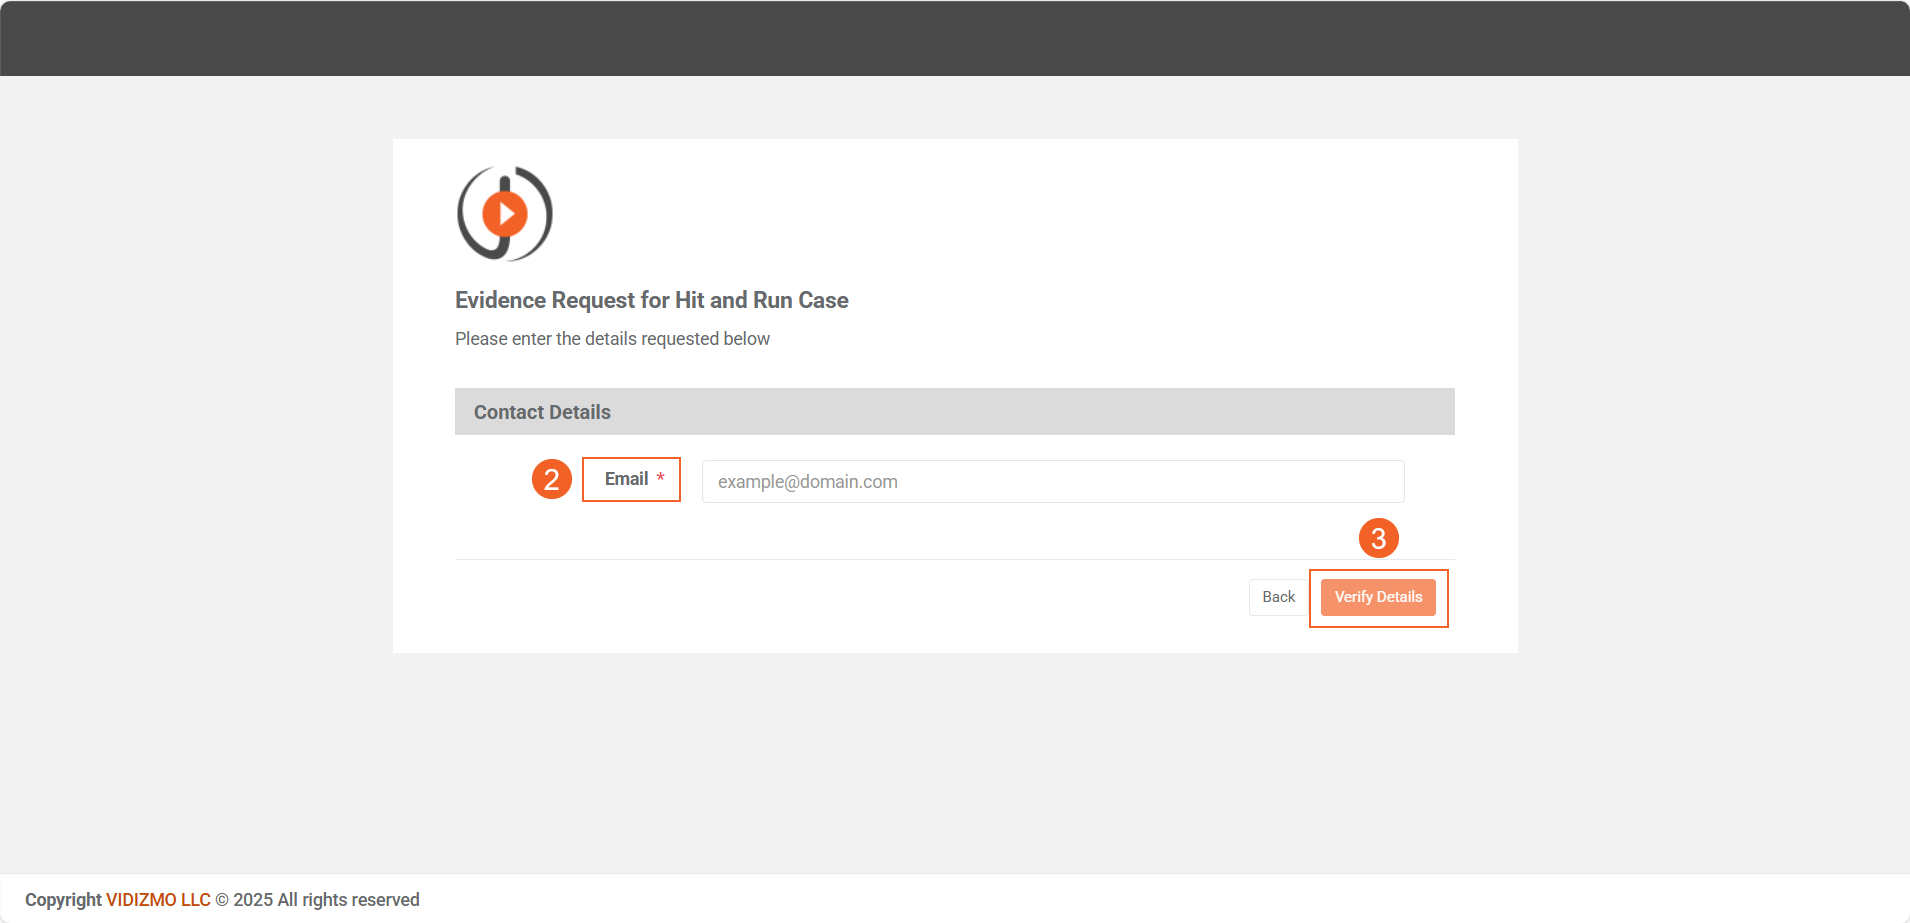
The user is prompted to enter their email address.
-
Click Verify Address to confirm the email entered.
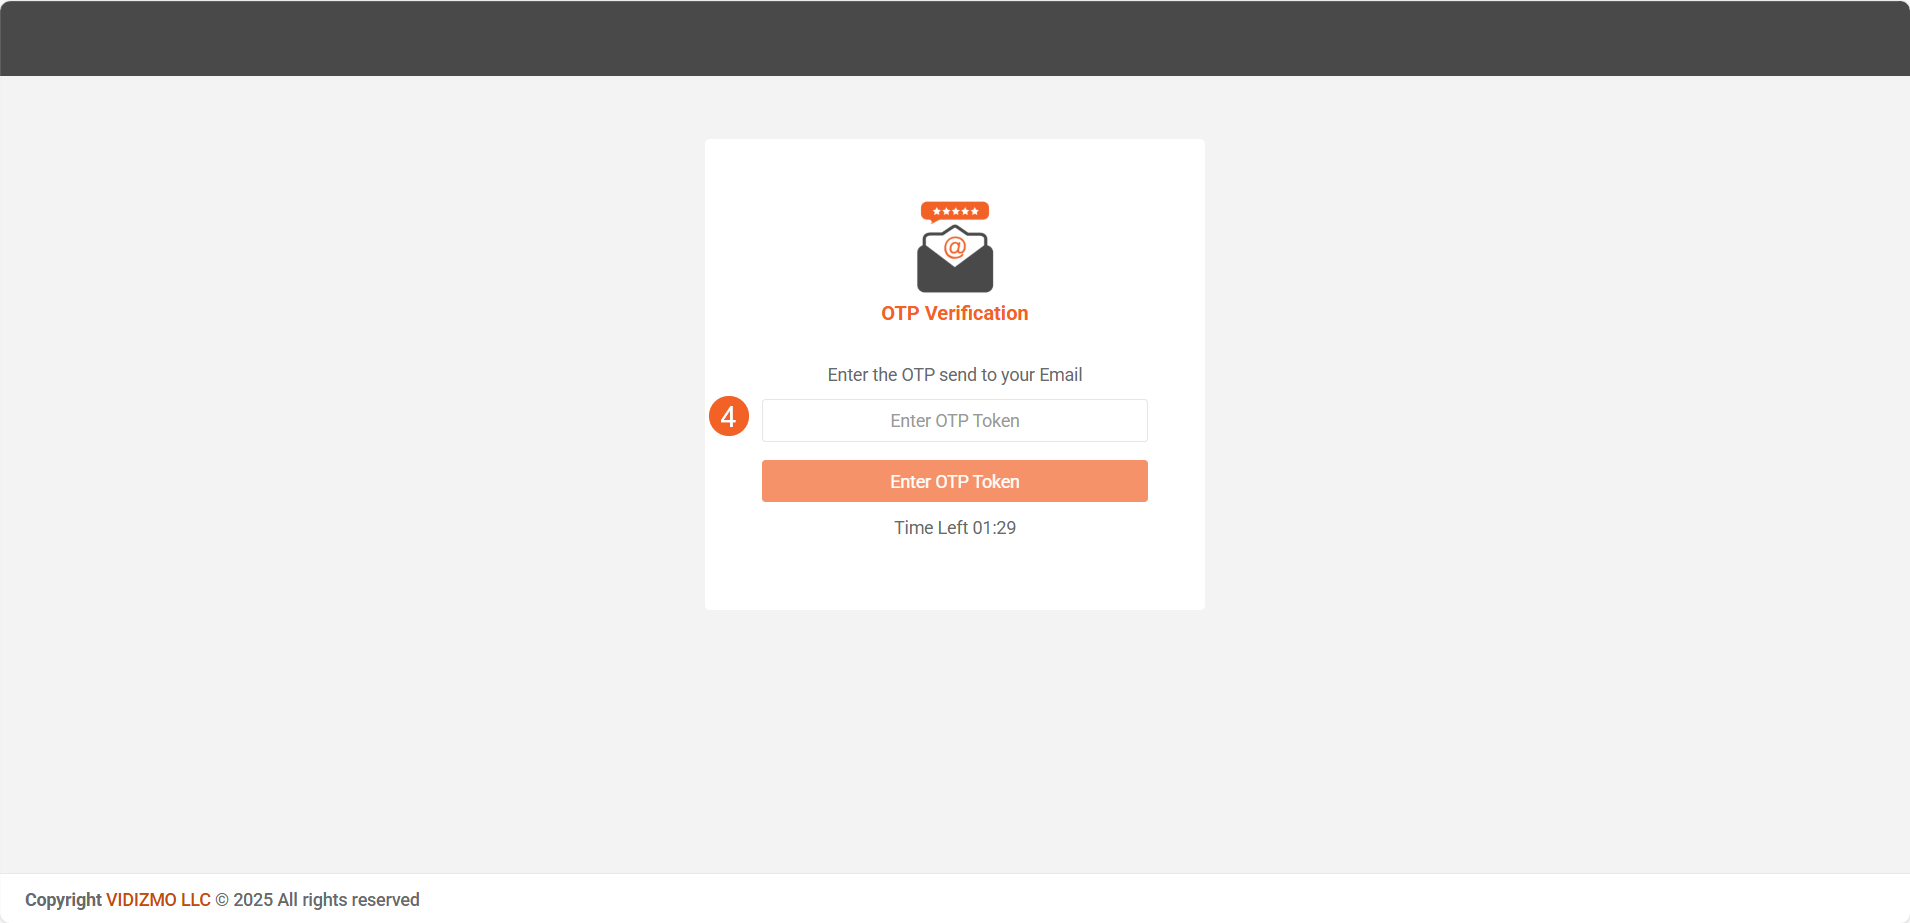
- An OTP (One-Time Password) will be sent to the entered email address. This step is mandatory, so ensure a valid email address is provided to receive the OTP.
-
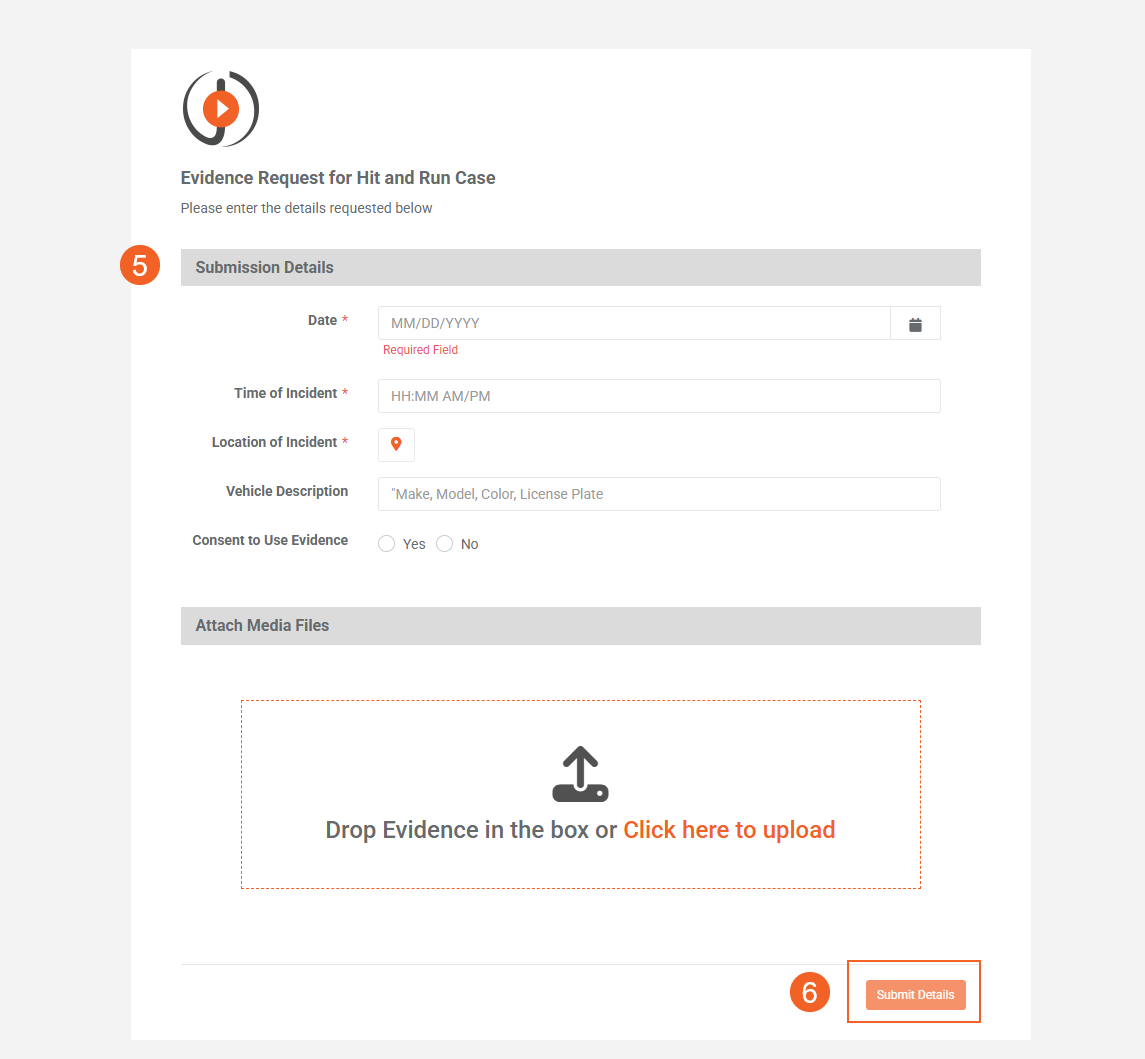
After verifying the OTP, the form will open. The user fills in the required details and uploads the evidence file(s).
-
Click 'Submit' to begin uploading the attached files. You can remove any files before clicking 'Submit.' Once submitted, the files are sent to the portal and cannot be retrieved by the external user.
Once submitted, you will receive a notification confirming the evidence submission.
Direct Invite
This section provides an overview of what an invited public user sees and how they interact with a direct invite sent to their email.
After the invite is sent, the recipient receives an email message. Clicking the "View Request" button takes them to the welcome page for the evidence request.

The process for submitting evidence is the same as described in the previous section for the public link.
Accepting Evidence
This section explains the process for accepting or rejecting evidence in the VIDIZMO portal after submission, including steps for content moderation and virus scanning.
Publish Evidence (When Content Moderation is Enabled)
- Access the Review Tab
-
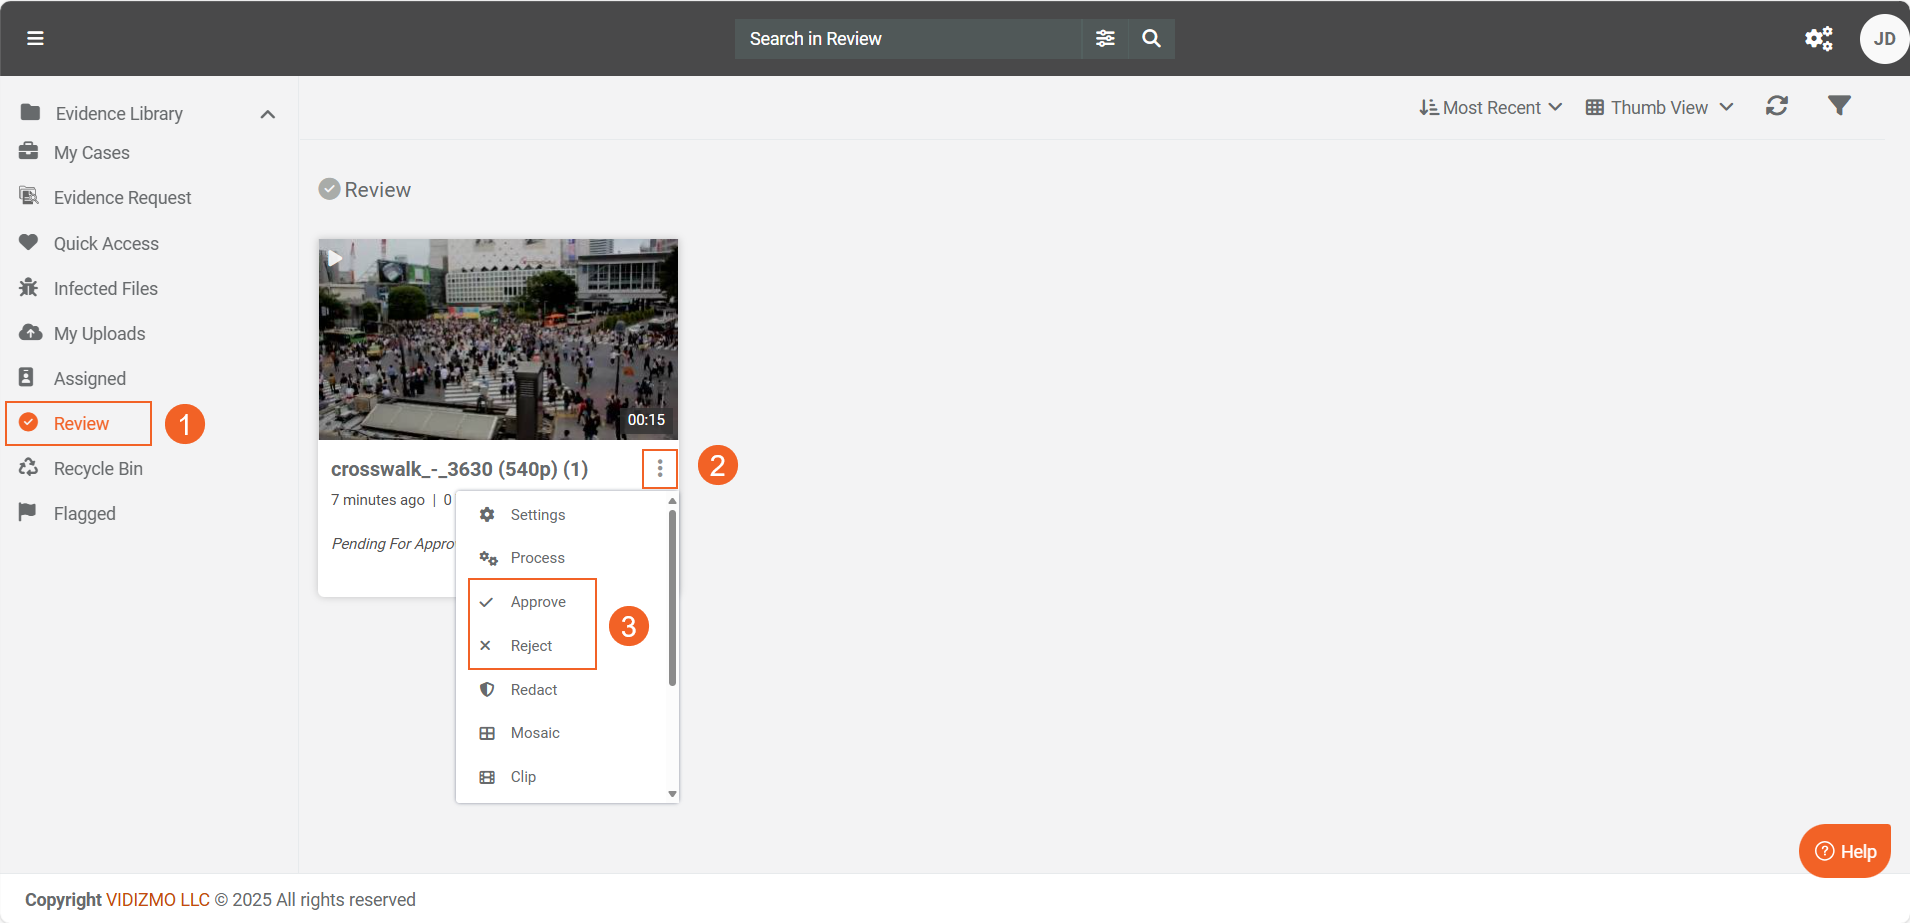
After evidence is submitted, it will appear in the Review tab if content moderation is enabled in the portal.
-
The Evidence Manager can then review the submitted files.
- Review Evidence
-
To review the evidence, locate the file in the Review tab.
-
Click on the overflow menu (three dots) next to the file.
- Accept or Reject the Evidence
-
To accept the evidence: Click on "Accept." The file will be directly added to the associated case and published as mentioned in the media request created earlier.
-
To reject the evidence: Click on "Reject." The file will not be published.
Direct Publication (When Content Moderation is Disabled)
- If content moderation is disabled, the evidence will be automatically published in the associated case without needing approval.
View Submitted Evidence
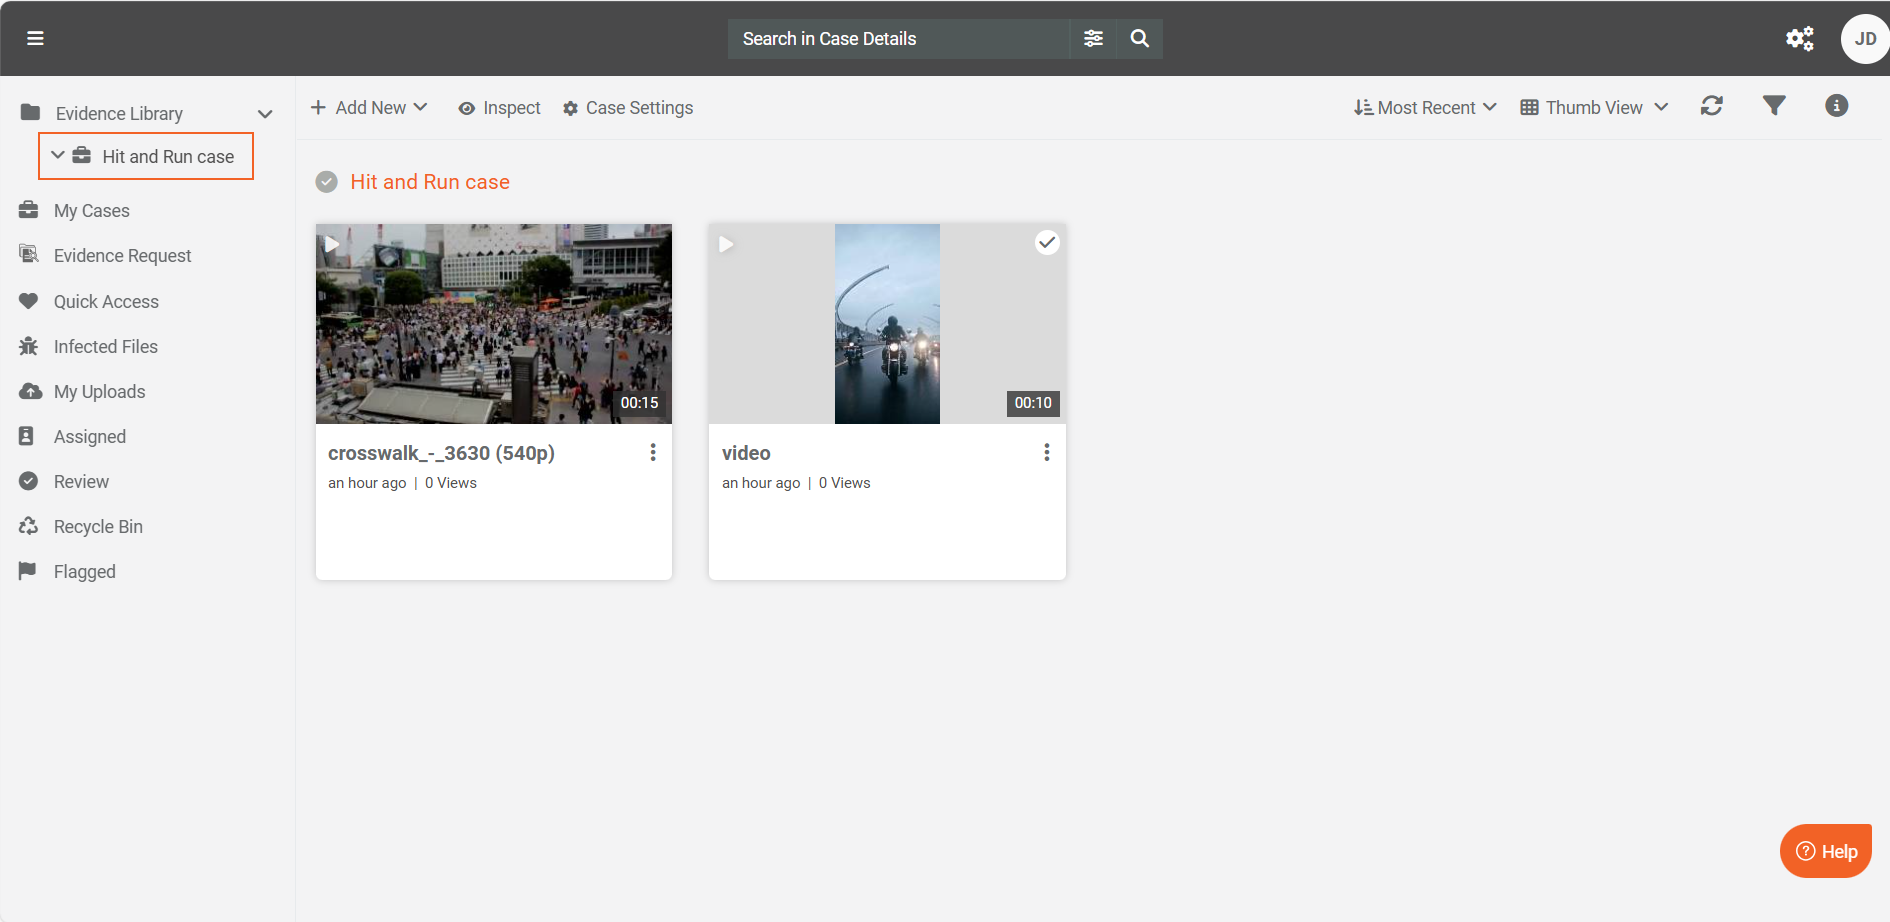
- The Evidence Manager can view all submitted evidence in the Evidence Library under the associated case or folder.
Malware Scan (Optional)
-
To ensure the security of the files, the Evidence Manager can use VIDIZMO's Malware feature to scan for any viruses or malicious content.
-
If a file is found to be infected, it will be moved directly to the Infected Files tab for further handling.
For more detailed instructions, refer to the article "How to Perform a Malware Scan on Your Content."