How to set up VIDIZMO Virtual Machine (VM) on Azure Marketplace
VIDIZMO, available in the Azure Marketplace, allows organizations to deploy a comprehensive video content management solution rapidly. By leveraging your existing Microsoft Enterprise Agreement and Azure subscription, you can streamline deployment, reduce costs, and simplify management within your cloud environment.
This article guides you through the process of setting up the VIDIZMO Virtual Machine (VM) in Azure, step by step.
Prerequisites
Before you begin, ensure you have:
- An active Microsoft Azure subscription.
Locate VIDIZMO on Azure Marketplace
Choose one of the following methods to deploy VIDIZMO from Azure Marketplace.
Option 1: Use Azure Marketplace directly
Quickly find and deploy VIDIZMO using the Azure Marketplace.
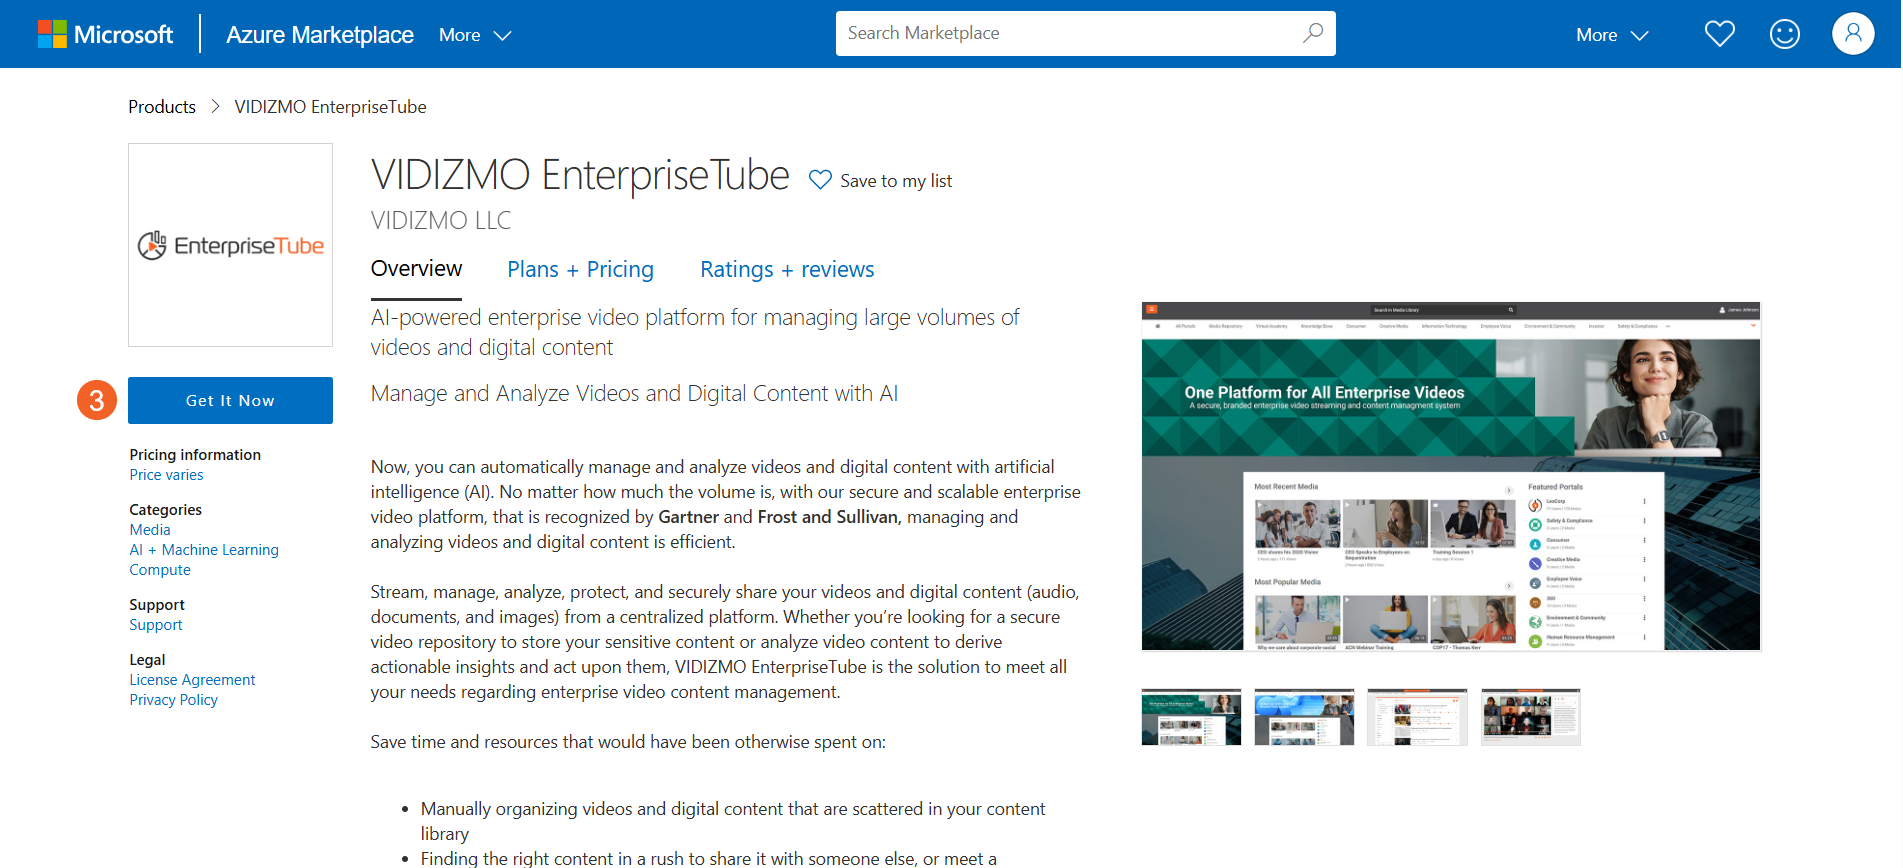
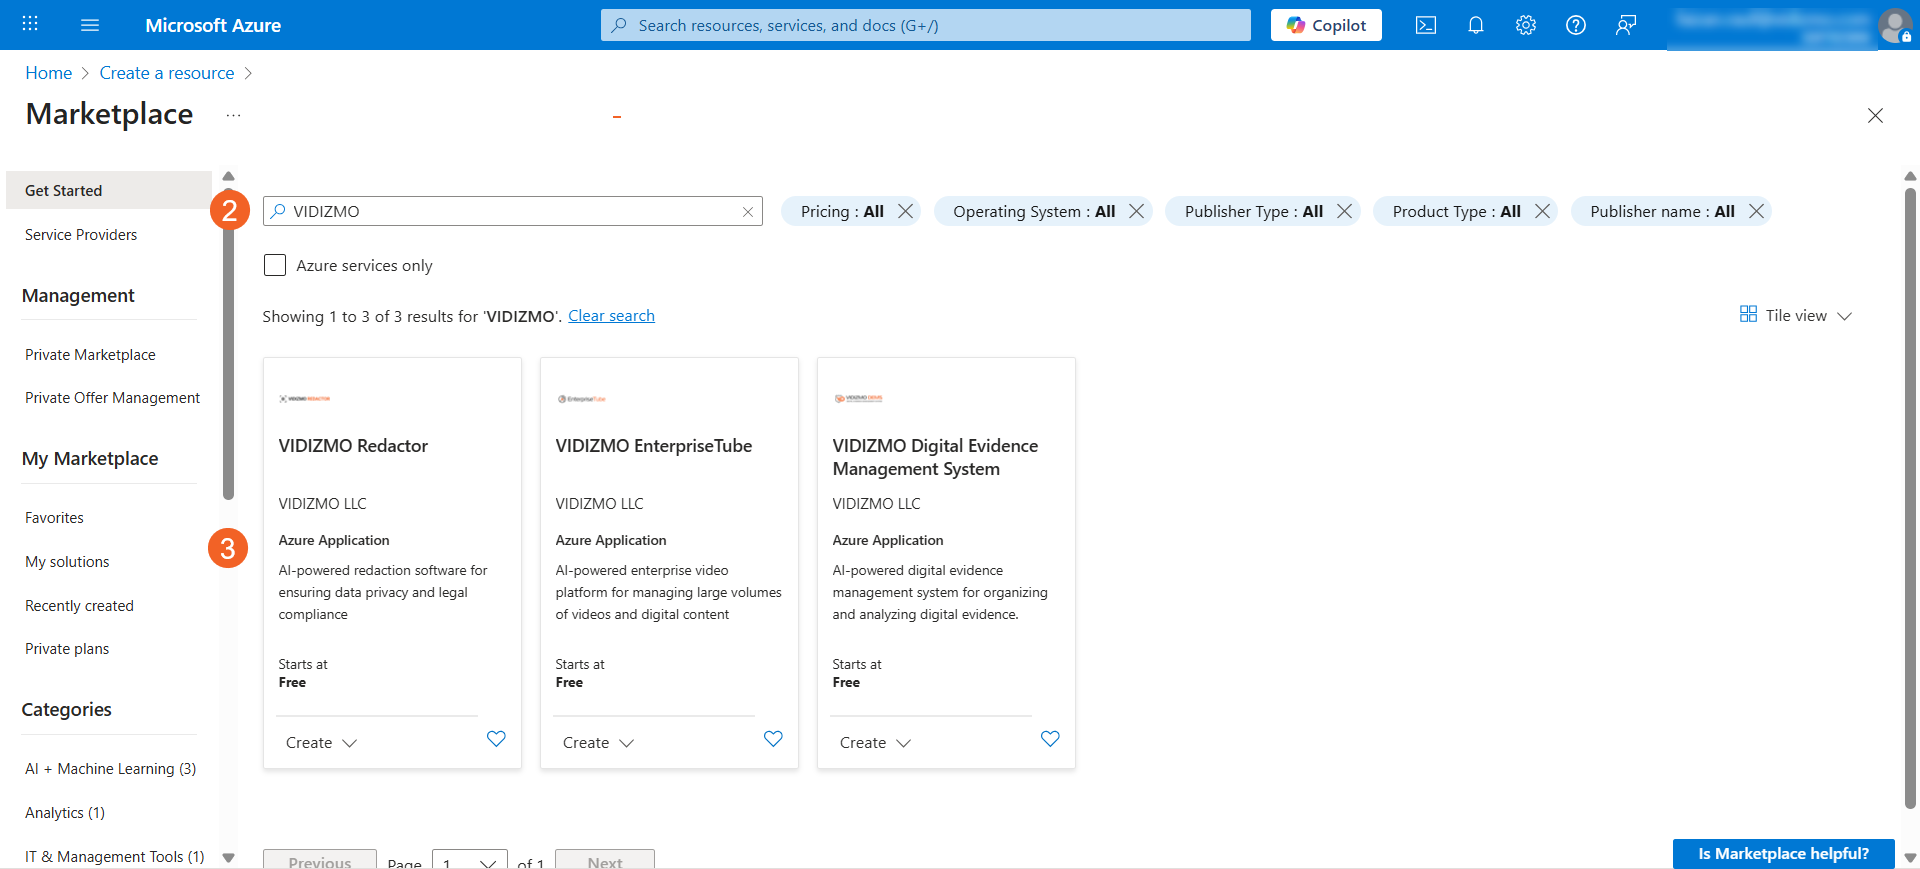
- Sign in to the Azure Marketplace and search for VIDIZMO.
- Select your preferred VIDIZMO product

- Select Get It Now
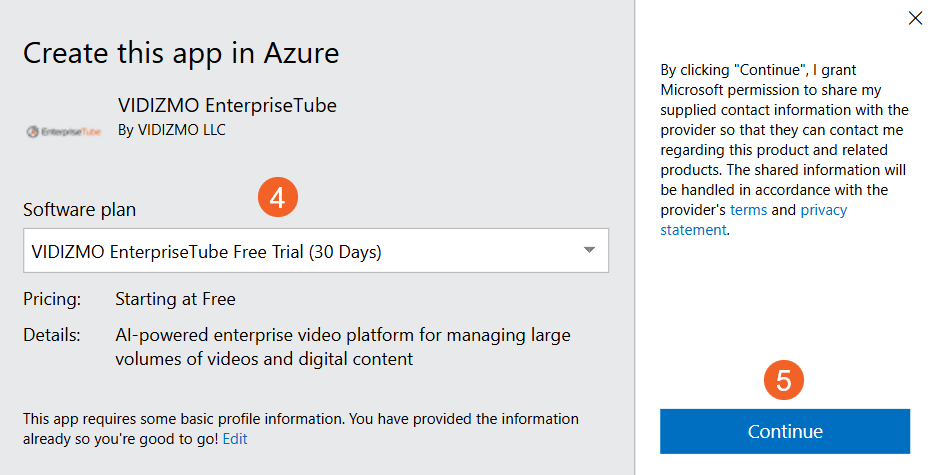
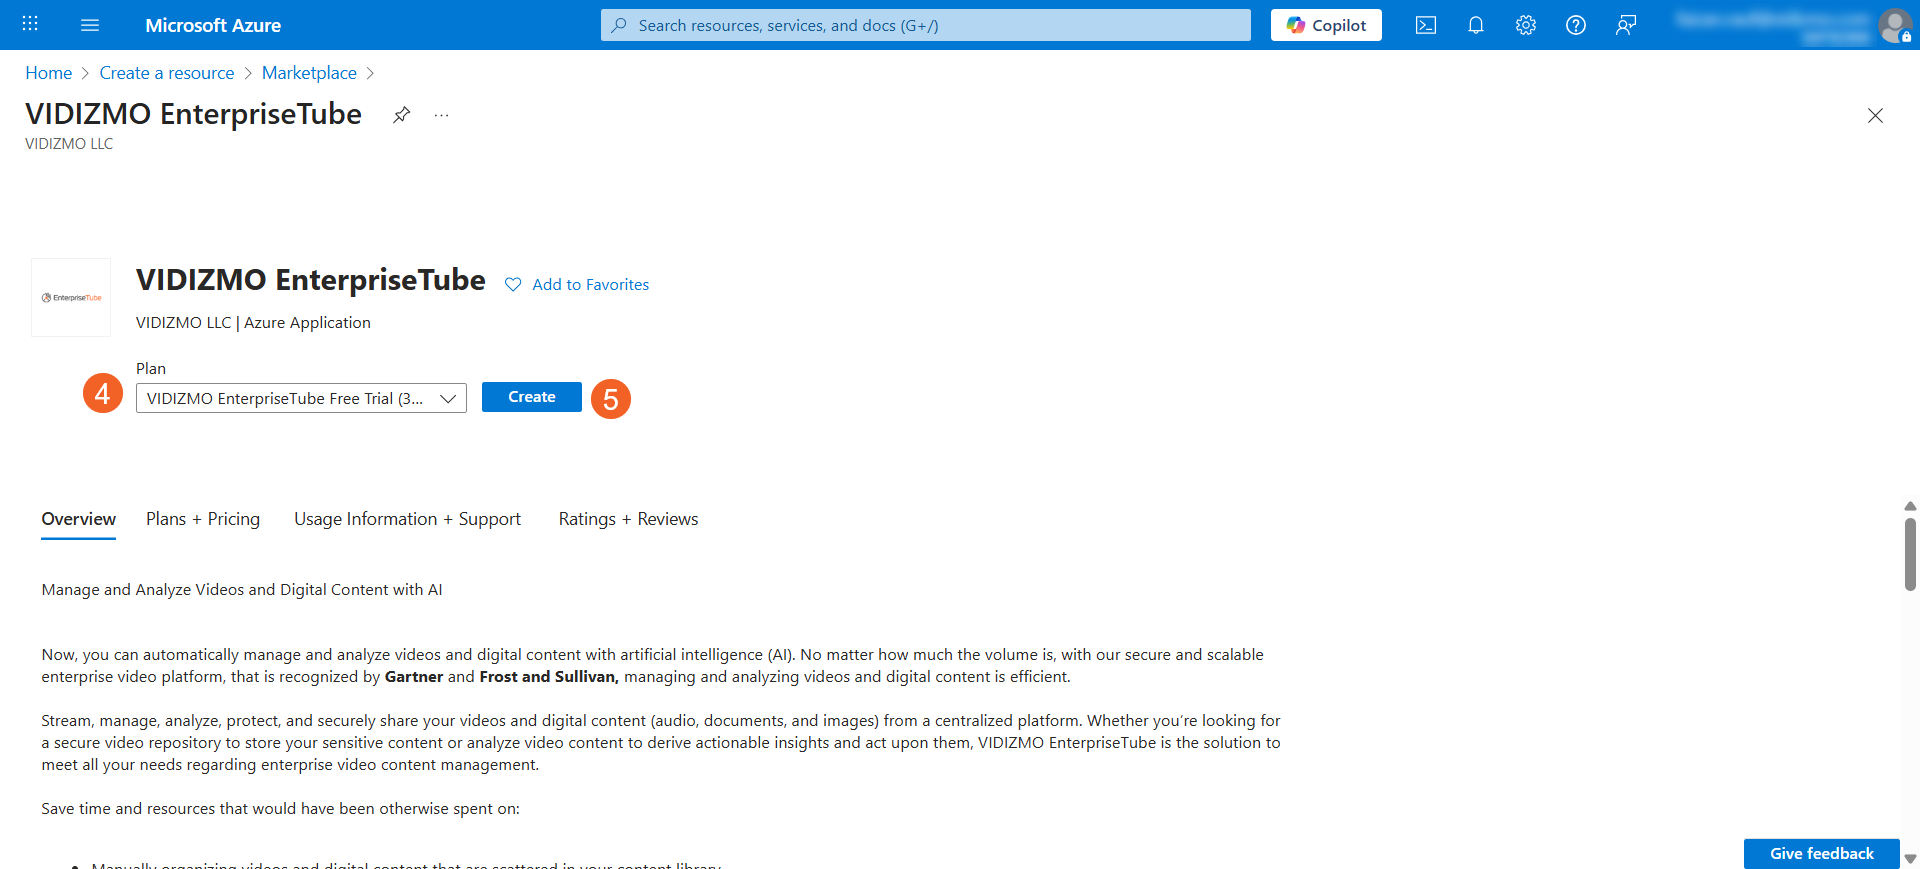
- Choose your desired software plan: 1. Managed: Includes support. 2. Unmanaged: Does not include support. 3. Free Trial: 30-day trial version.
- Select Continue.
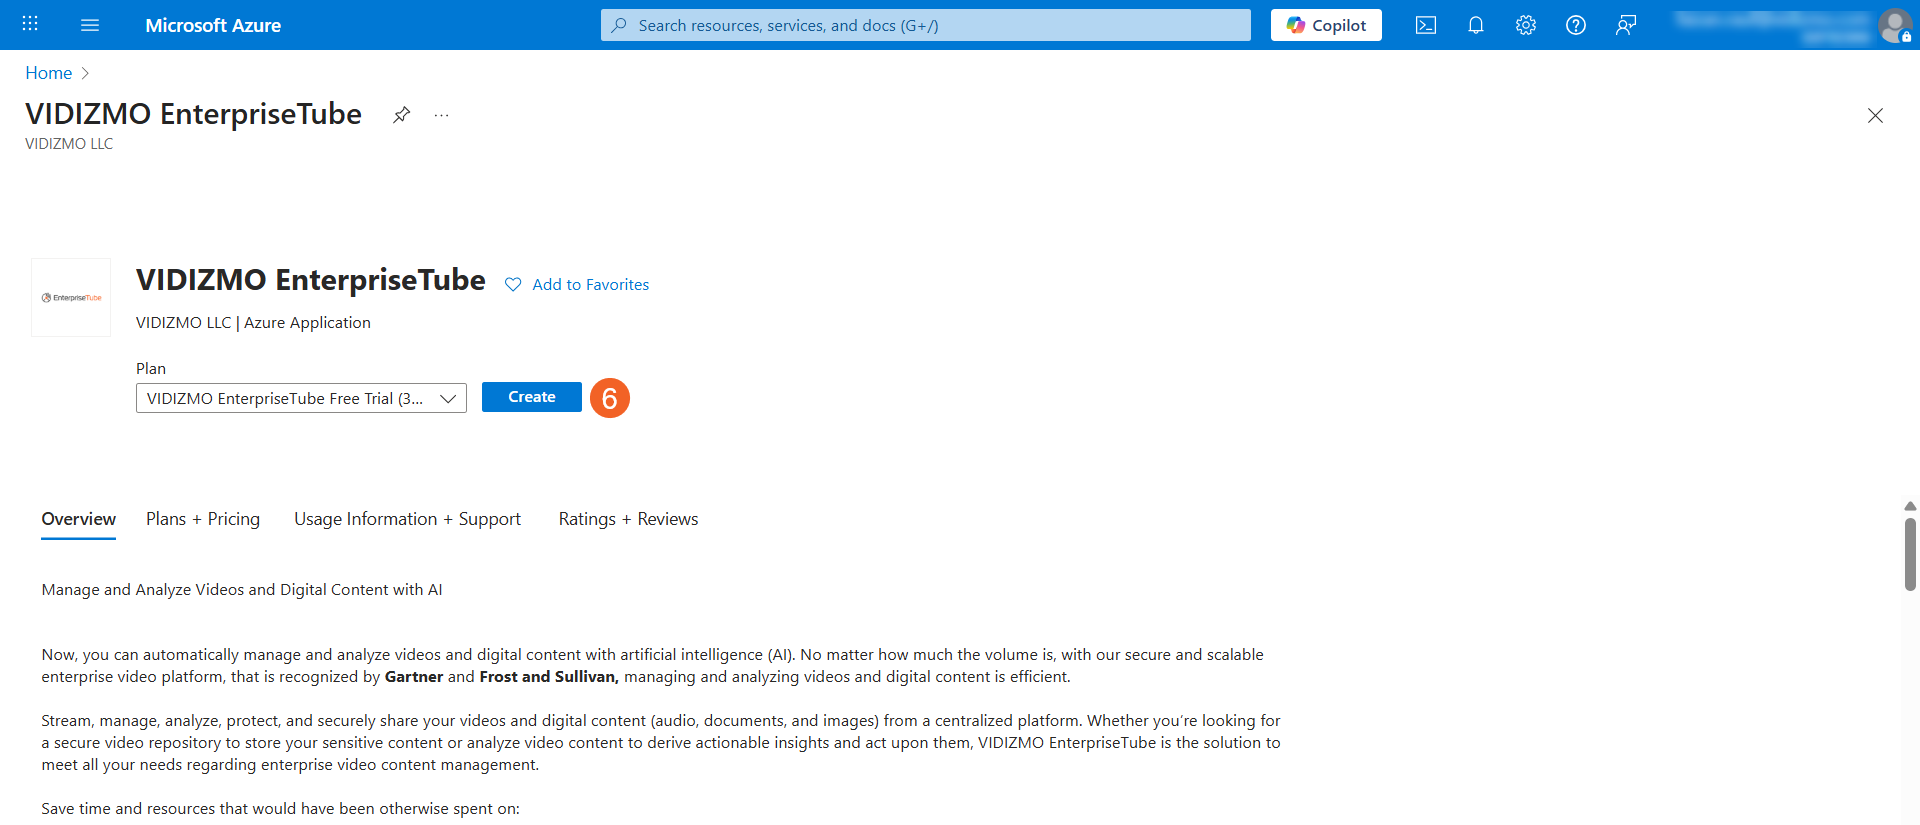
- You'll be redirected to the Azure portal. Sign in if prompted, then select Create to begin. You can also review additional details in the tabs before proceeding.
Option 2: Deploy from the Azure portal
Deploy VIDIZMO directly through your Azure portal's interface.
- From your Azure portal, select Create a resource.
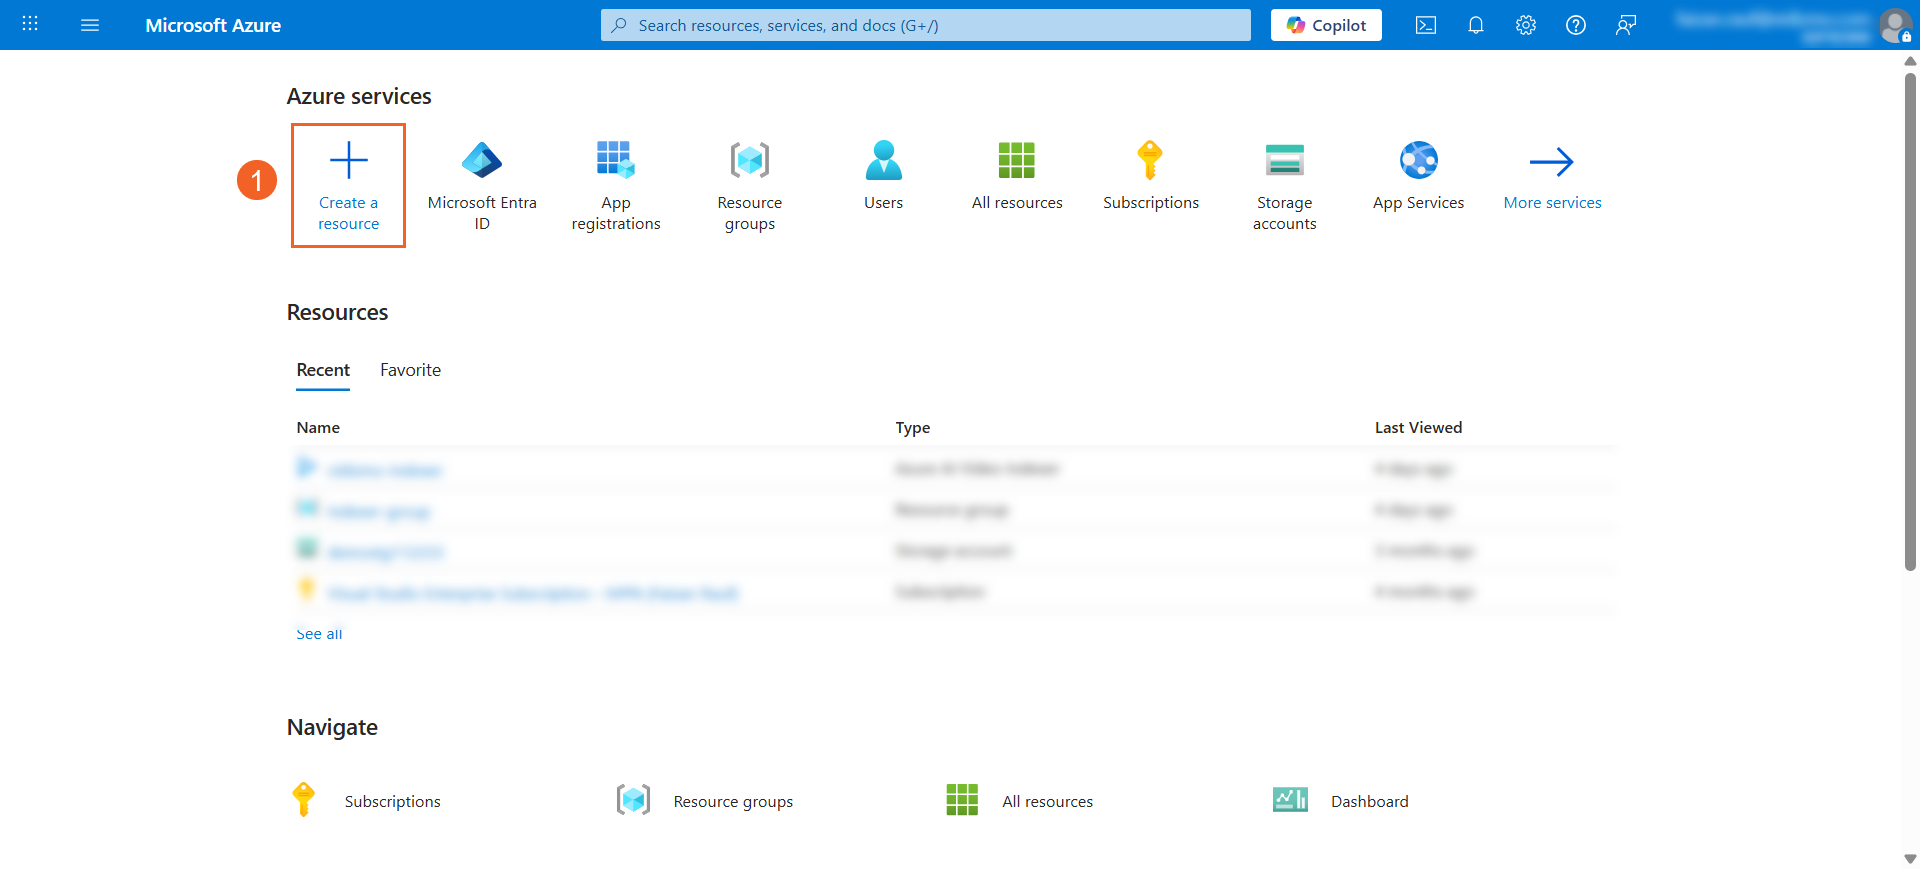
- Search for VIDIZMO
- Select your desired VIDIZMO product.
- Select your desired software plan.
- Select Create to begin. You can also review additional details in the other tabs before proceeding.
Setting up your VIDIZMO VM in Azure portal
Provide configuration details for the VIDIZMO VM deployment within Azure.
1. Basics
Define basic settings for the VM.
Project details
Provide Azure subscription and resource group details.
- Subscription: Select your Azure subscription.
- Resource group: Choose an existing resource group or create a new one.
Instance details
Configure instance-specific information.
- Region: Select your preferred Azure region.
- Application name: Enter a name for the application.
- VM admin username: Enter the administrator username for the VM.
- VM admin password: Enter a strong password for the VM.
- Confirm VM admin password: Confirm your VM admin password.
Managed application details
Adjust settings for the Azure managed application.
- Managed application name: Enter a name for the managed application.
- Managed resource group: Displays the resource group containing all resources for the managed application. You can leave the default or specify a new one.
- Select Next to continue.

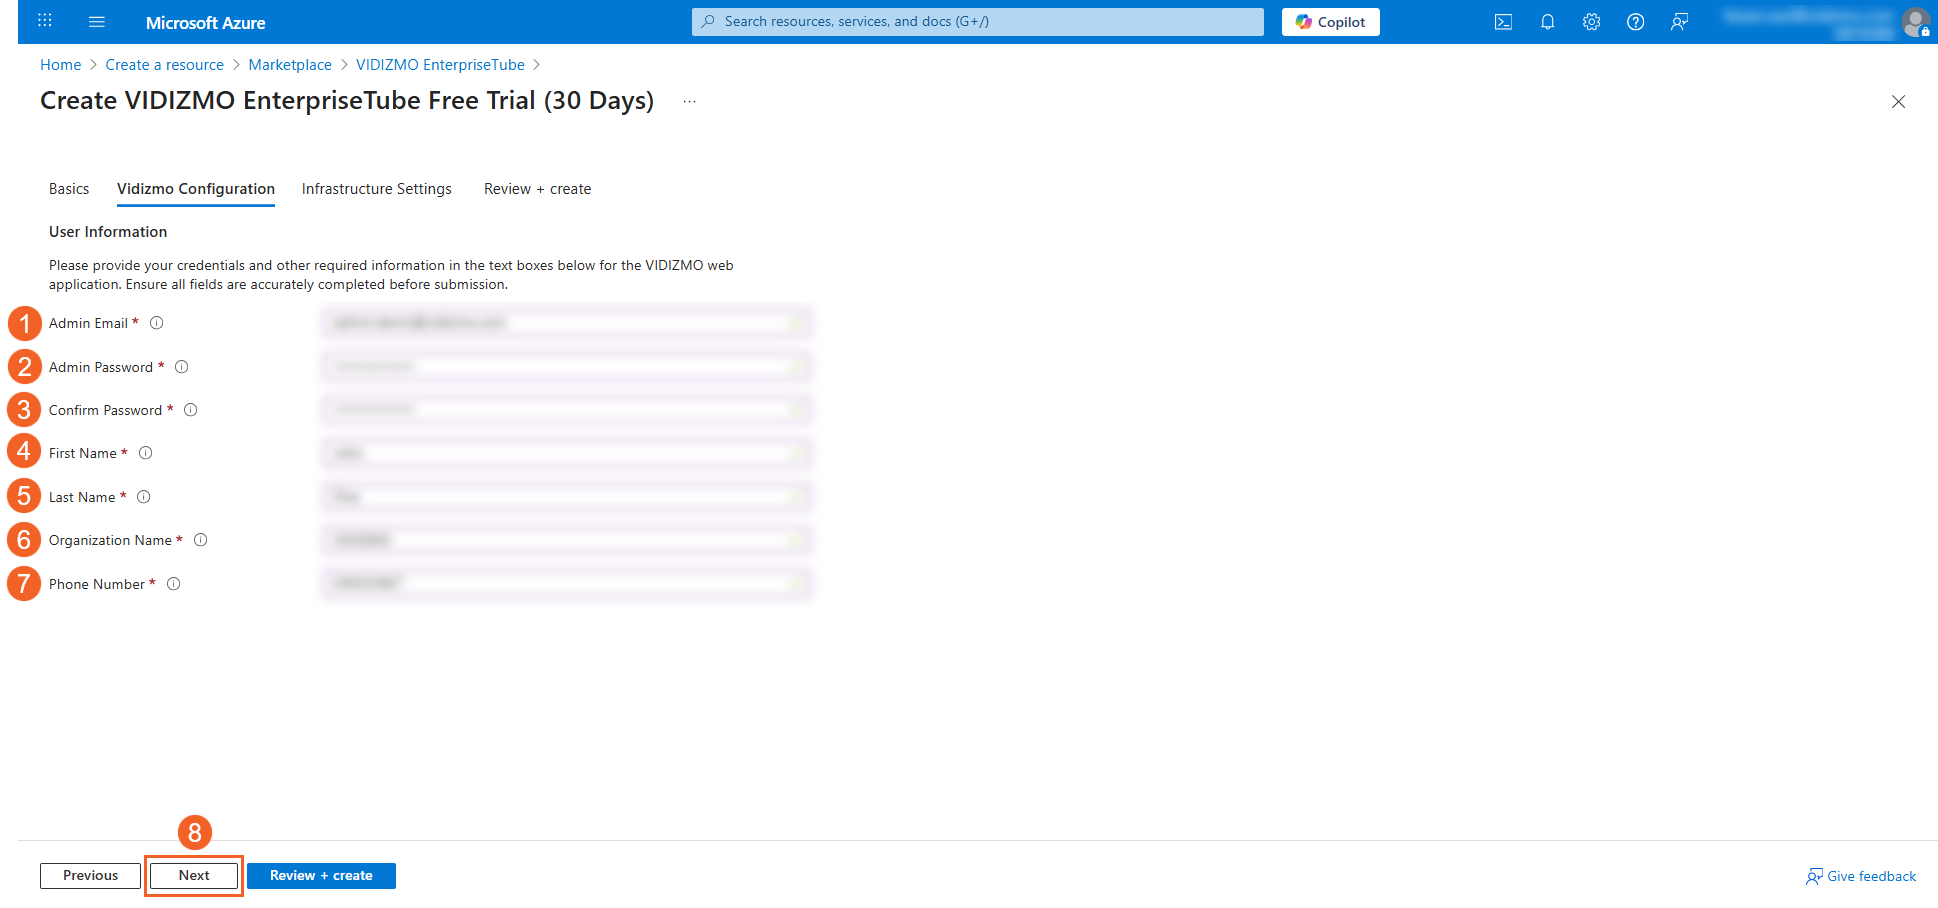
2. VIDIZMO Configuration
Provide the information to set up your VIDIZMO web application.
- VIDIZMO admin email: Enter the email address for the VIDIZMO Portal account owner.
- VIDIZMO account password: Enter a strong password for your VIDIZMO account.
- Confirm password: Re-enter the password.
- First name: Enter your first name.
- Last name: Enter your last name.
- Organization name: Enter your organization's name.
- Phone number: Enter your contact phone number.
- Select Next
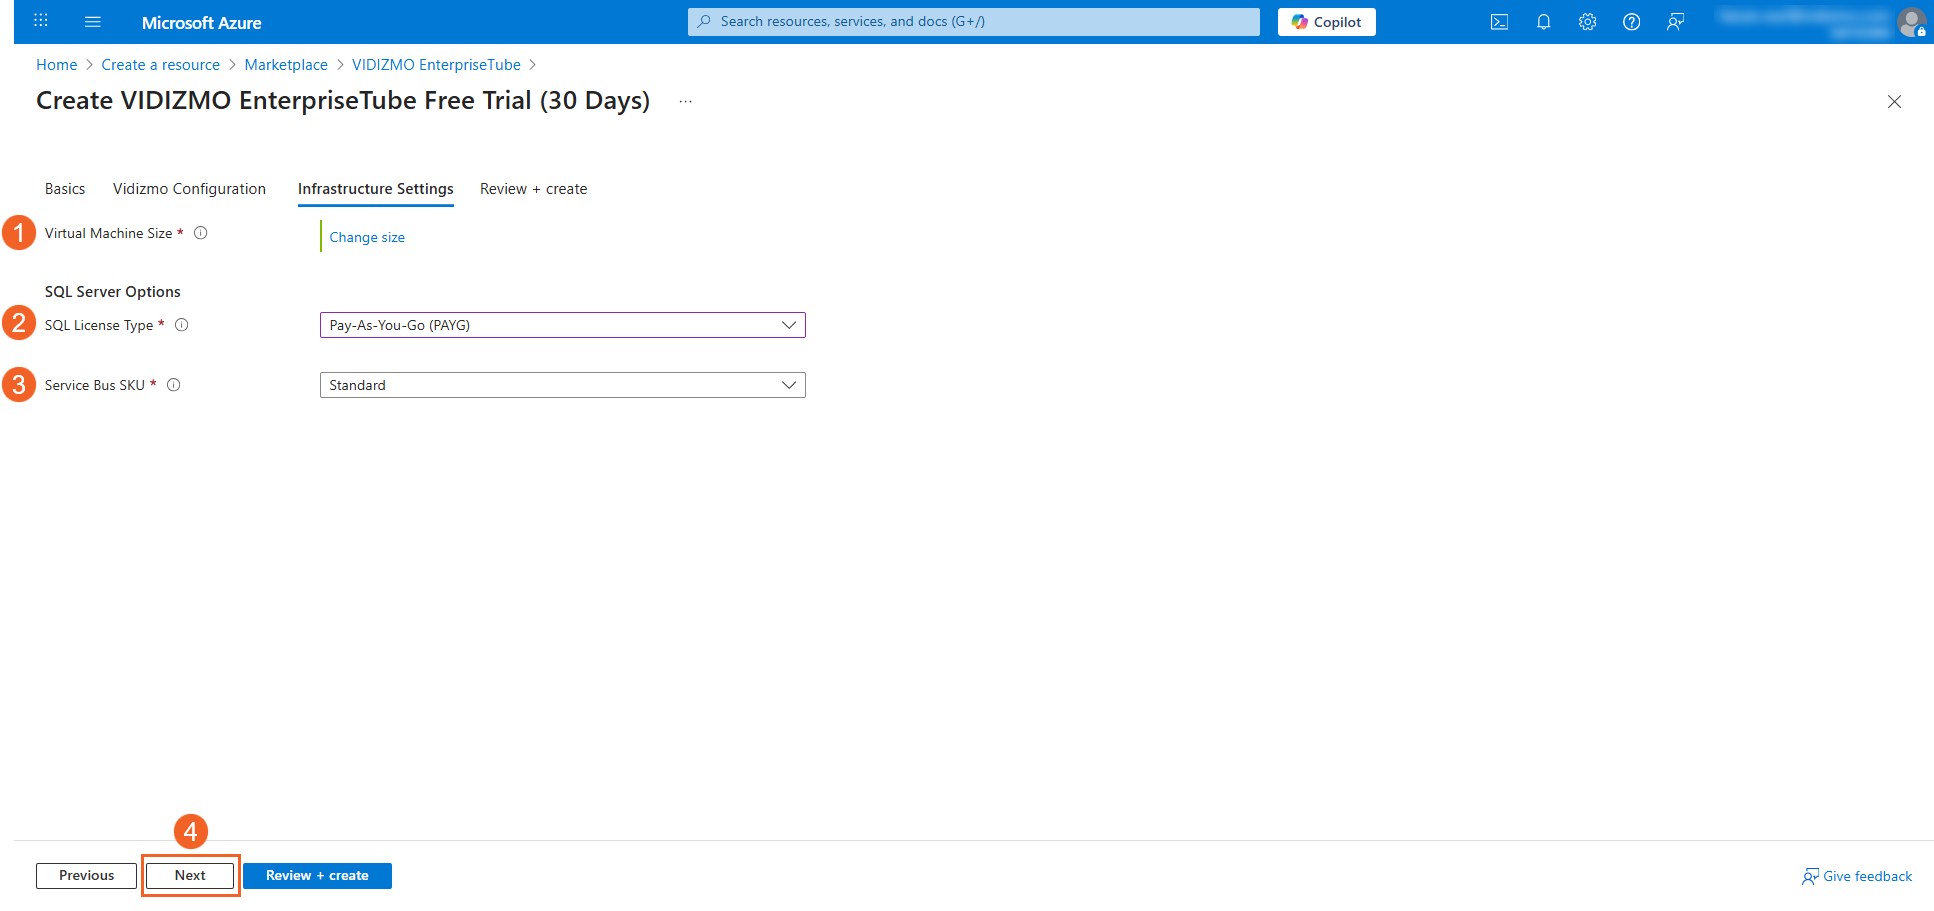
3. Infrastructure Settings
Specify resource allocation and performance configurations for your VIDIZMO VM deployment.
- Virtual machine size: Select Change Size to set VM size, which affects performance and scalability. For more information, see Sizes for virtual machines in Azure.
SQL Server options
Configure SQL Server licensing and Service Bus preferences.
-
SQL license type: Choose the licensing option for SQL Server: 1. Pay-As-You-Go (PAYG): Rent SQL Server licenses by the hour or second directly from Microsoft. Recommended if you don't have existing SQL Server licenses. You'll be billed for SQL Server licenses along with VM usage. 2. Azure Hybrid Use Benefit (AHUB): Use your existing SQL Server licenses with Software Assurance or an active subscription. You won't pay extra for SQL licenses, only for VM usage.
-
Service Bus SKU: Select your desired Service Bus SKU: 1. Basic 2. Standard 3. Premium
-
Select Next to continue.
Review + Create
Review and confirm your VIDIZMO VM settings and costs.
- Under Terms, verify your contact information and enter your phone number if desired.
- Under Co-Admin Access Permission, select the checkbox to accept the terms and conditions.
- After reviewing all information, select Create.
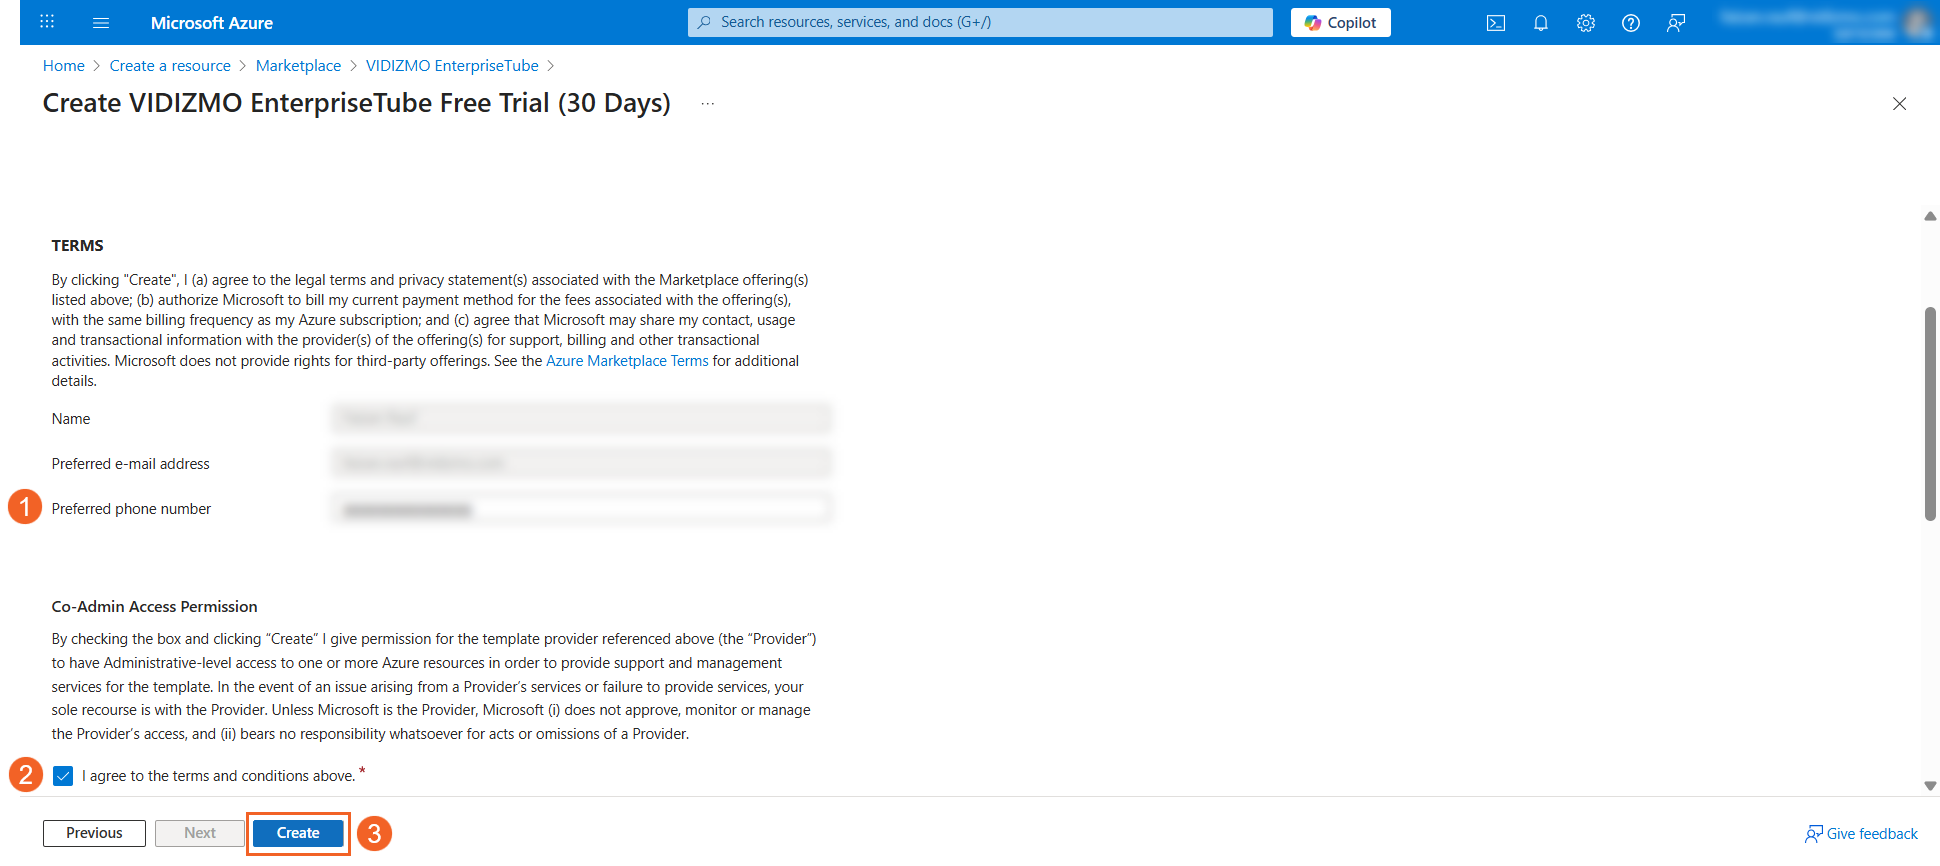
- Azure begins deployment. Once completed, you'll receive an email with the link to your VIDIZMO Portal.

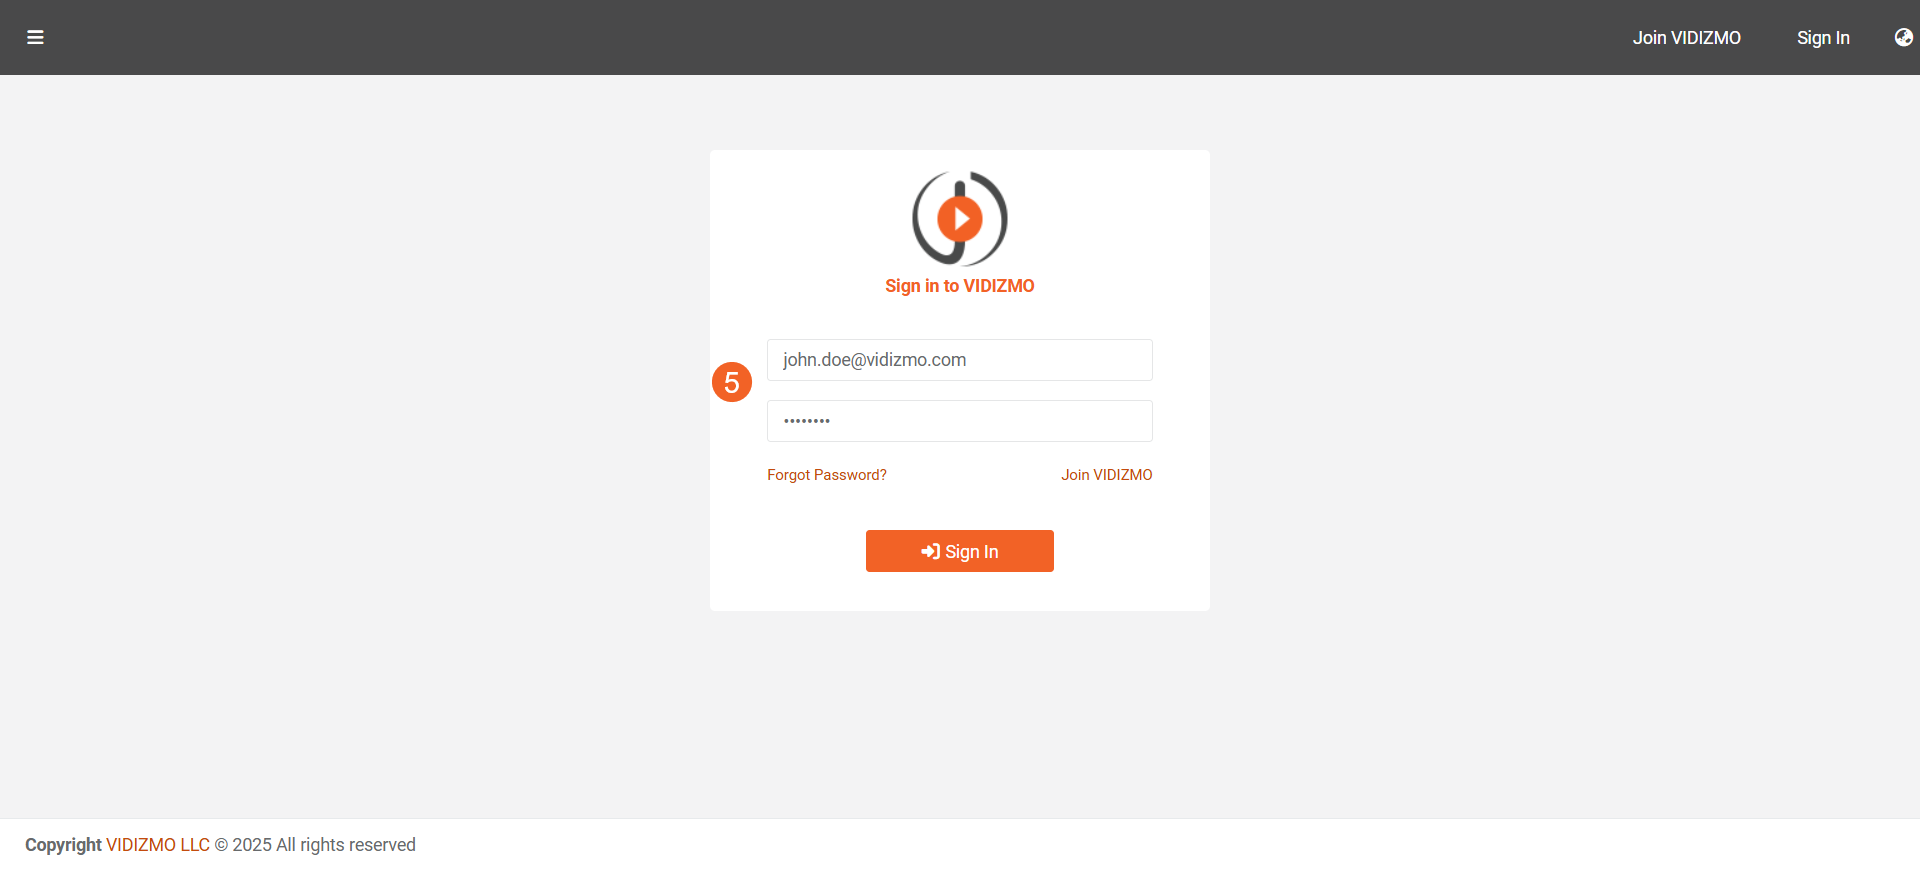
- Use the URL provided in the email to access your VIDIZMO Portal. Sign in using the email address and password you specified during VIDIZMO Configuration.