Creating Agents
This article describes the configuration options for creating an agent in VIDIZMO. Use these settings to control agent behavior, content access, and appearance.
For a conceptual overview, see Agents.
Access Agent
To access the agent configuration page, go to Portal Settings > Agent Management > Add New Agent.
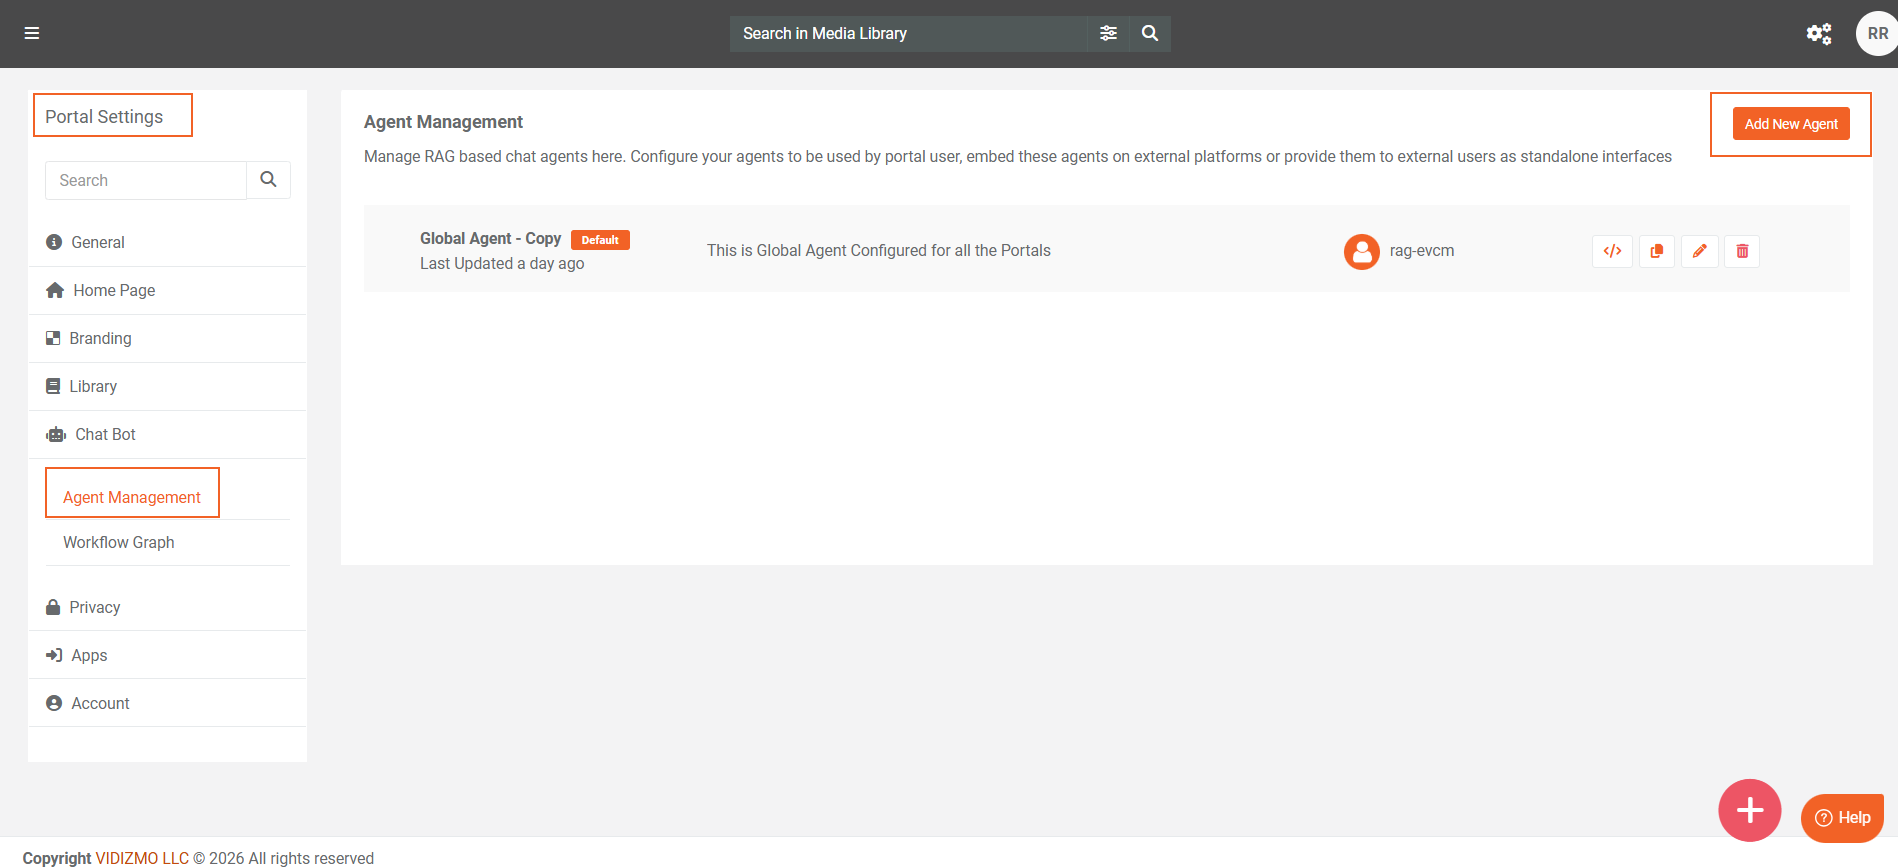
Add New Agent
This section defines the basic identity and role of the agent.
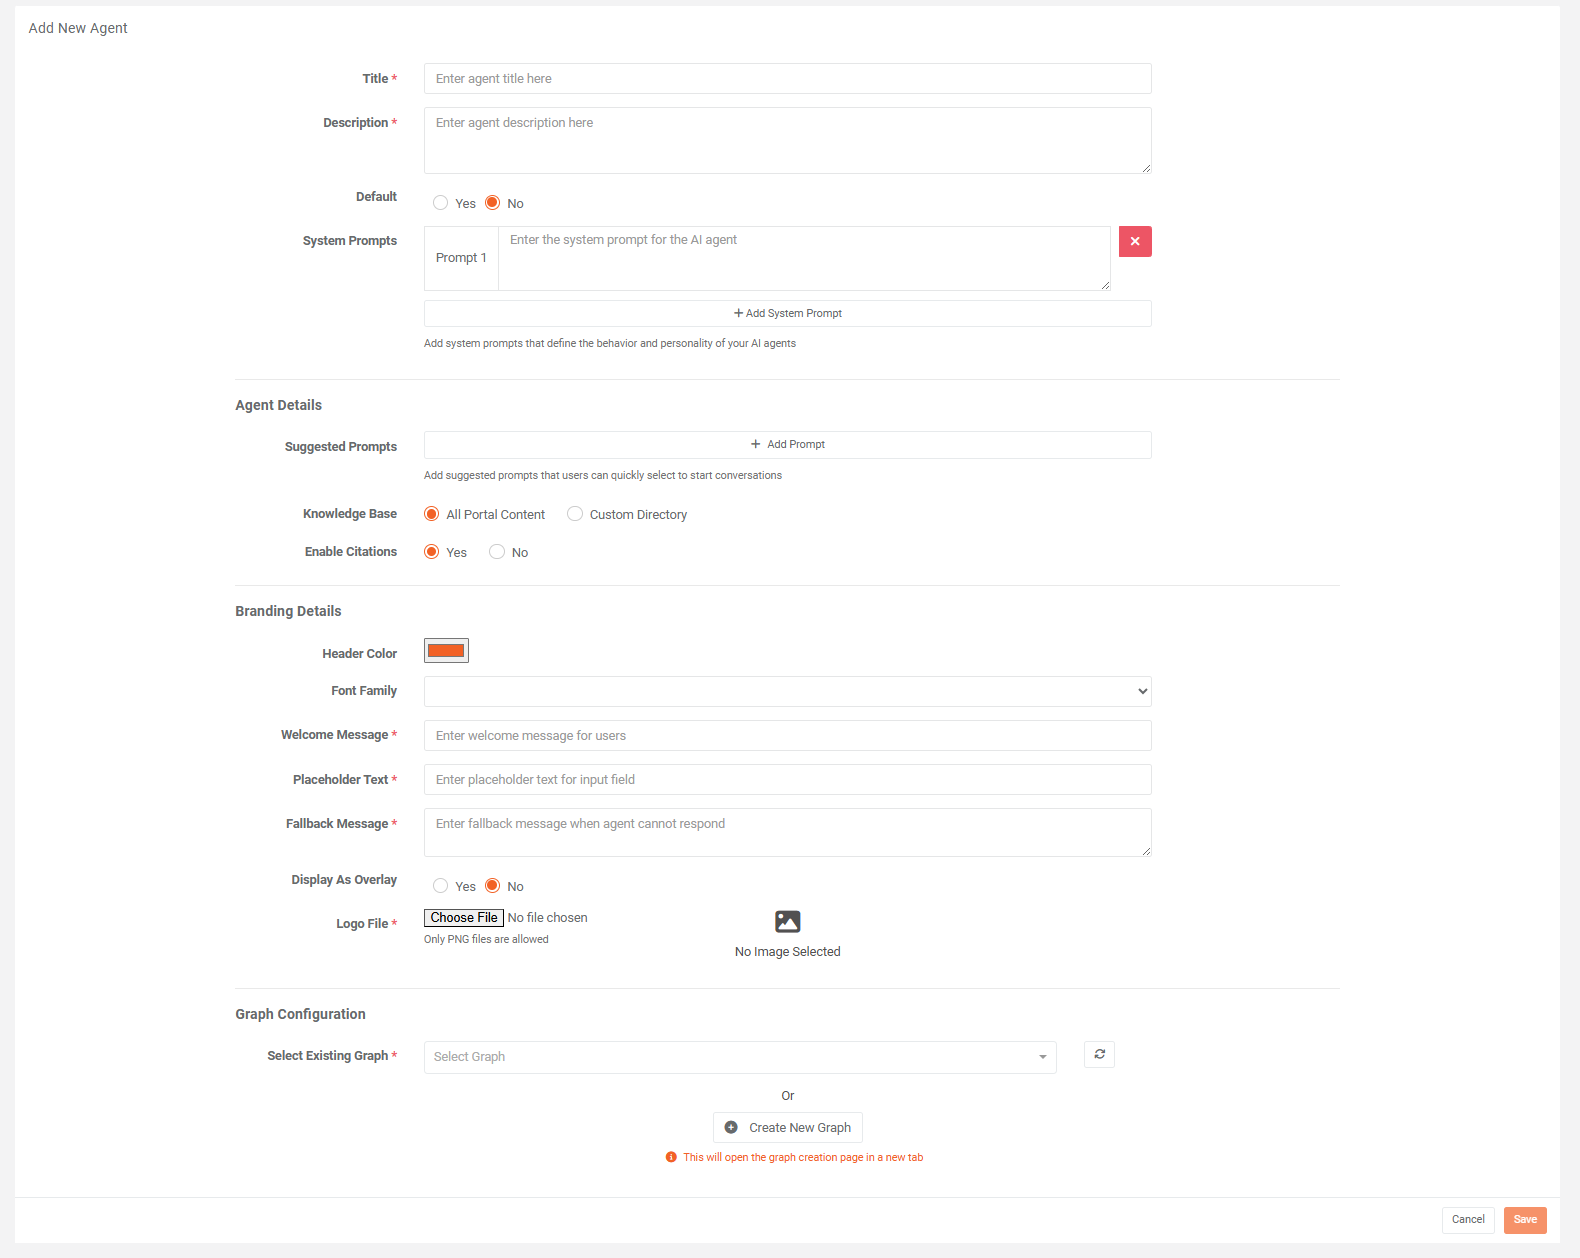
Title
Enter a display name for the agent. This name appears in the portal interface and helps users identify the agent. Choose a name that reflects the agent's purpose or target audience.
Description
Enter a brief explanation of what the agent does. This description helps administrators understand the agent's intended use case and can appear to users depending on portal configuration.
Default Agent
Specify whether this agent serves as the default for the portal.
- Yes: Sets this agent as the default experience for users. Only one agent can be the default at a time.
- No: Makes the agent available but not automatically assigned as the default.
When a portal has a default agent, users interact with it automatically unless they select a different agent.
System Prompts
System prompts define the agent's behavior, personality, and response guidelines. These instructions are sent to the language model at the start of each conversation.
Use system prompts to:
- Set the agent's tone (formal, conversational, or technical)
- Define response format preferences
- Establish behavioral boundaries
- Specify the agent's role or area of expertise
You can add multiple system prompts. Each prompt contributes to the overall instruction set that shapes agent responses.
Well-crafted system prompts produce more consistent and predictable agent behavior.
Agent Details
Suggested Prompts
Suggested prompts are predefined questions or commands that appear when users start a conversation. They help users understand agent capabilities and reduce friction for new users.
Each suggested prompt requires:
- Prompt title: A short label that appears to users
- Prompt message: The text sent to the agent when a user selects this prompt
Use suggested prompts to:
- Highlight common tasks or questions
- Demonstrate agent capabilities
- Standardize frequent queries for consistent results
Knowledge Base
The knowledge base setting controls what content the agent can access when generating responses.
-
All Portal Content: The agent searches and retrieves information from all indexed content in the portal. Use this option when the agent needs broad access to organizational knowledge.
-
Custom Directory: The agent is restricted to specific directories or content categories. Use this option to limit scope and improve response accuracy for specialized use cases.
Enable Citations
Specify whether the agent includes source references in responses.
- Yes: Responses include citations that point to the source content. This helps users verify information and navigate to source materials.
- No: Responses appear without source references.
Enable citations to increase transparency. This setting is recommended for knowledge-based agents where users need to verify or explore source content.
Branding Details
Branding settings customize the visual appearance of the agent interface. These options are useful when you embed agents in external applications or need consistent branding.
Header Color
Specify the color for the agent's header area. Enter a valid color value that matches your organization's branding.
Font Family
Select the typeface for text in the agent interface. Choose a font that aligns with your brand guidelines and ensures readability.
Welcome Message
Enter the initial message that appears when a user opens the agent interface. Use this message to greet users and set expectations.
An effective welcome message:
- Introduces the agent's purpose
- Suggests what users can ask
- Sets an appropriate tone
Placeholder Text
Enter the text that appears in the input field before the user types a message. This text guides users on how to interact with the agent.
Example: "Ask a question about our video library..."
Fallback Message
Enter the message that appears when the agent cannot generate a response. This message provides guidance when the agent encounters limitations.
An effective fallback message:
- Acknowledges the limitation
- Suggests alternative actions
- Maintains a helpful tone
Display as Overlay
Specify how the agent interface appears on the page.
- Yes: The agent appears as a floating overlay on top of page content. Users can interact with the agent without leaving their current context.
- No: The agent appears as an embedded element within the page layout.
Overlay Position
When you display the agent as an overlay, this setting determines where the agent appears on screen.
- Bottom Right: The agent appears in the lower-right corner.
- Bottom Left: The agent appears in the lower-left corner.
Choose a position that doesn't interfere with critical page elements.
Logo File
Upload the image that appears in the agent interface header. Only PNG files are supported. Use a logo that represents the agent's identity or your organization's brand.
Workflow Configuration
Each agent must connect to a workflow that handles request processing. The workflow defines the logic, tools, and language model interactions used to generate responses.
Select Existing Workflow
Select from workflows already created in the workflow designer. The selected workflow determines how user requests are processed and what capabilities the agent has.
Create New Workflow
Select this option to open the workflow designer in a new tab and create a workflow for this agent. Use this option when existing workflows don't meet the agent's requirements.
After you create the workflow, return to the agent configuration and select the new workflow.
Best Practices
- Define clear, specific system prompts that guide agent behavior without being overly restrictive.
- Use suggested prompts to showcase the agent's most valuable capabilities.
- Configure knowledge base settings to include only relevant content for improved response accuracy.
- Test the agent with real user queries before you set it as the default.
- Write fallback messages that help users rather than simply state that an error occurred.
Limitations
- One workflow per agent: Each agent connects to exactly one workflow. For complex scenarios that require multiple workflows, implement routing logic within a single workflow.
- PNG logos only: Logo files must be in PNG format. Other image formats aren't supported.
- Single default agent: Only one agent can be the default per portal.
Next Steps
After you create an agent:
- Test the agent with sample queries to verify behavior.
- Configure the agent as the default if appropriate.
- Embed the agent in external applications if needed.
- Monitor interactions and refine system prompts based on user feedback.